Who can use this feature?
🗣️ All researchers (both admins and users)
⭐ All Research Hub plans
You can find individual participants by searching directly in your Hub panel. You can also filter participants by specific attributes, and save those groups as segments to use for future retargeting.
How do I search for participants?
Use the search bar to type in your search, and your query will run automatically—no need to press enter. Currently, you can search for participants using:
- First name
- Last name
- Phone number
Combine searching and filtering at the same time to pinpoint the right participants for your study more quickly.
Occasionally, we will surface participants who are close matches to a search term—these will show below exact matches in the search results. You can share your search query or results with a teammate by sending them the specific url to your search results.
💡Note: Comma separated search (for example searching for multiple participants at once using multiple terms) is not yet supported.
How do I filter my participants?
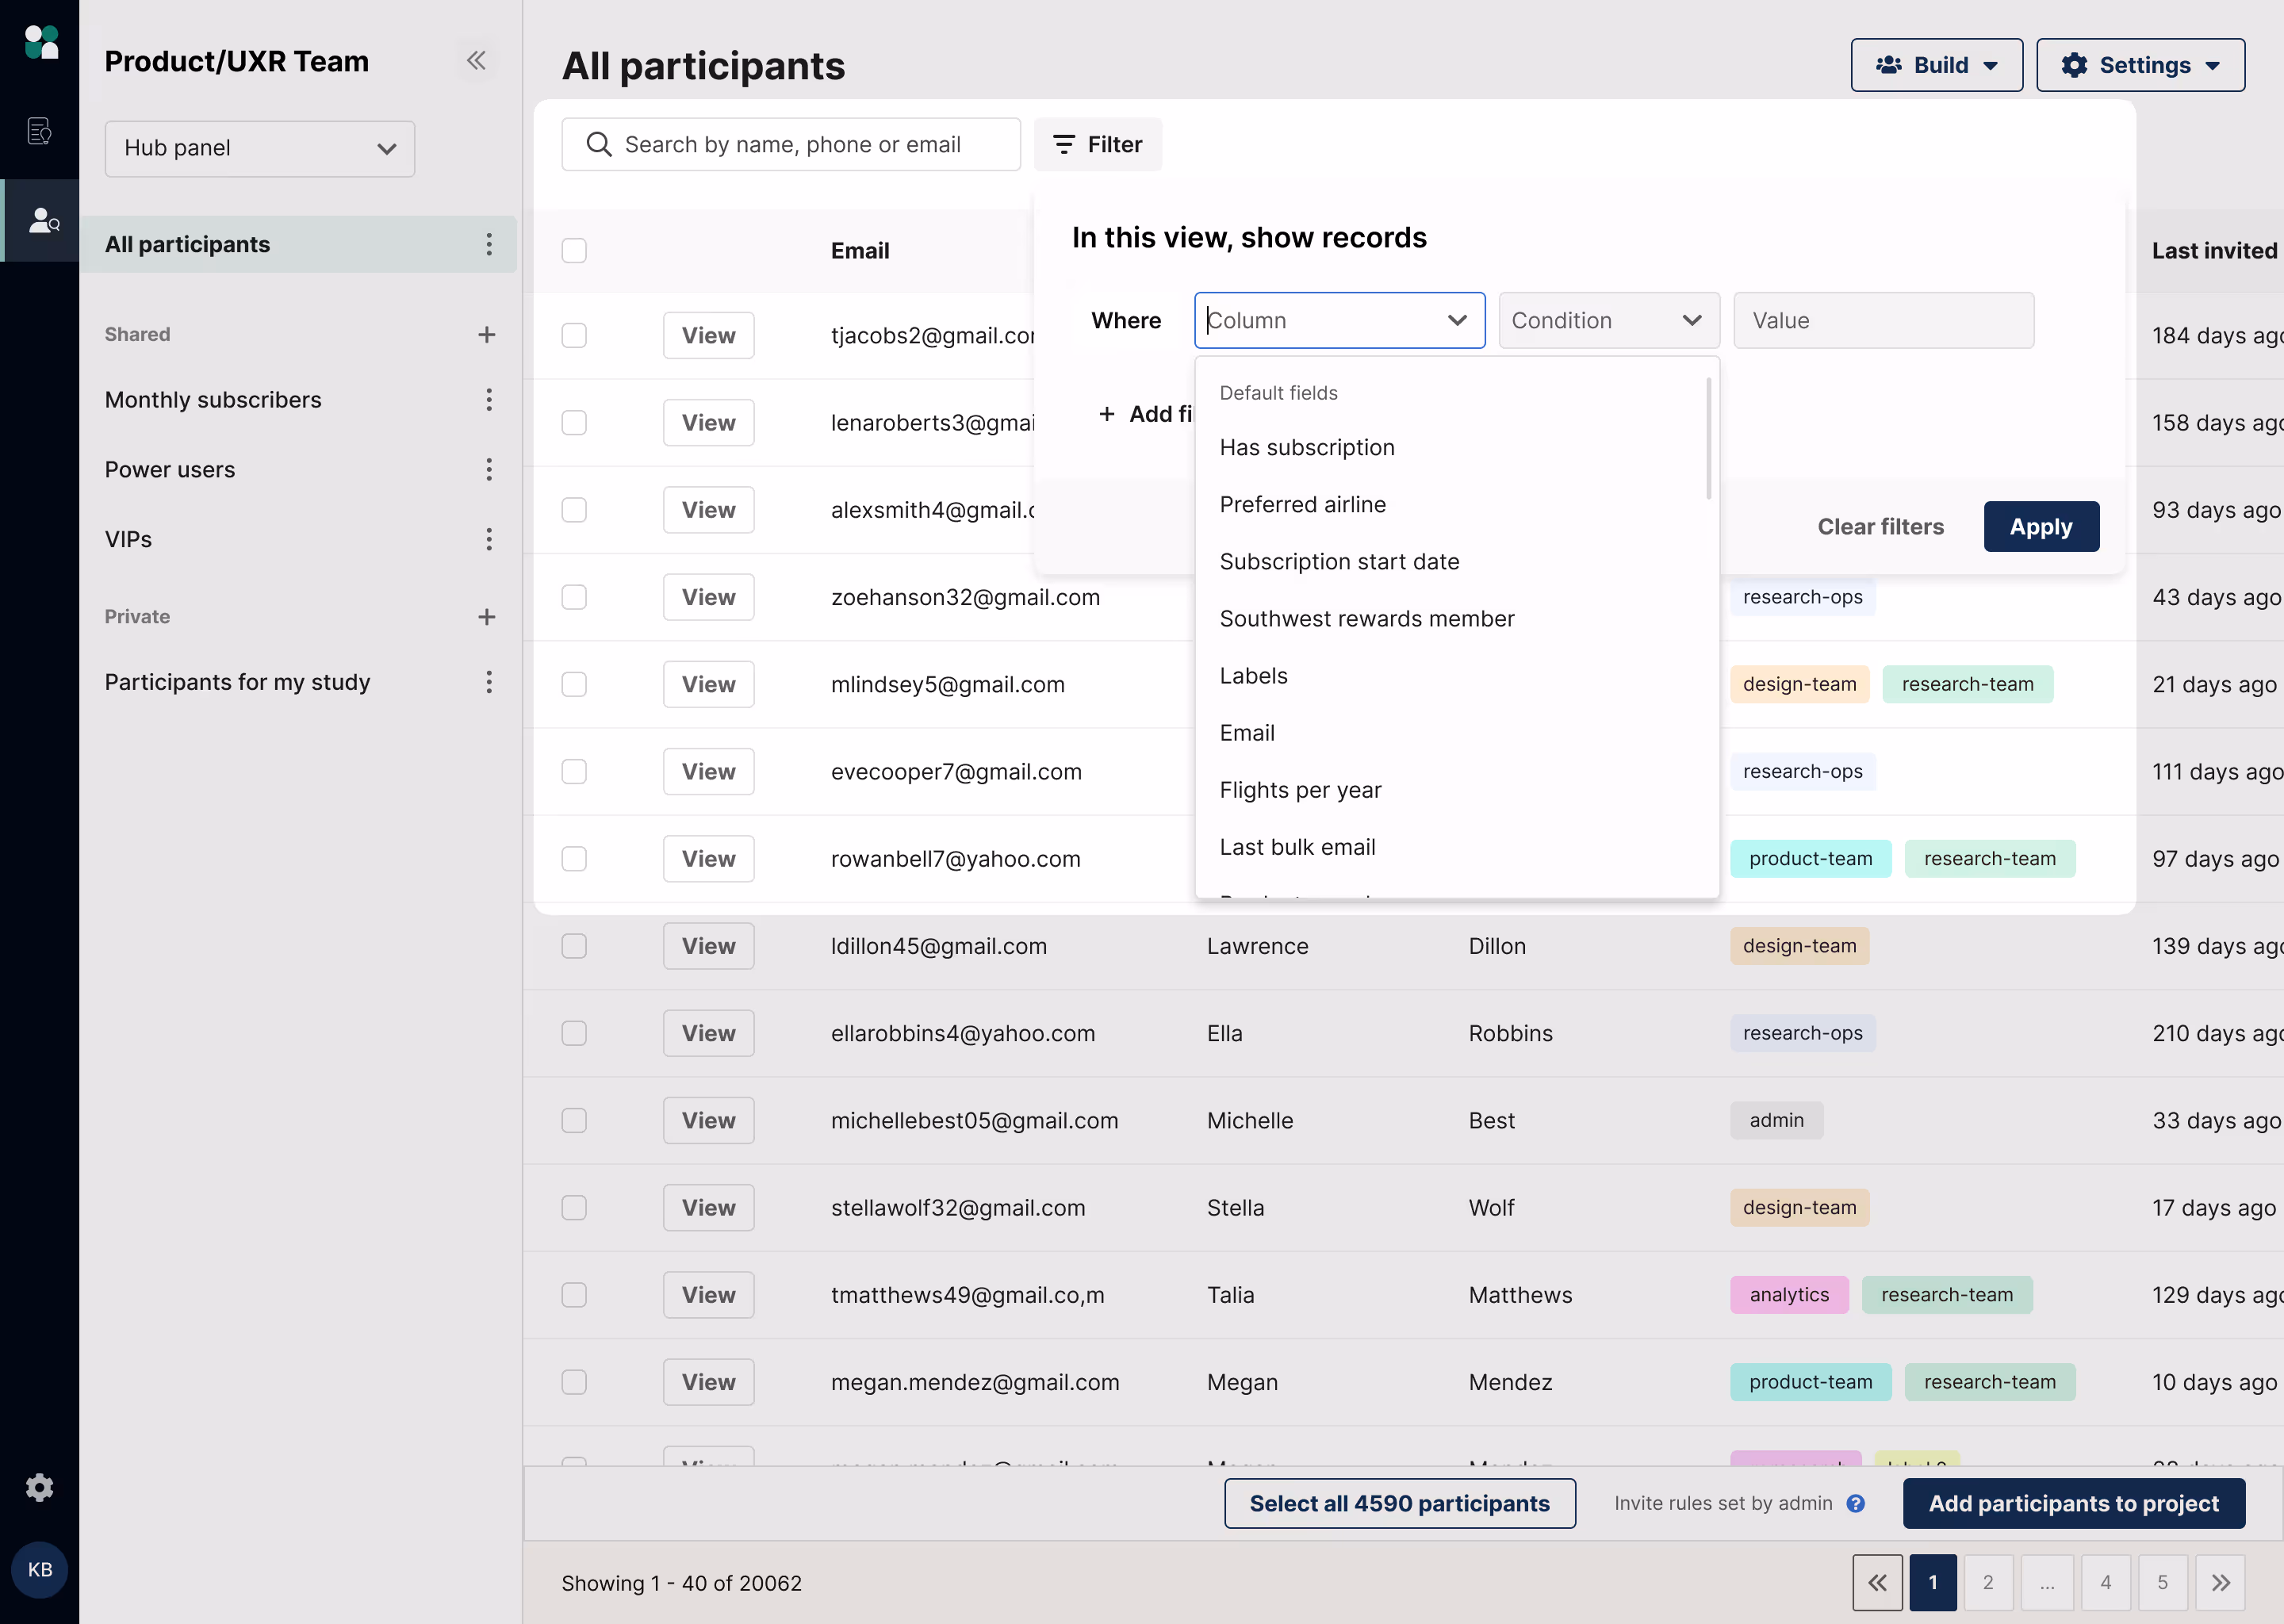
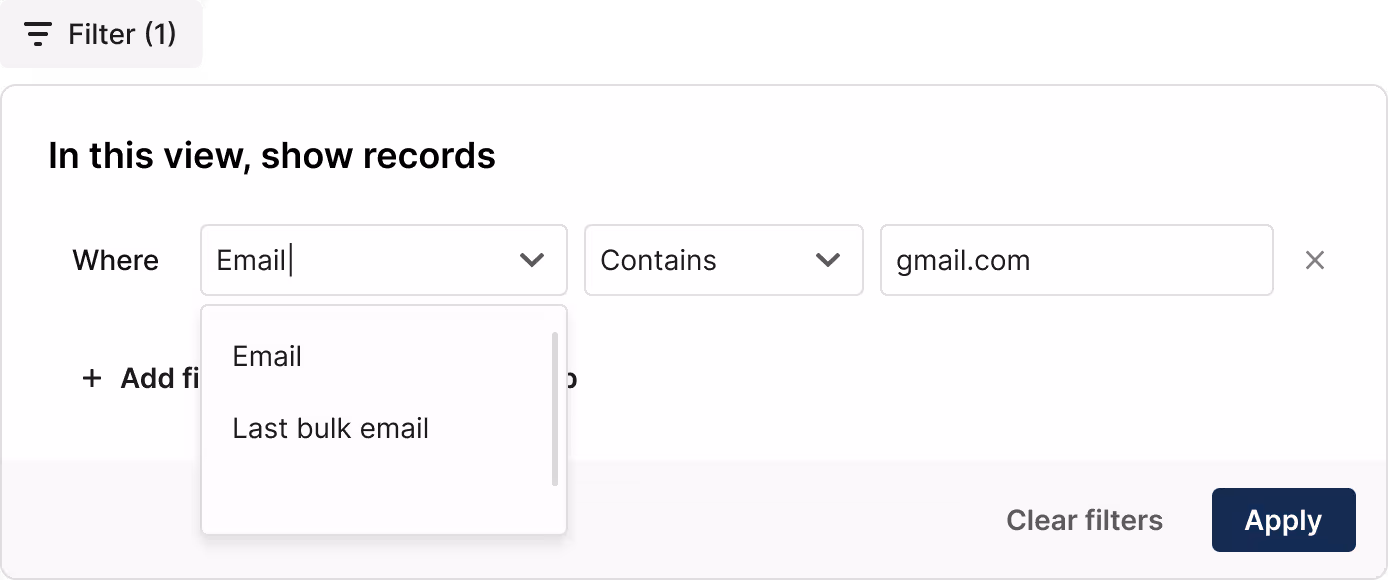
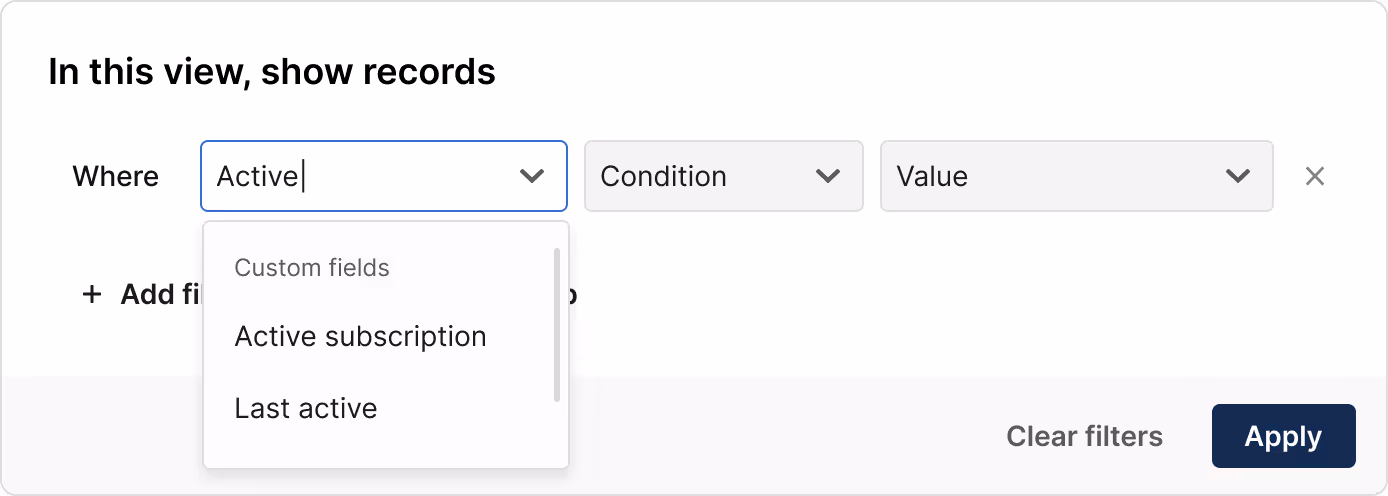
Click the "Filter" button to view and filter by participants' contact info, activity history, and custom fields. You can filter on the following attributes.
Labels
Create and tag participants with labels to keep your panel organized.

Activity
- Project history
- Last applied date
- Last invited date
- Last participated date
- Incentives earned

Participant Info
- First name
- Last name
- Phone number
- Date added
- Unsubscribed from User Interviews emails
Custom fields
- Numbers, dates, text fields—whatever you need to organize your panel.
Timezone
- Filter by timezone to help optimize participant outreach times.

⛳ Note: If your team is importing CSVs with multi-select responses, you’ll want to format your responses with the delimiter: double semicolon + space (;; ). This enables UI to display the multi-select responses as distinct values in the filter dropdown.
How can I save and edit filters?
From the Hub panel, apply filters to narrow in on participants who meet your study criteria, and then save that custom group as a segment by clicking "Save as new segment". Saved segments will appear in the left panel, and can be reused by any member of the research team for future studies.
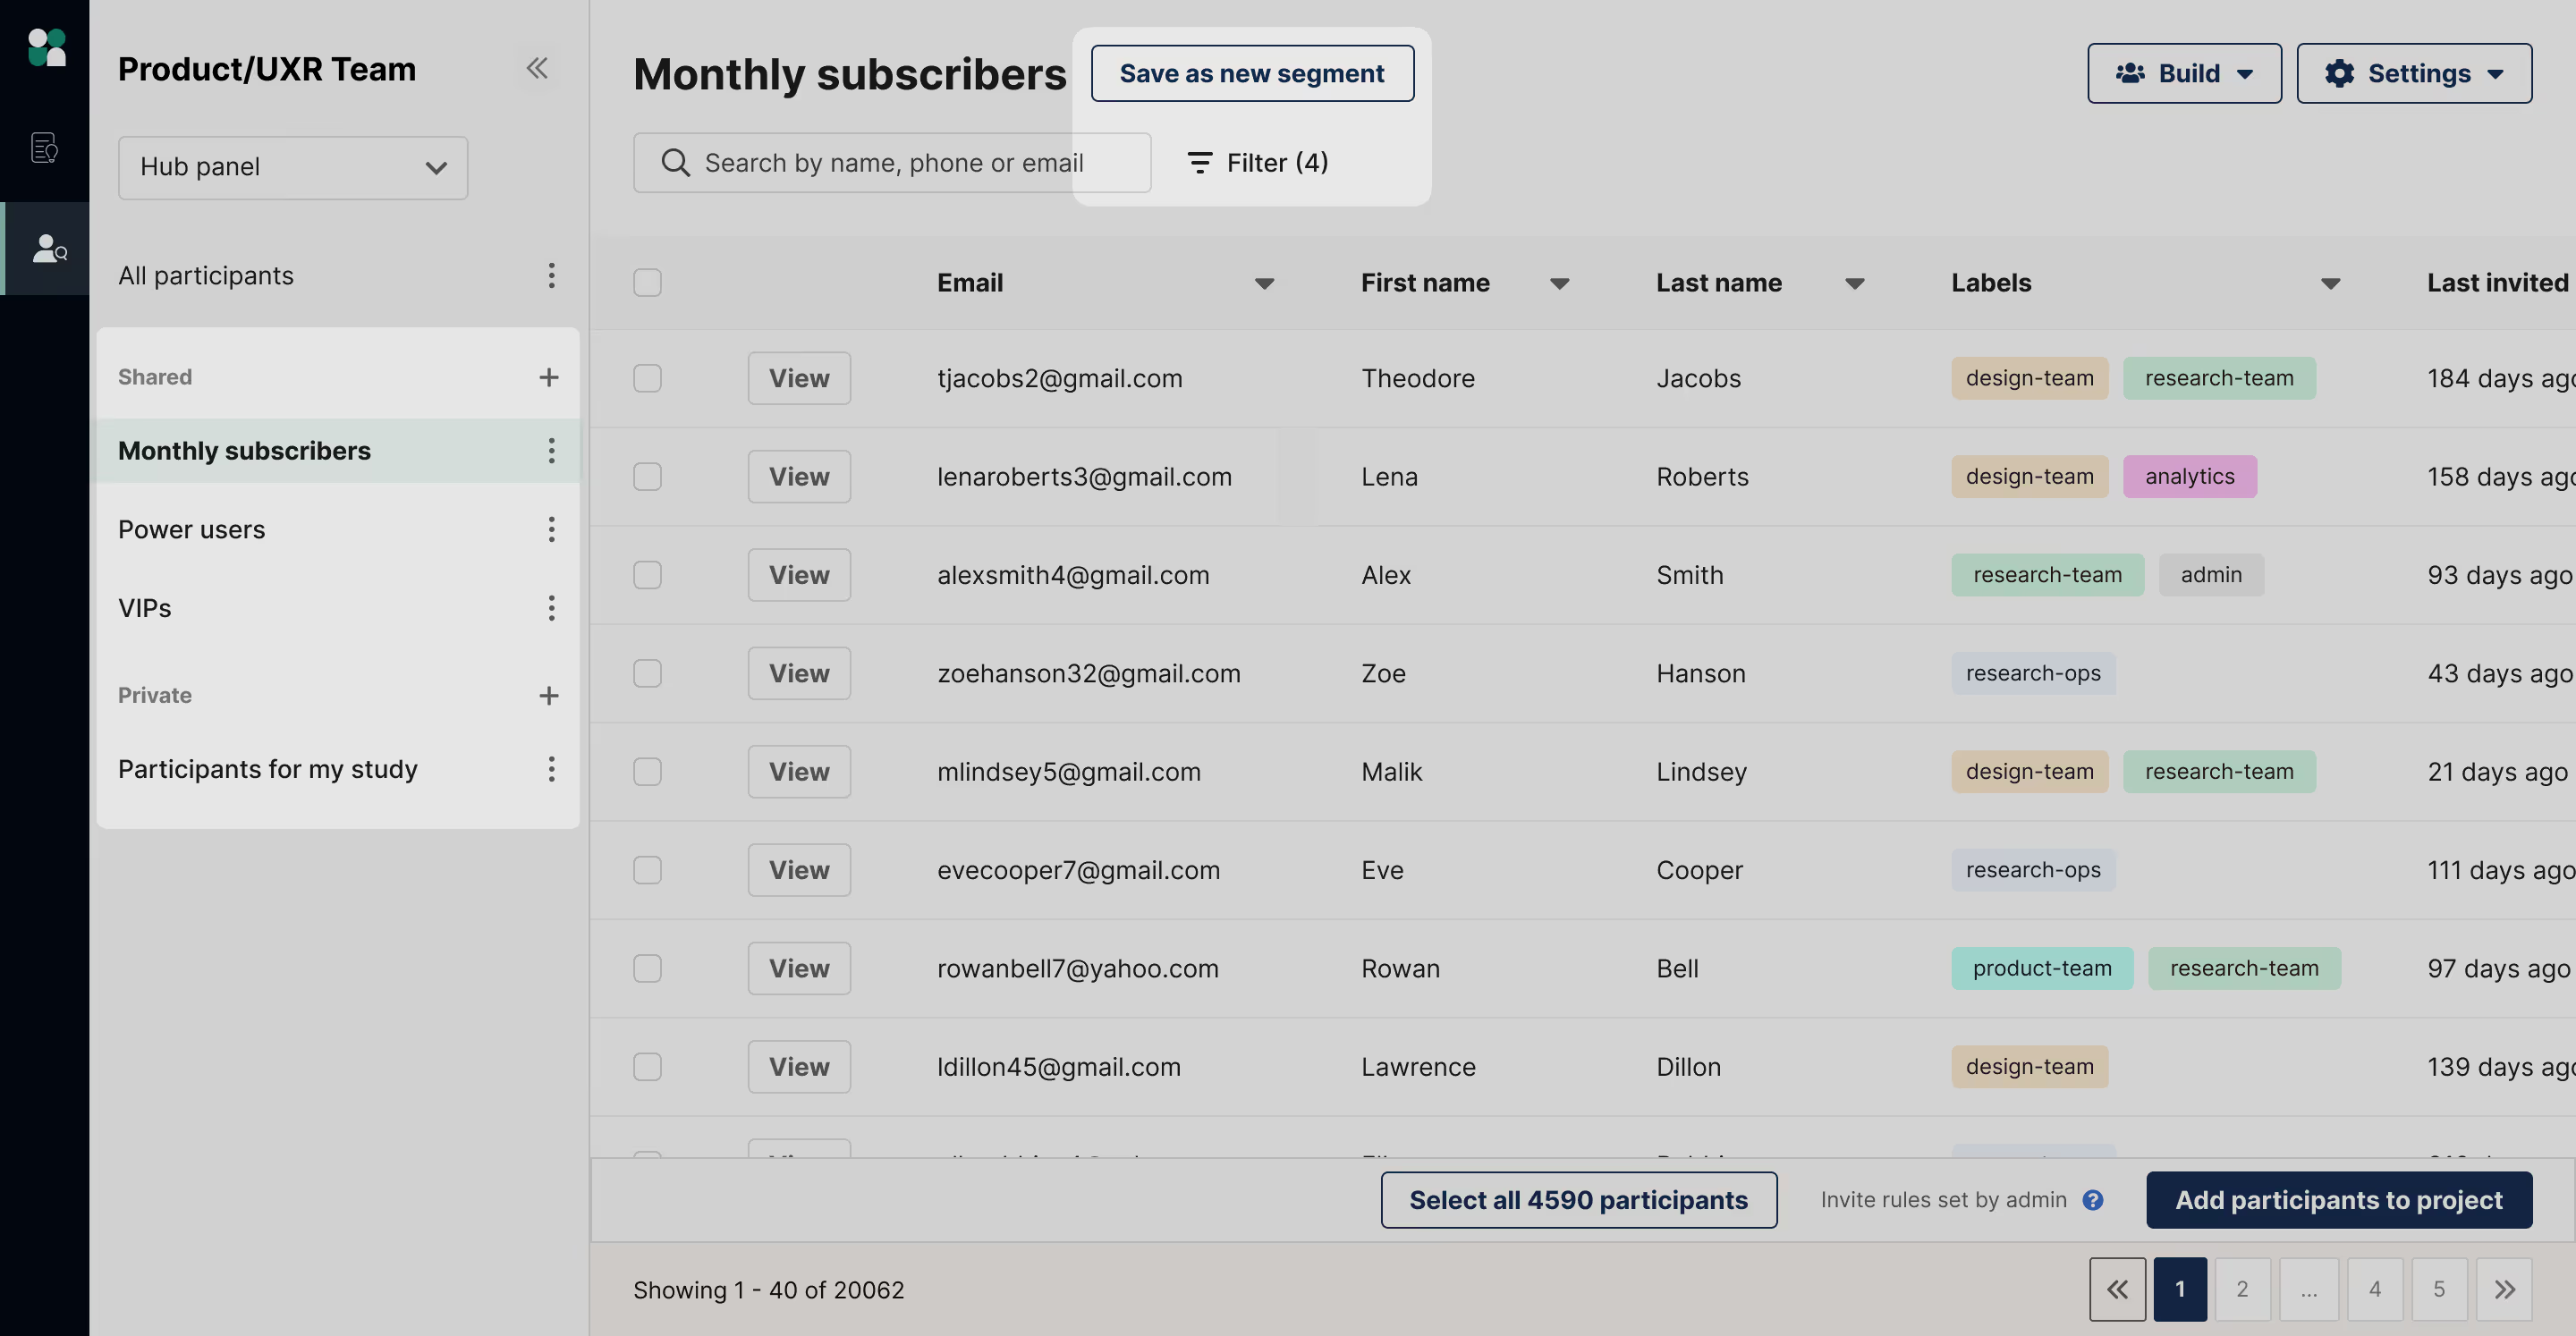
You can also create segments by selecting, "+" on the left hand menu. This will prompt you to name your segment and confirm and adjust the set filters. To learn more about segments, check out our support guide here.
Invite participants to projects
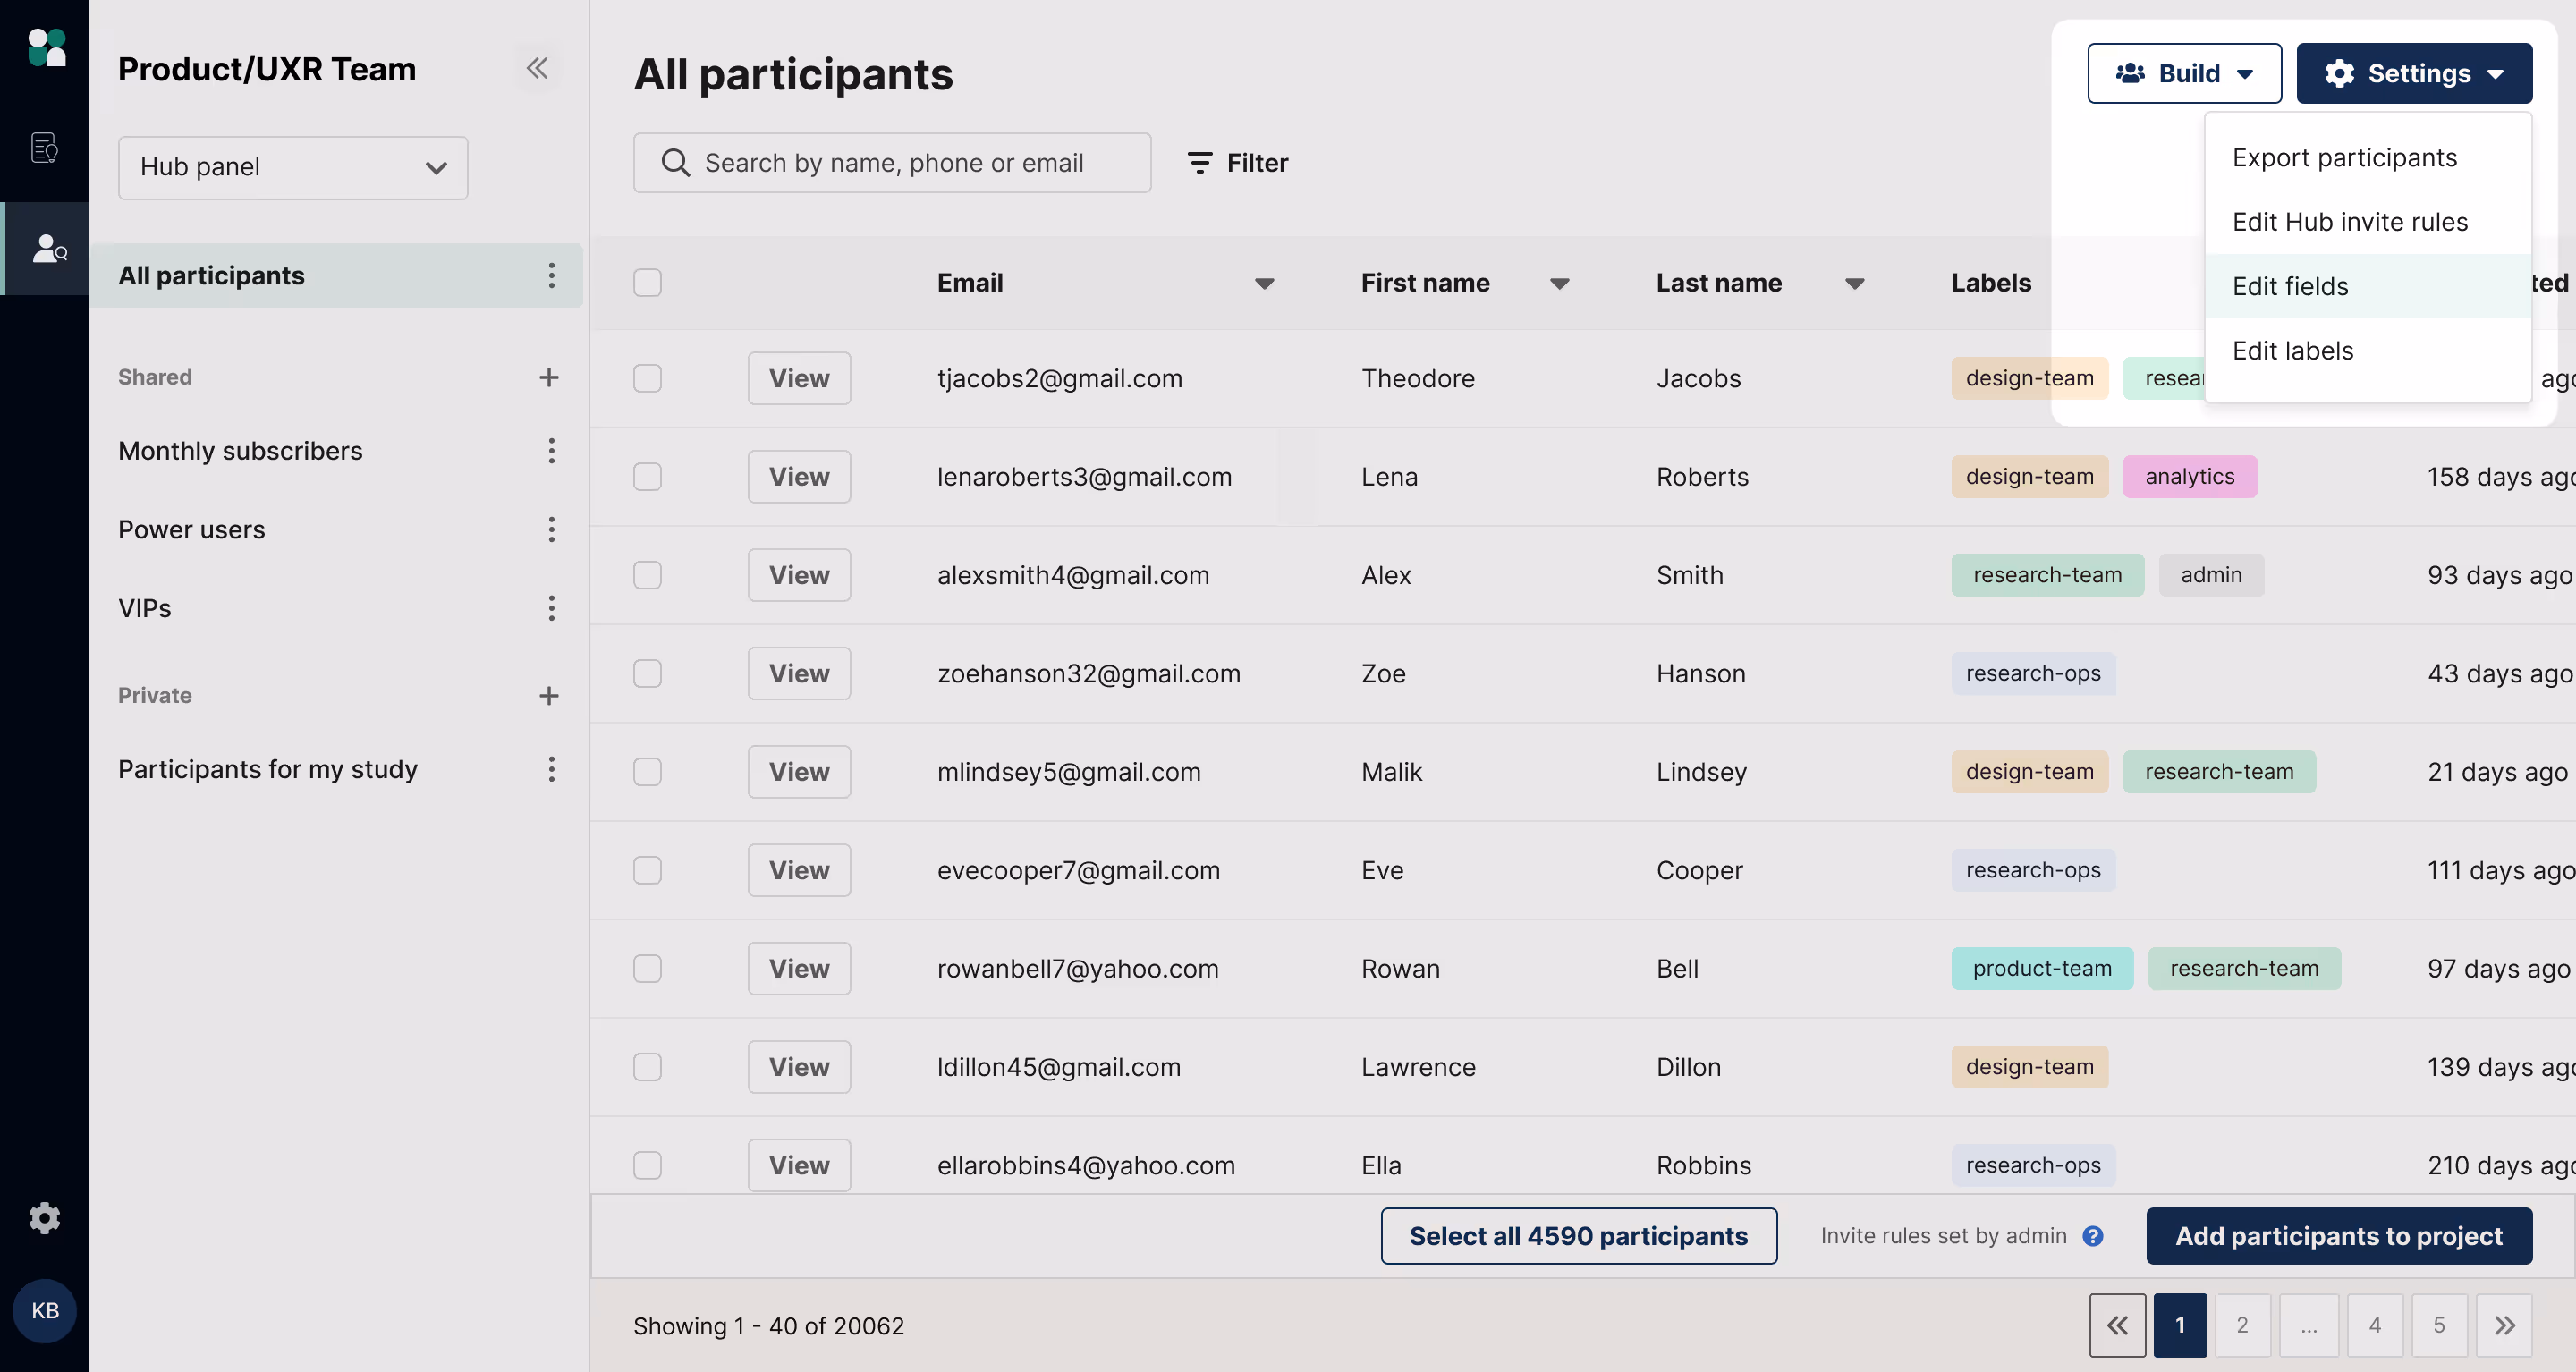
Check the boxes on the left to select specific participants to invite and click "Add to project."
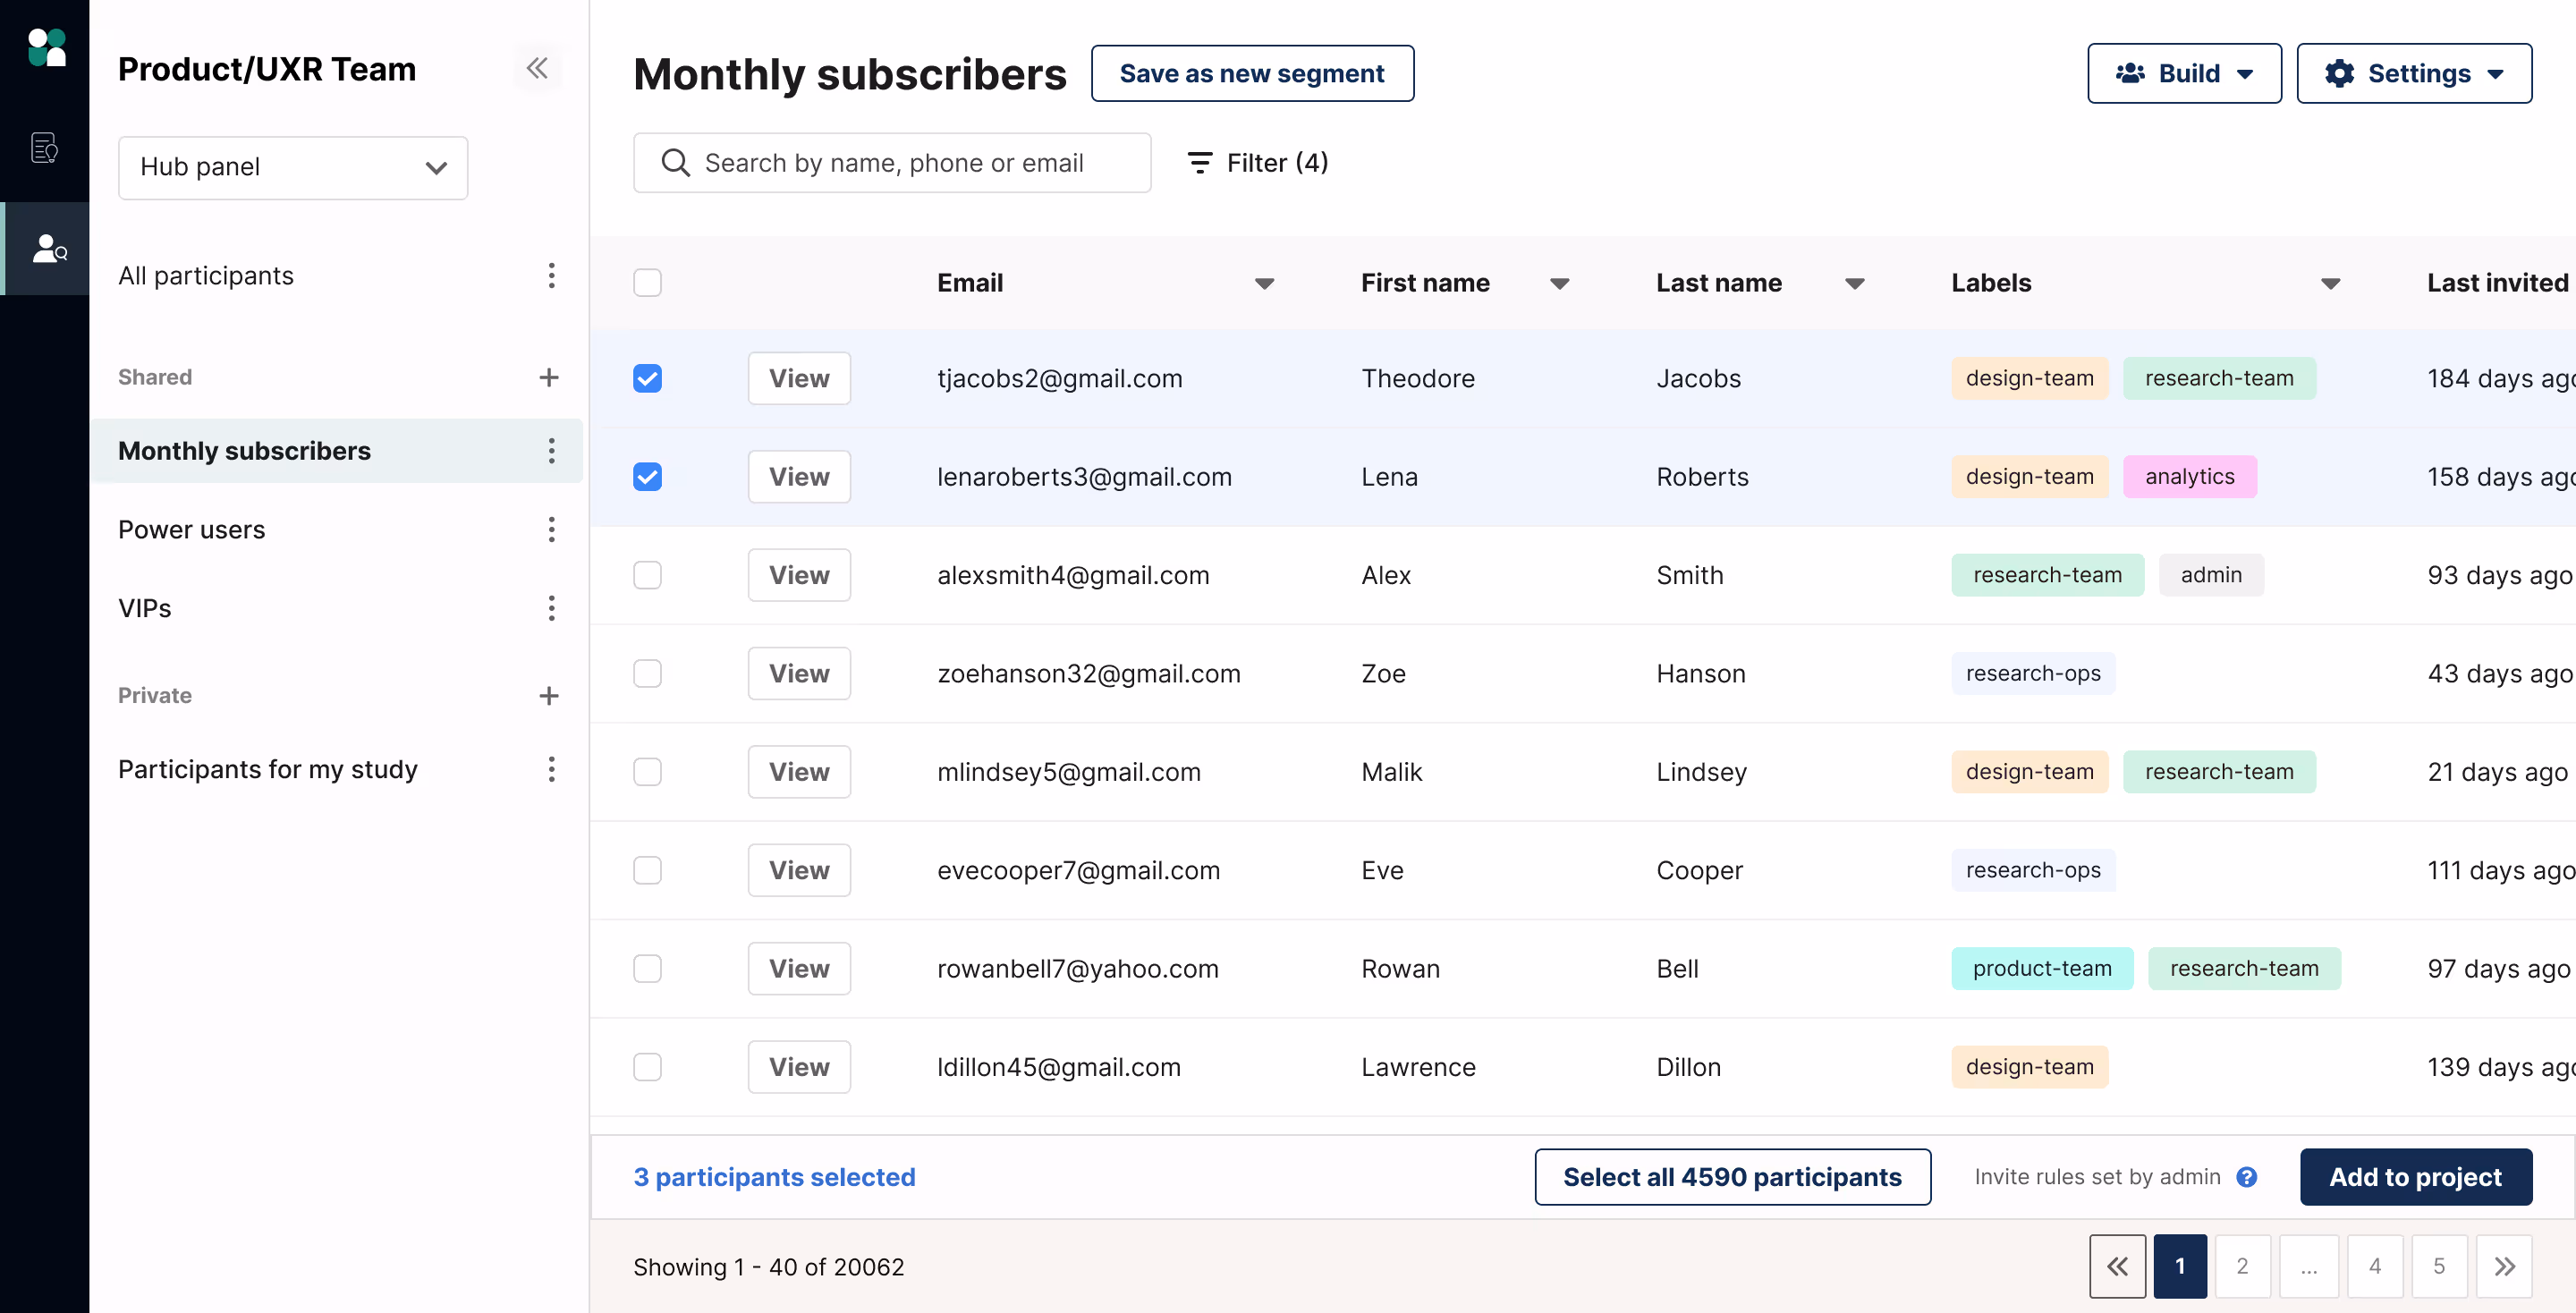
Select an existing project to add to, or create a new project. You can add participants to the project and invite them later, or if you’re ready, you can choose to invite them right away.
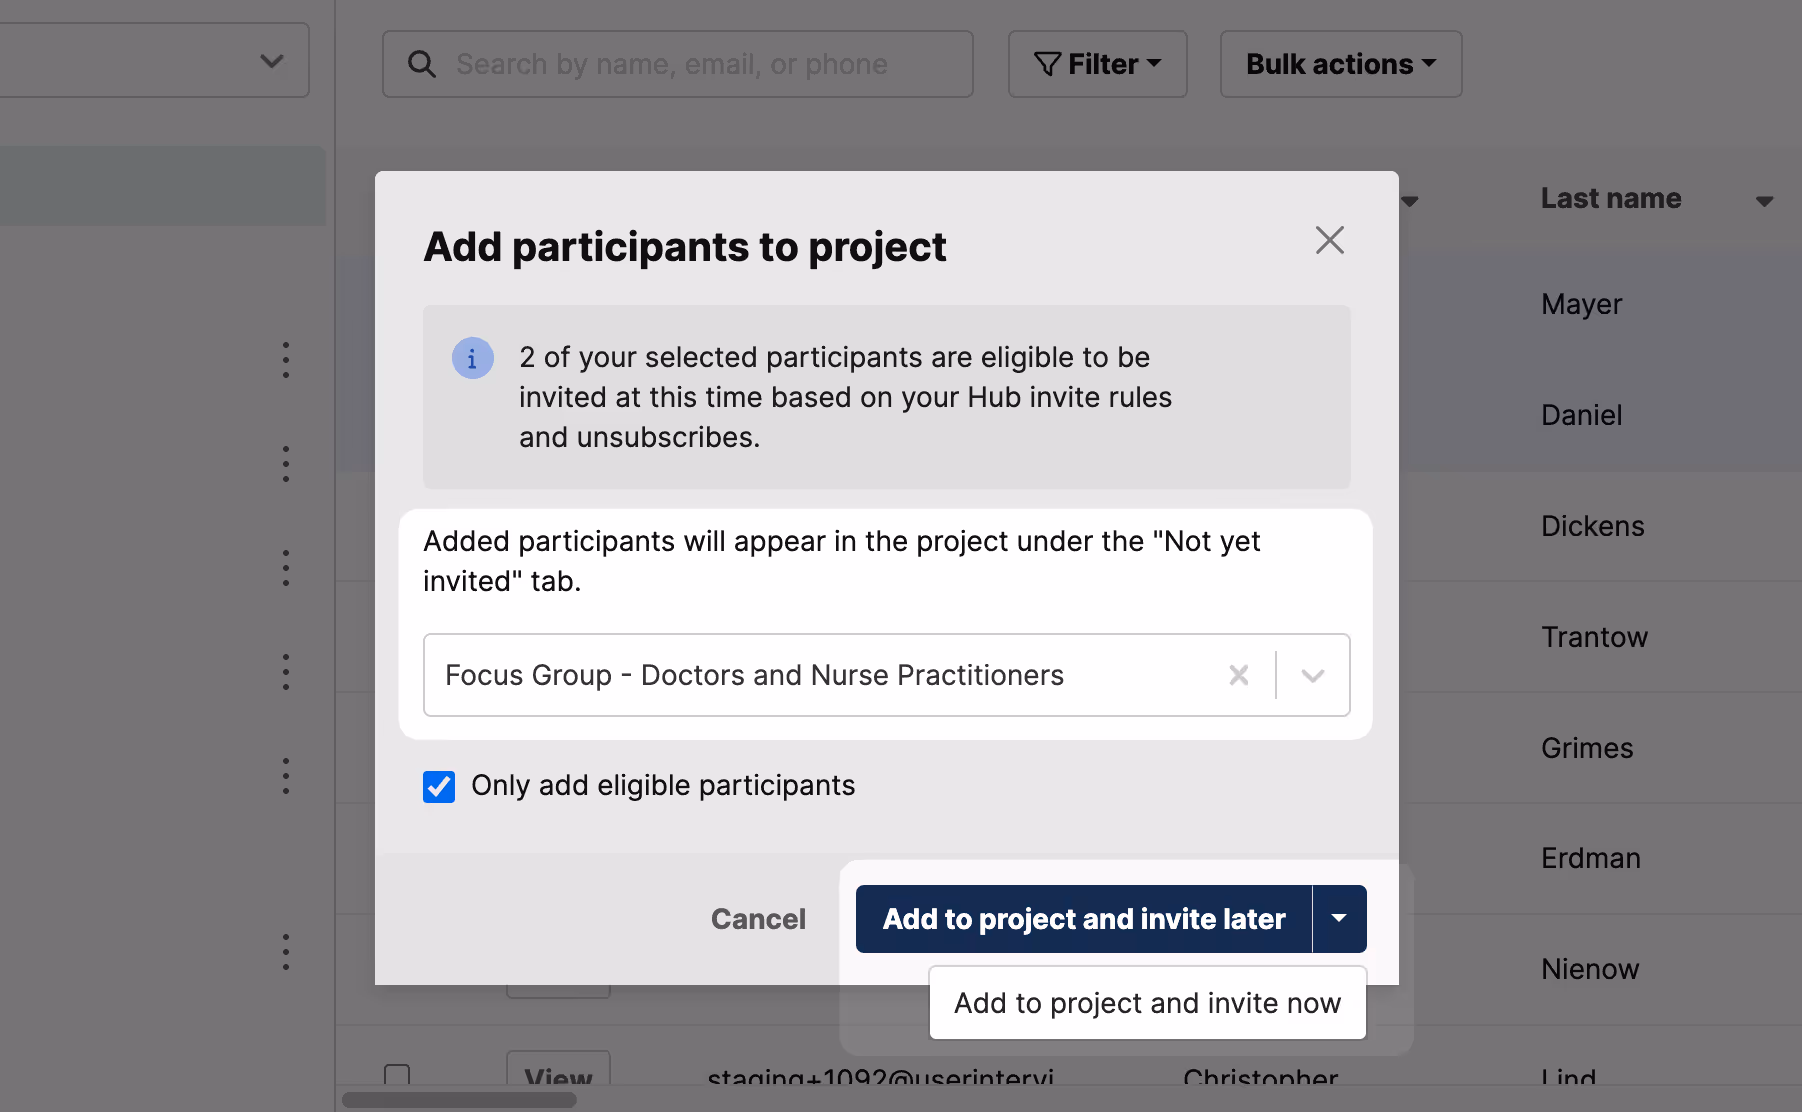
When adding participants to a project, you will be able to see who is eligible to invite based on your team’s Hub invite rules. Select “Only add eligible participants” if you’d like to only add eligible participants to your project.

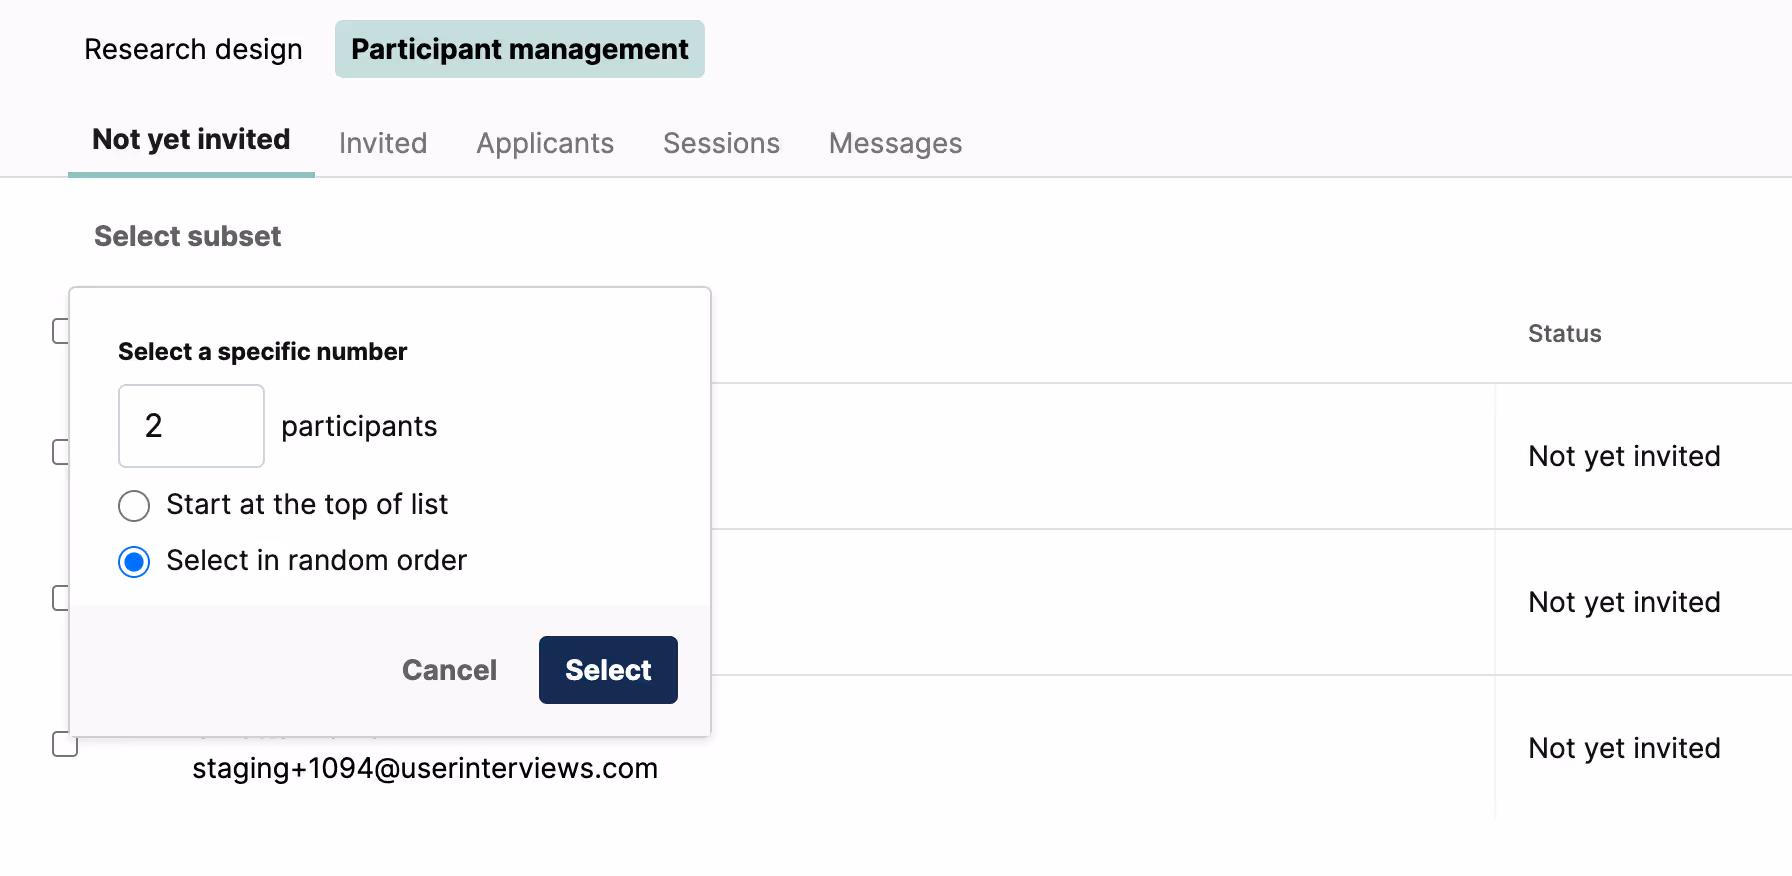
To invite a random subset of participants to your project, navigate to the Participant management section of your project > the “Not yet invited” tab. Here, you can select the number of participants you’d like to invite, as well as starting invites at the top of the list or in random order.
Can I delete or rename filters?
At this time, filters can be cleared but are not able to be deleted or renamed.
If a filter is based on one or more custom attributes, and you'd also like to delete those attributes, this can be accomplished under the "Edit fields" section of your Hub settings. Custom attributes that are deleted here would result in the deletion of any corresponding filters. Please note this is only applicable if you'd like to remove a filter AND delete the custom data column(s) from your Hub.
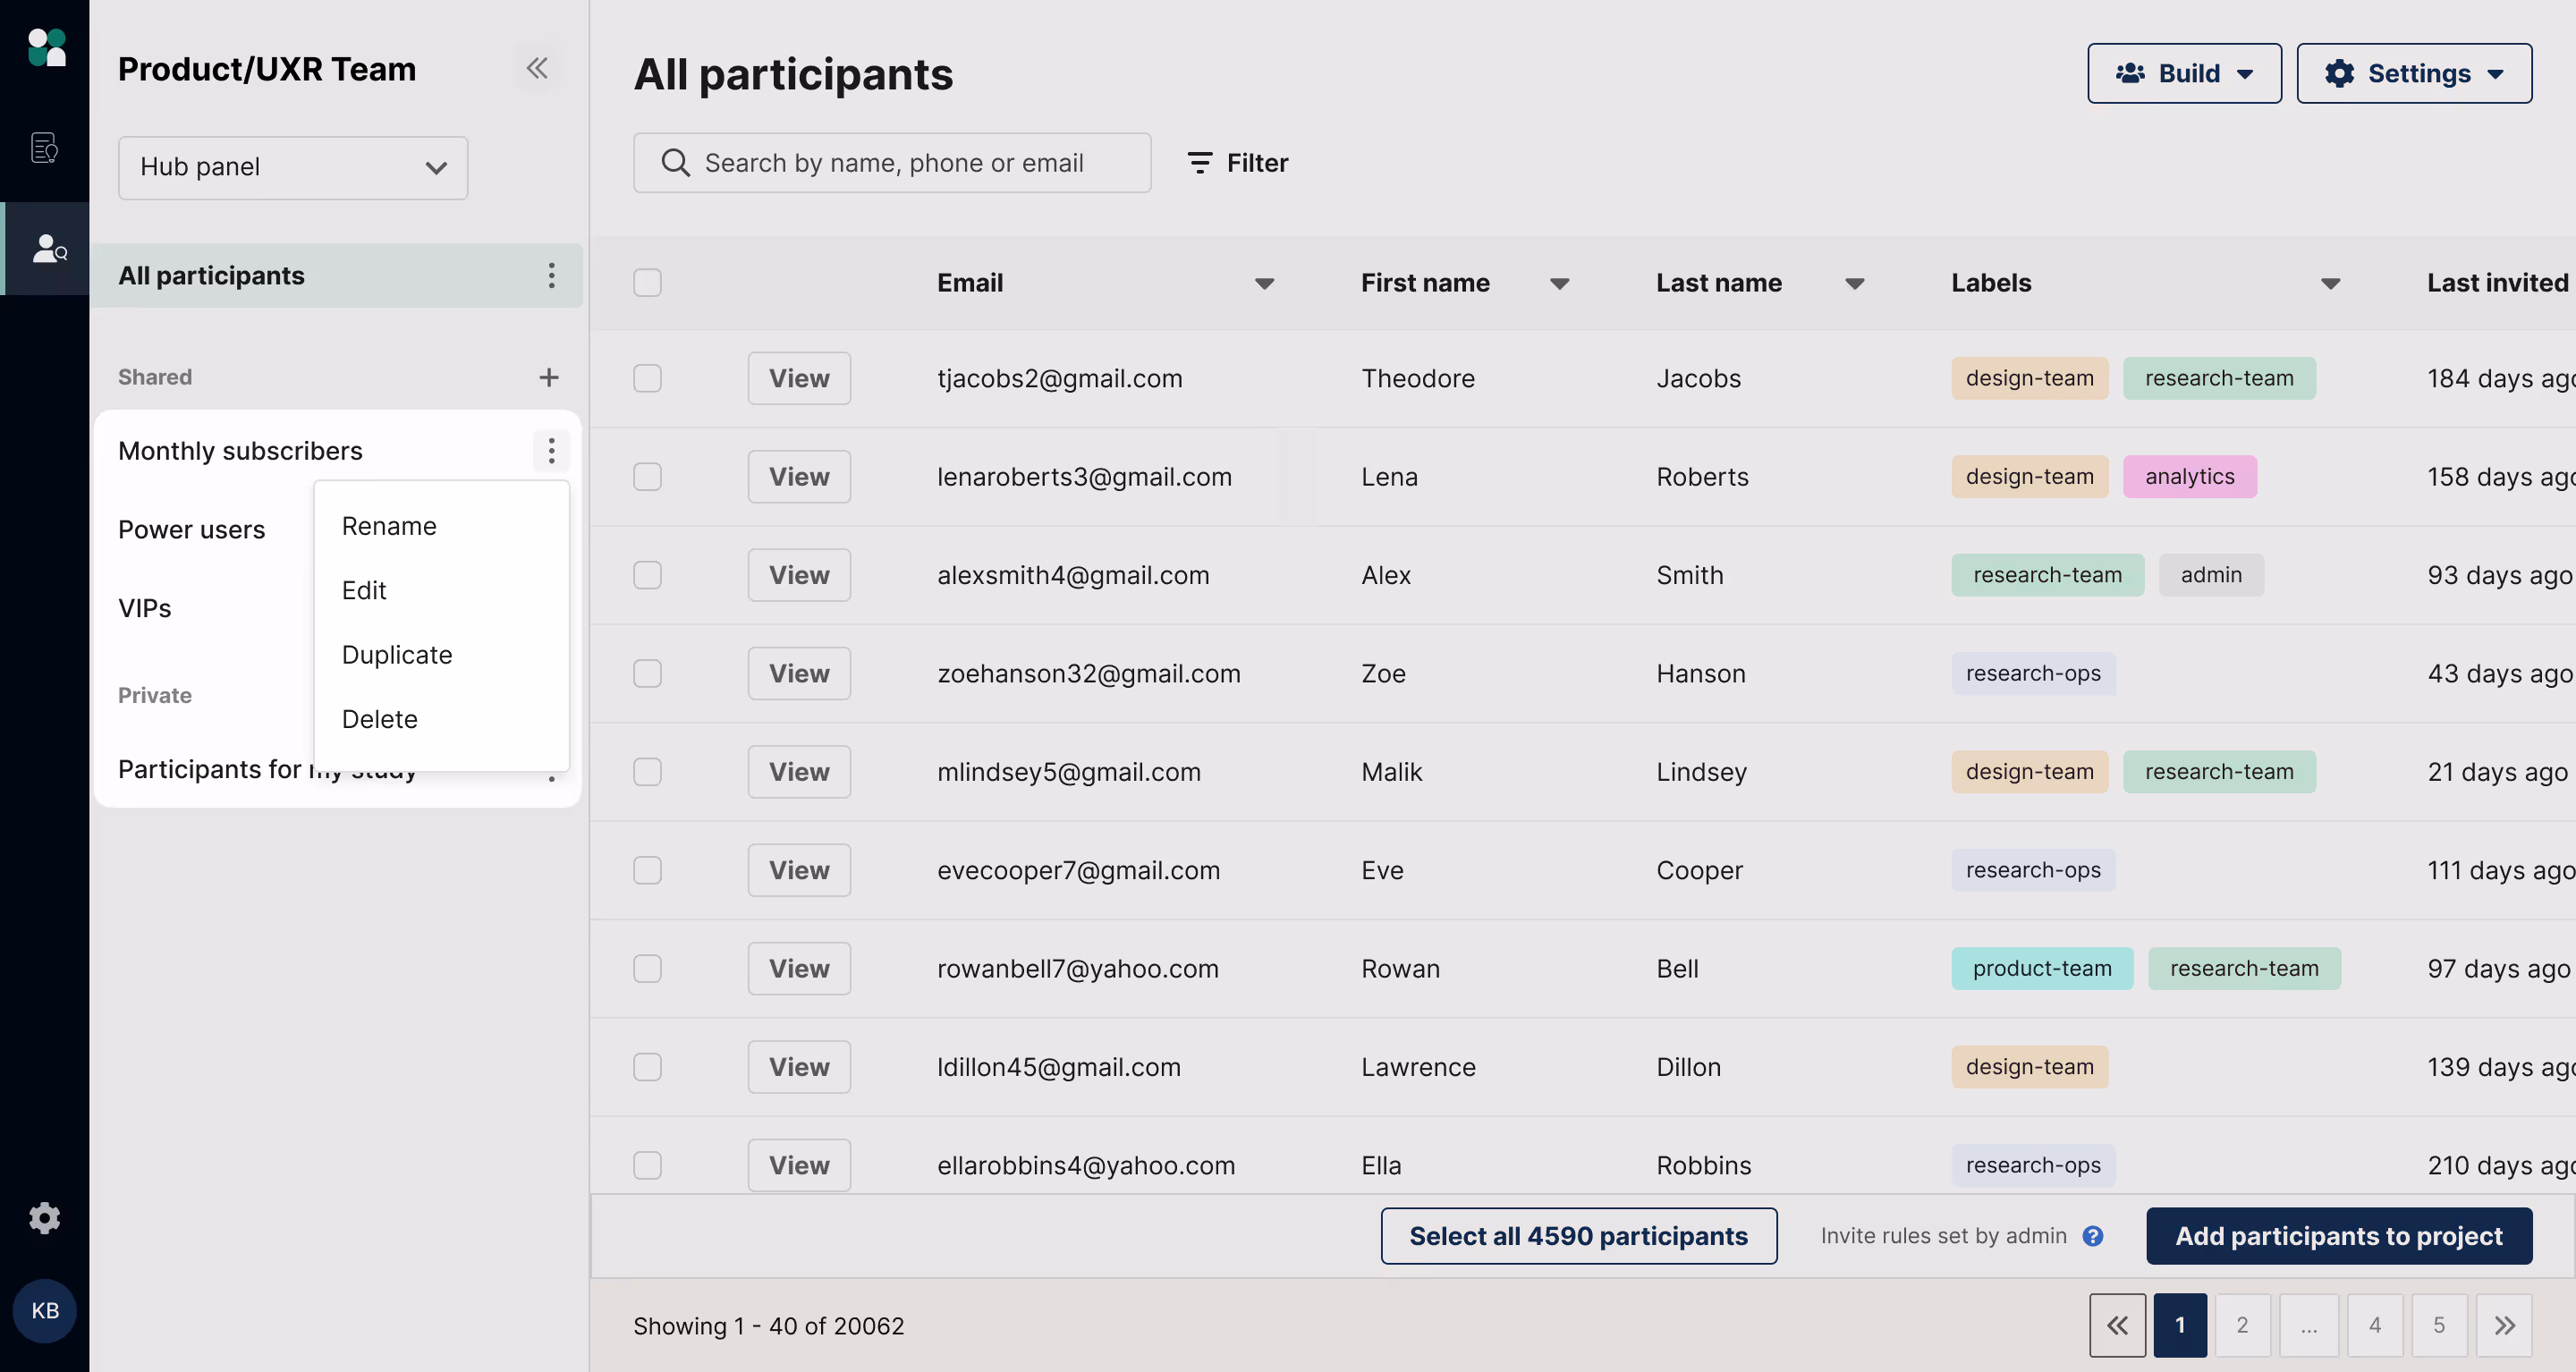
Saved segments can be edited, renamed, duplicated, or deleted. To do so, click the ellipses to the right of the segment name and select the appropriate action.