
For any Hub project, you can now use segments to easily save and reuse custom groups of participants in your Hub panel. Use filters to narrow in on participants who meet your study criteria, and then save that group as a segment. Saved segments appear in the left panel, and can be reused by any member of the research team for future studies.
What are segments?
Segments, previously known as “saved filters,” are custom groups of participants in your Hub panel. Don’t worry, your saved filters haven’t gone anywhere—all of your saved filter data has been ported over and now appears as segments in the left panel. Any invite rules or invite limits you have in place won’t be affected, and will still apply to these new segment groups.
We’ve also built in some new functionality to help you better manage these groups. You can create new segments at any time, and they are easily adjusted when your targeting or retargeting needs change. Segments can be edited, renamed, duplicated, and/or deleted.
Segments are also dynamic, so you never have to worry about updating them. Segments will automatically add or remove participants based on your filter criteria and any changes in participant data. For example, if your segment is “Active users” defined as people who have been active in your product for the past 30 days, the segment will automatically add people who pass into that 30 day range, and remove those who are no longer within it.
When to use segments vs. panels
Panels and segments differ in some key ways:
- Panels are helpful when you need tight permissions and governance around who is allowed to view different participants. For example, you can create a panel of high-value participants for strategic research shared only with your UX research team, or create an opt-in only panel to ensure that researchers only contact participants who consented for future studies. Panels are curated manually: you can select and add participants to panels, or set up opt-in forms to add them automatically when participants sign up.
- Segments are helpful filters within a wider group. For example, you can create segments based on key characteristics such as pet owners or power users. Segments are dynamic and will automatically add or remove participants based on your criteria and any changes in participant data.
Use segments when you want to guide researchers to specific sets of curated participants, without needing to lock down access. When you need stricter permissions for accessing a specific set of participants, panels are the better choice.
💡 Learn more about panel management in our free, self-guided Academy course, Building a Participant Panel.
How to use segments
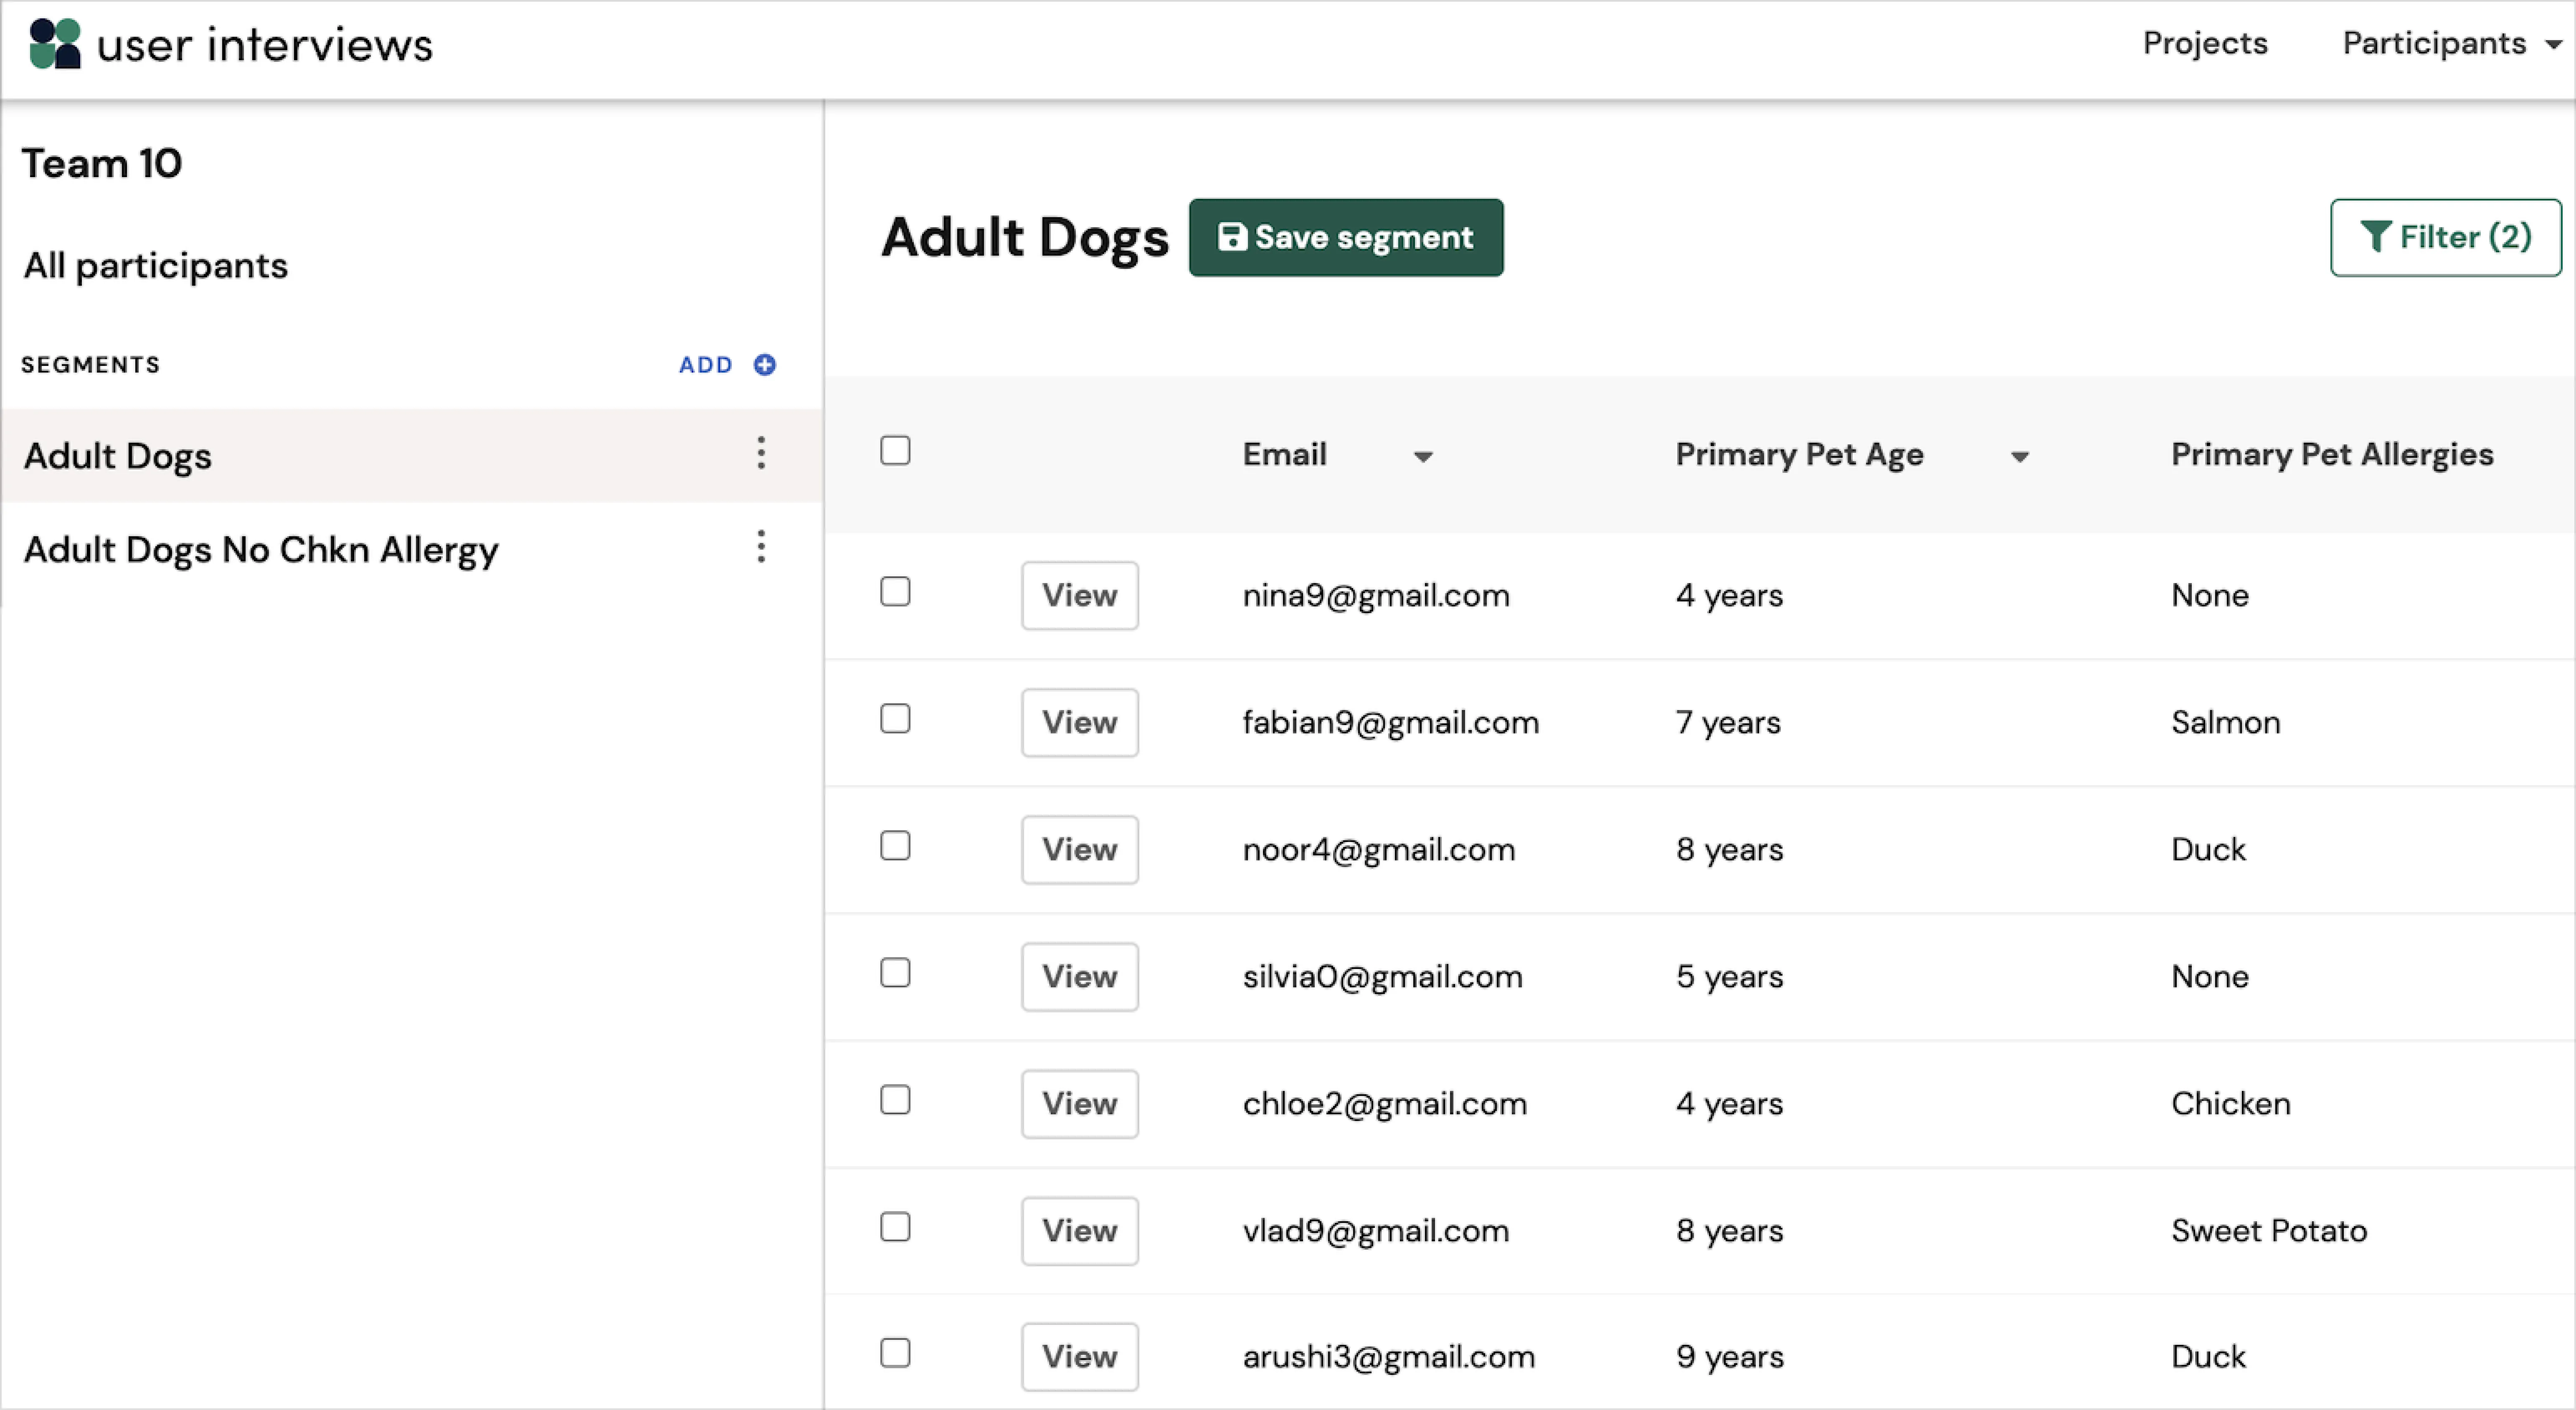
Segments allow your entire team to quickly pinpoint the right users for their research, and retarget the same group for future studies. Segments can be used in a variety of ways, but some popular use cases include:
- Creating segments based on customer personas or key characteristics—such as grouping by new users, monthly users, and power users of a product, or dog owners and cat owners
- Creating segments for teams in an organization to use—someone on a Research Operations team managing a large Hub panel may want to guide recruitment by creating segments customized for specific researchers or research teams.
- Creating segments for quick access to “standard” segments—a researcher may often want to start with default “active users” of a product, and refine their segment from there.
.avif)
Segments are available on all Hub plans, to Team Admin and Researcher roles (the Teammate role cannot view the Hub panel). Segments exist at the team level and are viewable by everyone on the team.
How to create a segment
There are two ways to create a segment:
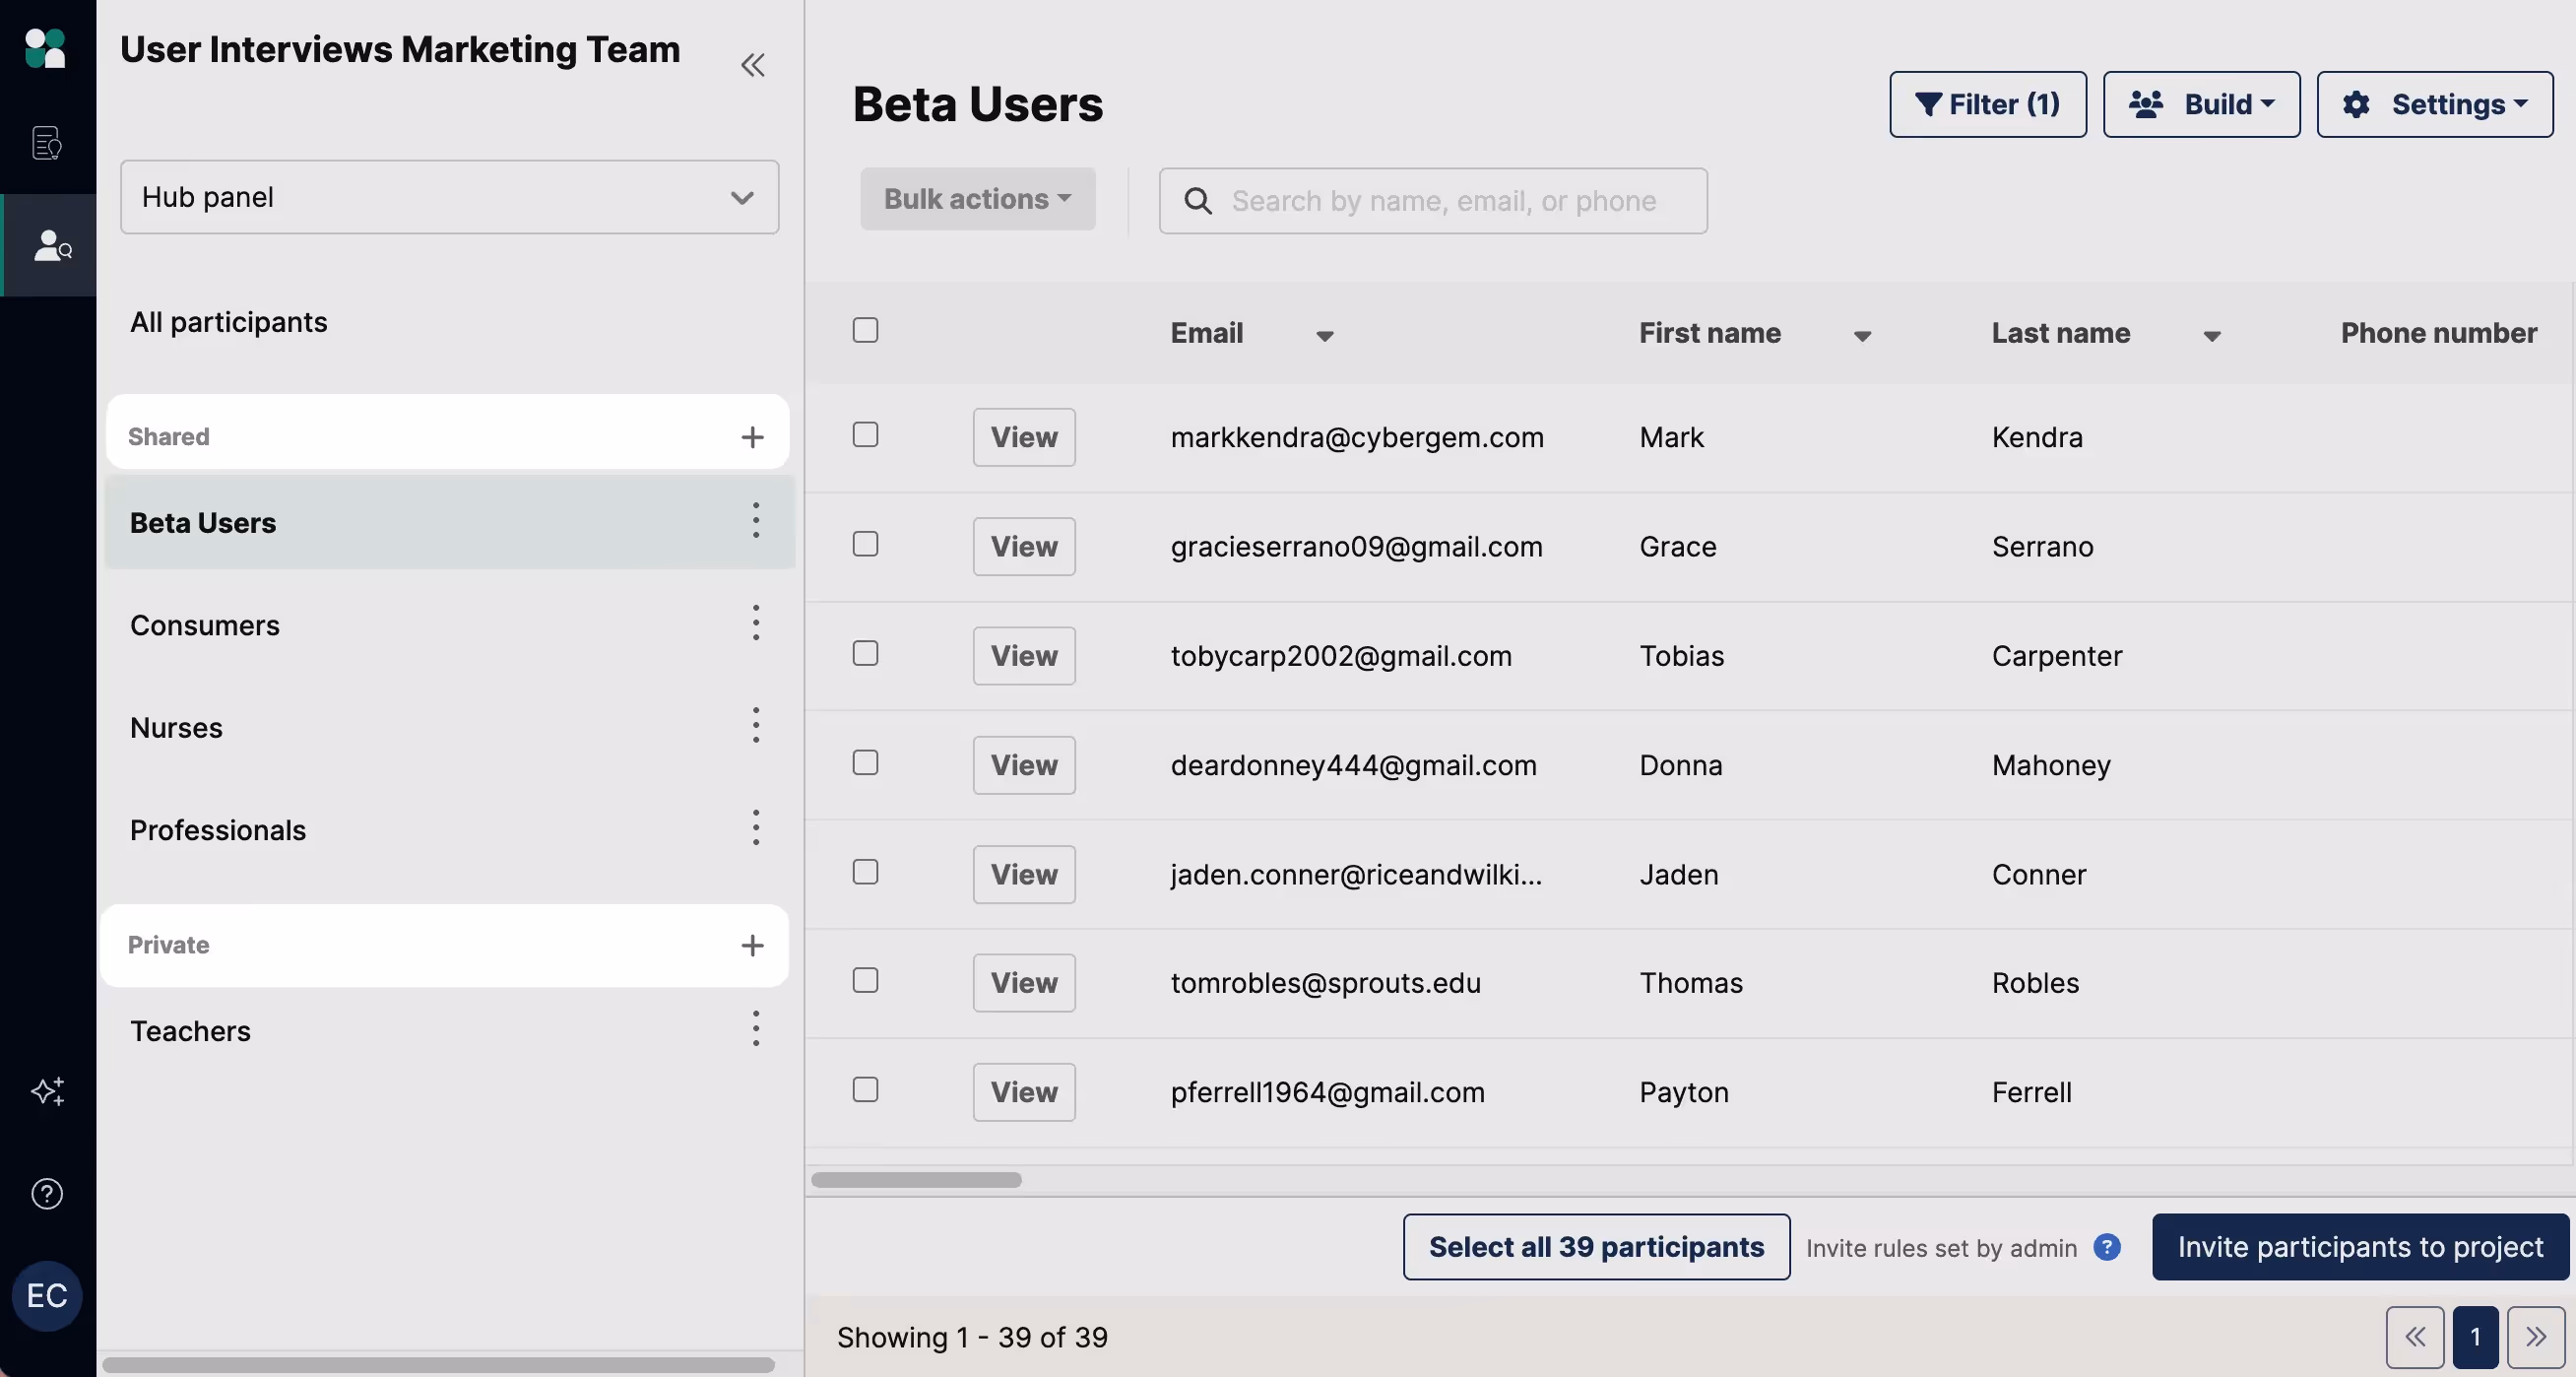
Apply filters and create a segment using the “Save segment” button
- Click on the filter button at the top right of the Hub table
- Add as many filters as you need to narrow down your group of participants. Click apply to view the participants that fit your criteria.
- A “Save segment” button will appear, click to name and save your segment. Your saved segment will appear in the left panel and you, or members of your team, can reuse it anytime
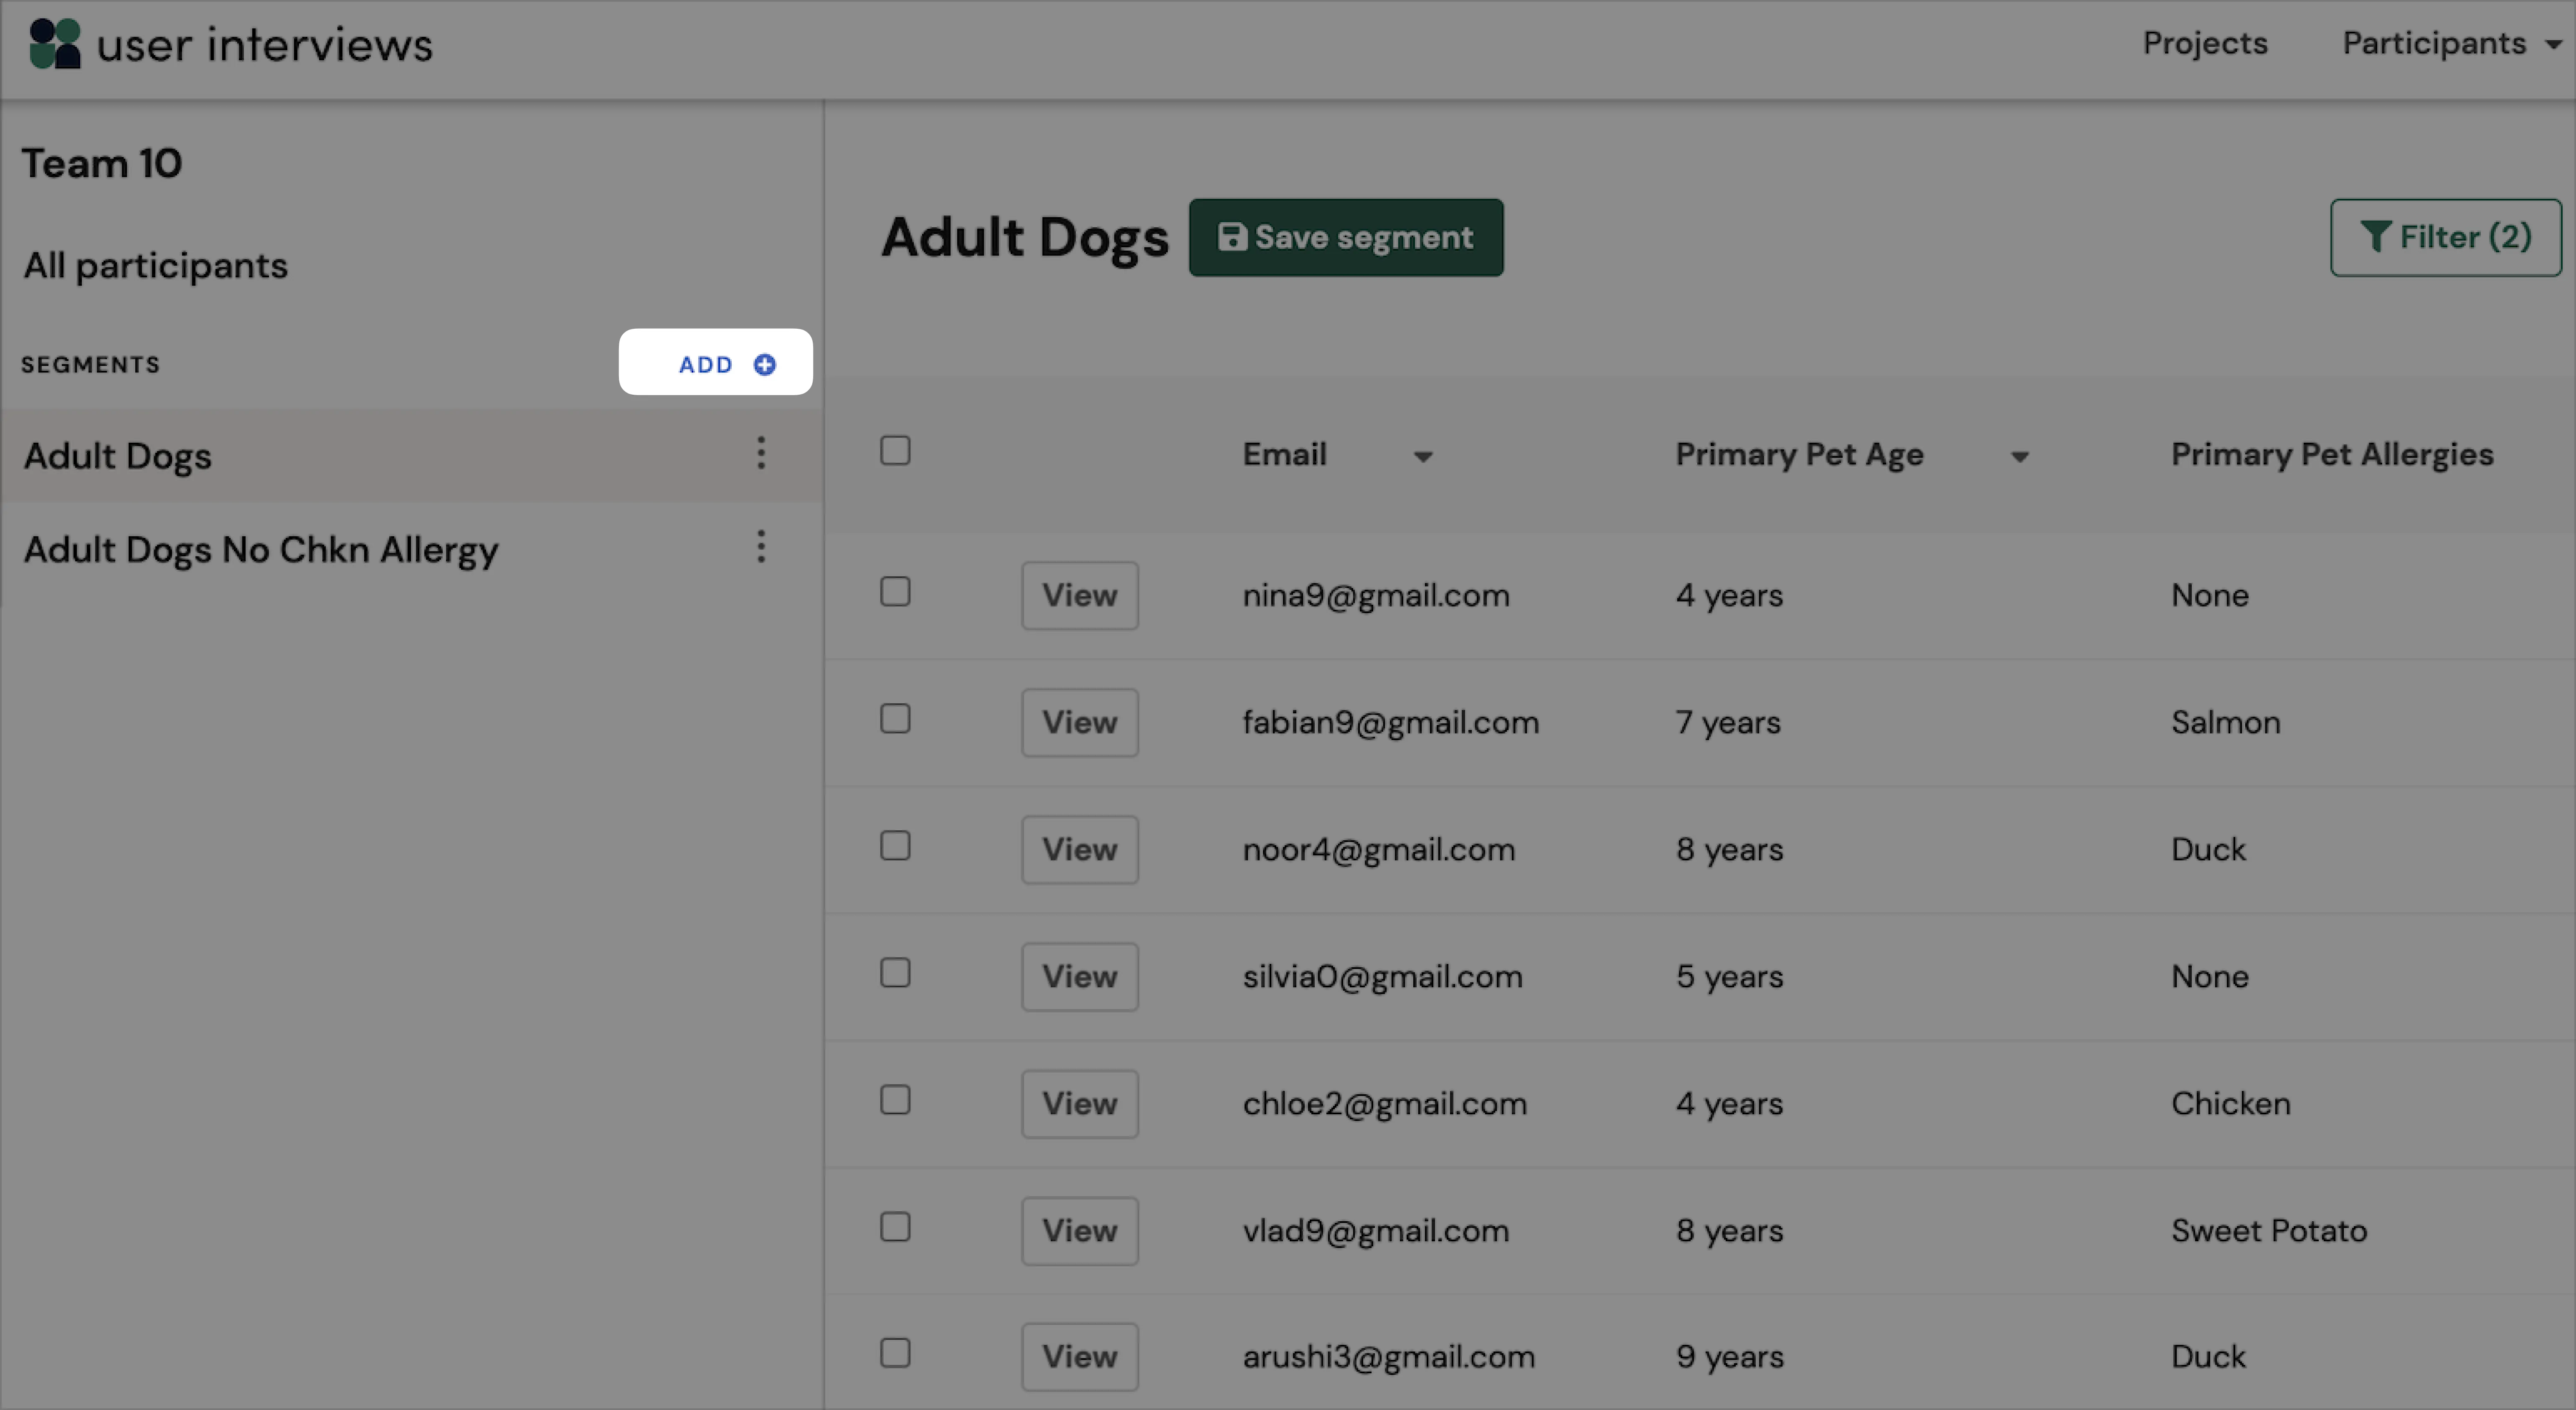
Add a segment directly from the panel to the left of the Hub table
- Click “Add” in the left panel
- Enter the name of your new segment, and click “Create segment”
- Search filters or start typing to filter down your group of participants
- Click “Save segment”
How to edit a segment
Researchers now have the power to edit, duplicate, rename, and delete segments. To edit a segment, click on your segment, then click the “Filter” button at the top right of the Hub panel. Make any filter adjustments, click "Apply", and click the “Save segments” button to save your changes. To rename, duplicate, or delete a segment, simply click on the three dots to the right of the segment, and click to select.
How to set segment permissions
To organize and manage segments across the team, you can control whether other team members can view or edit your segments. Set edit access for segments that are open to collaboration, or update to view-only access to prevent any accidental changes after a segment is final.
Setting segment permissions
When creating a segment, you’ll see the option to set permissions for the entire team: no access, can view, or can edit. To share your segment with individual researchers only, use the dropdown to search and add someone by name, and specify that person’s access using the dropdown to the right.
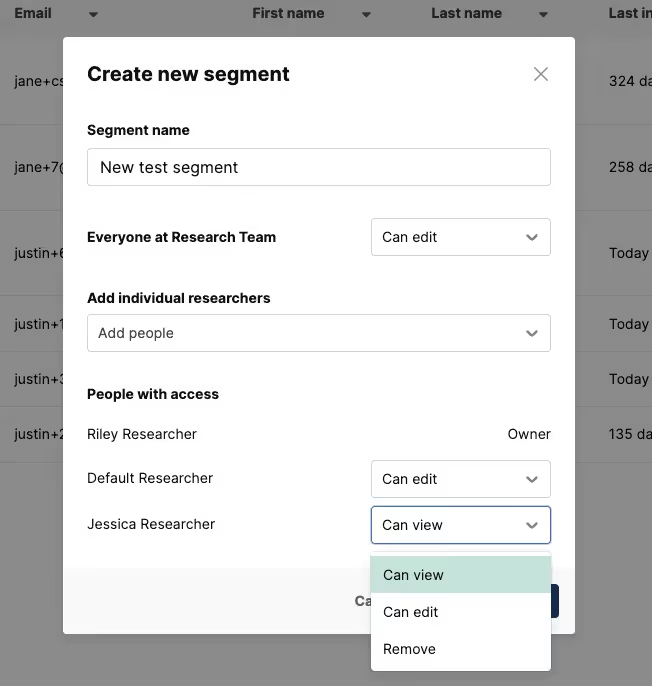
If you create a segment in the “Shared” section of the side panel, access will default to “Can edit.” If you create a segment in the “Private” section, access will default to “No access.” You can update these permissions at any time. Note that selecting “No access” will make that segment private and move it under the Private section.
Editing segment permissions
To adjust the permissions of a segment, click the kebab to the right of the segment and click “Update permissions.” You can edit these permissions at any time.
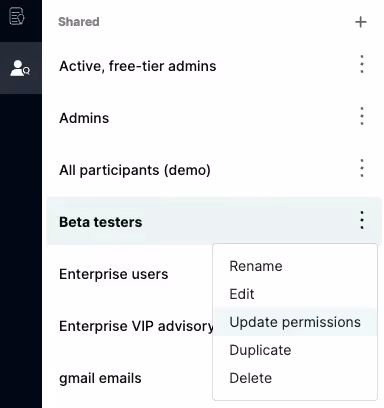
💡Note: These permissions apply to the specific segment, but not the participants in the segment themselves. For example, if you set “View only” access on a segment, other team members will only be able to view, but not edit, the segment. This doesn’t apply to permissions set on access to the participants themselves.
FAQs
Who can use segments?
Segments are available on all Hub plans, to Team Admin and Researcher roles (the Teammate role cannot view the Hub panel).
How do I create a segment?
There are two ways to create a segment:
- Click on the Filter button at the top right of the Hub table, add as many filters as you need to narrow down your group of participants, and then click "Apply”. A “Save segment” button will appear, click to save. Your saved segment will appear in the left panel and you can reuse it anytime.
- Add a segment directly from the panel to the left of the Hub table. Click "Add", enter in the name of your new segment, and click "Create segment". Search filters or start typing to filter down your group of participants. Click "Save segment".
What happened to my current saved filters?
Don’t worry, we’ve imported all of your saved filter data, which now appear as segments in the left panel. And, we’ve provided some new functionality to help you manage these—you can now edit, rename, duplicate, delete, or create new segments any time to streamline your recruiting process.
Will segments stay up to date with filter and/or participant data changes?
Yes, segments are dynamic and will automatically add or remove participants based on your filter criteria and participant data, ensuring it always reflects the most up to date group.
Since segments update automatically, you cannot manually add or remove participants from a segment. If you wish to create a static list, you can create a segment where the only filter applied is a specific label. You can then add or remove that label from participants you want to add or remove from that segment.
Can I edit a segment?
Yes, you can edit the filters that define a segment. Click on your segment, then click the “Filter” button at the top right of the Hub panel. Make any filter adjustments, click "Apply", and click the “Save segments” button to save your changes.
Who can view/edit my segment?
You can set permissions to control whether other team members can view or edit your segment. Set edit access for segments that are open to collaboration, or update to view-only access to prevent any accidental changes after a segment is final. You can also create private segments for personal or draft segments you don’t need to share with the team.
💡Note: These permissions apply to the specific segment, but not the participants in the segment themselves. For example, if you set “View only” access on a segment, other team members will only be able to view, but not edit, the segment. However, this doesn’t apply to permissions set on access to the participants themselves.
Can other people on my team invite participants from my segment?
Yes, everyone on your team can view all segments and invite participants from them to their projects. Note that participants can be included in more than one segment.
How many filters can I apply to my segment?
You can apply as many filters as you need to narrow down participants for your segment.


