
If you edit your screener, the saved changes will overwrite your past versions. Your most recent version will be live for all future participants to see and complete. Any past versions will be read-only. Before making edits, review your screener survey's effectiveness with our screener survey grader tool.
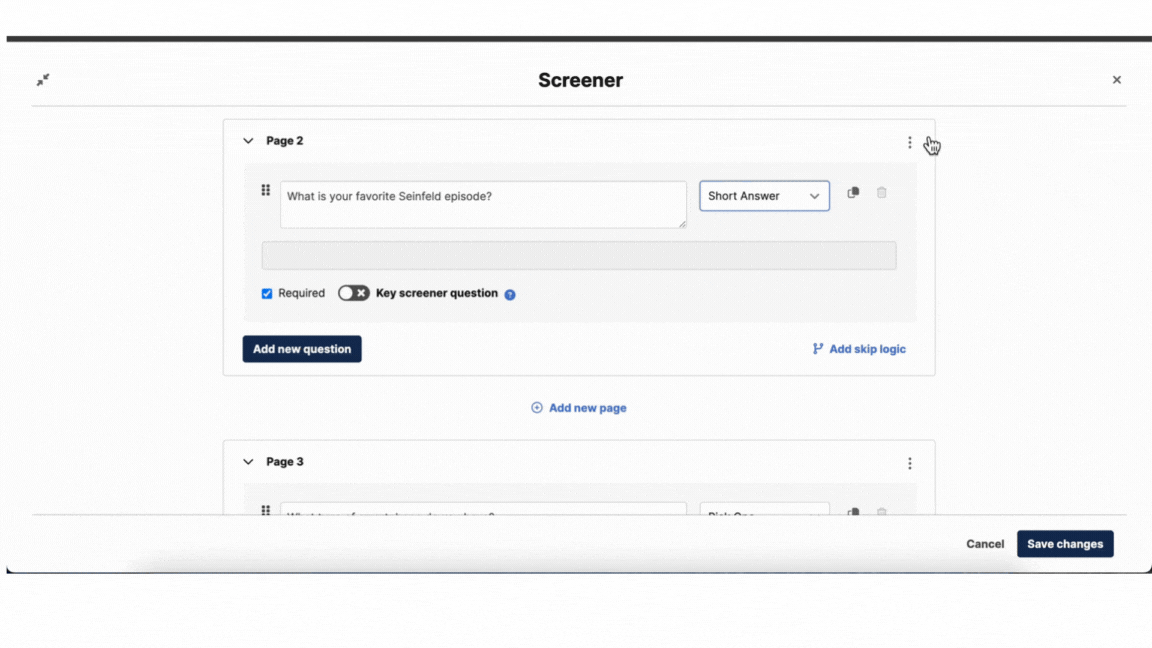
To edit a screener survey, visit your project workspace. Under the Research Design section and Recruitment tab, scroll down to "Screener Survey" and click "Edit". A side drawer will pop out with our screener survey builder. It should look familiar—it's the same tool that you used when launching your project. Here, you can make and save your changes as you'd like. You can also click "Preview Screener" to view the Participant's experience!

Screener Building Basics
Adding, duplicating, and deleting questions
- To add a question, click "Add new question" at the bottom of the intended page.
- To duplicate a question, click the copy button in the top right corner of the question (to the left of the trash can).
- To delete a question, click the trash can icon in the top right corner of the question (to the right of the copy button).
Bulk importing answer choices
If you often draft screener questions in other tools, it’s easy to bring them into UI. Copy and paste answer choices directly into the builder using command or control + v. UI will automatically create a new row for each answer choice added.

Adding, duplicating, and deleting pages
To add a page to your screener, click "Add new page" at the bottom of any page.
After you've created at least one new page, a trash can icon will appear in the top right corner of each page, allowing you to delete pages until you have one left. Keep in mind, deleting a page also deletes all questions and Skip Logic inside the page. Each page is displayed as its own card, which can be collapsed or expanded as needed.

If you’d like to duplicate a page, you can do so using the duplicate icon on the top right corner of the selected page.
Moving questions
To move a question, click and drag the "grip" icon (it looks like a group of 6 small dots) in the top left corner of the question box. You'll be able to drag the question to any position you'd like, including new pages
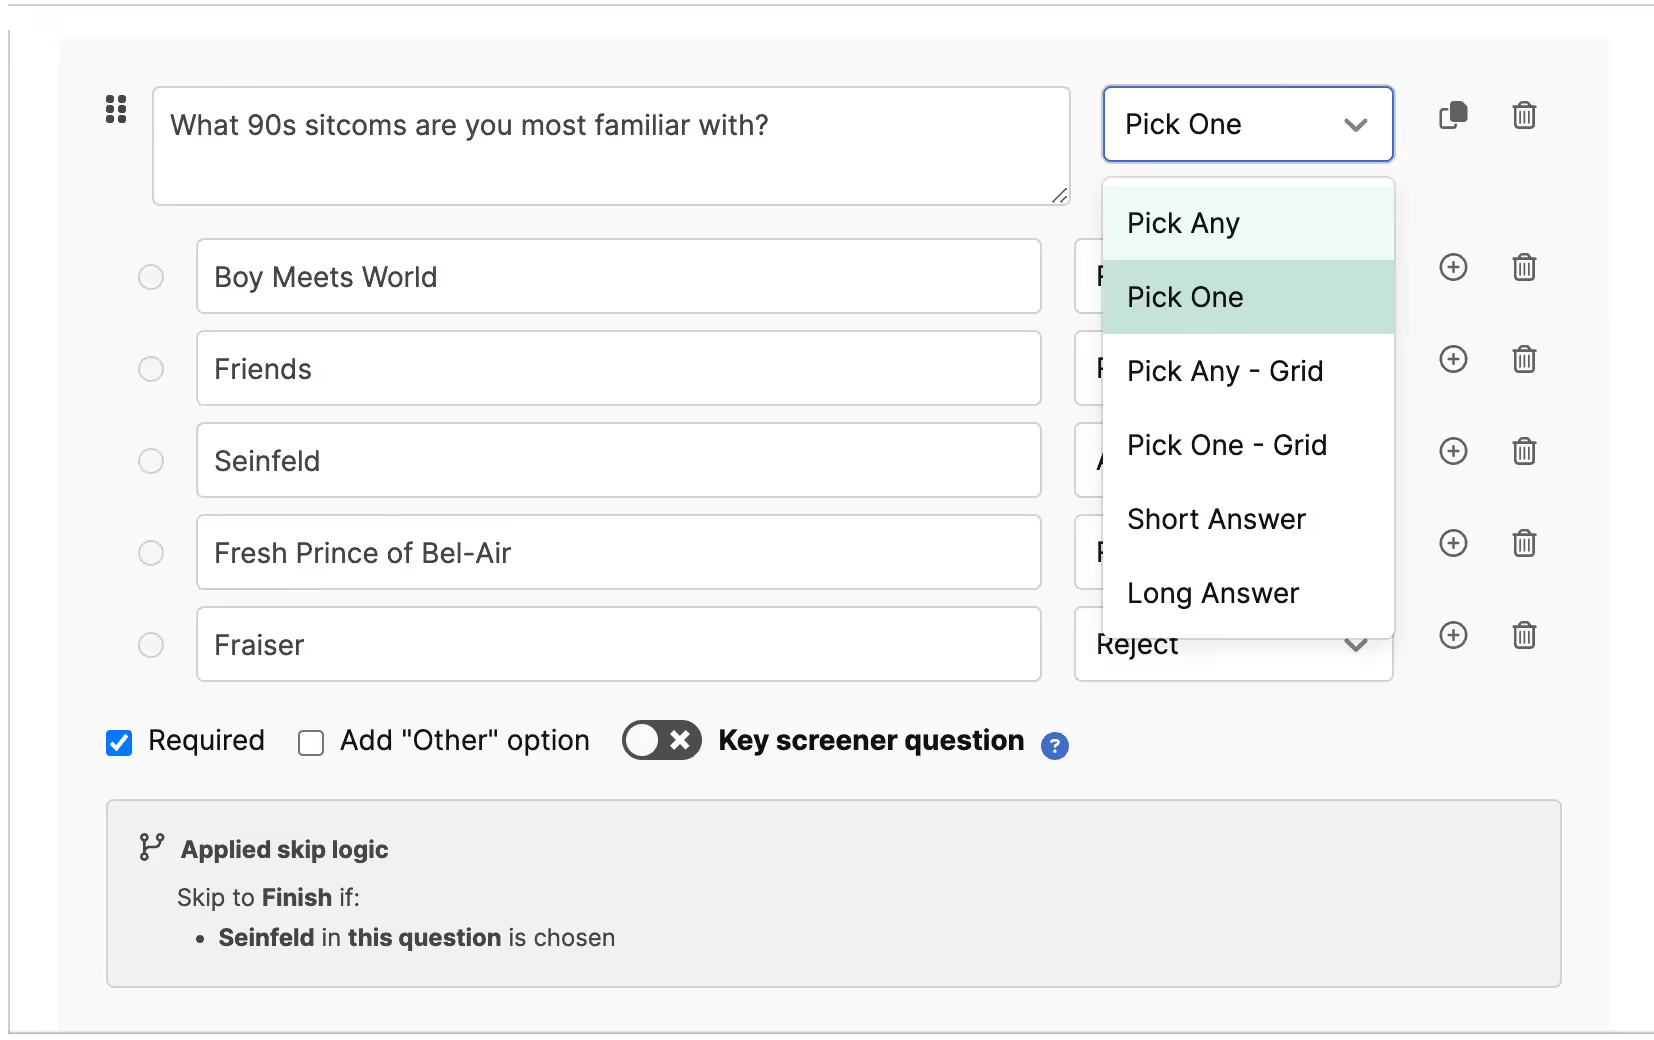
Changing question format
To change your question format (e.g. Pick One vs. Pick Any), click the drop down menu next to the desired question. Then, click the desired question type. A drop-down will appear and you can then select what kind of question you want.
Add "Other" option
To add an “Other” option to Pick One and Pick Any questions, click the Add “Other” option checkbox at the bottom of the page. This will give participants the option to select “Other” and enter text into a response field.
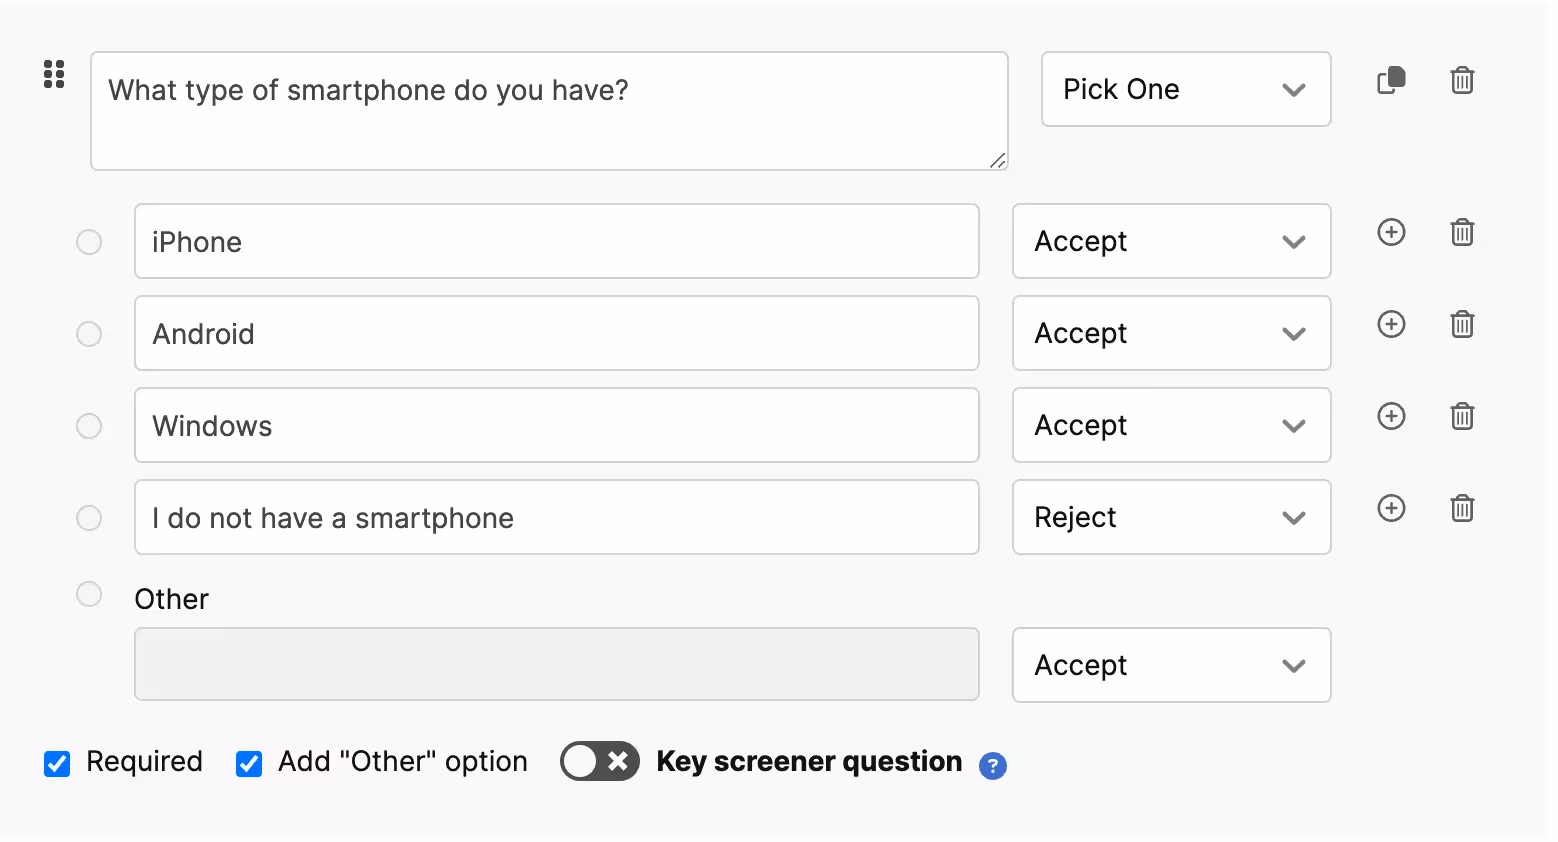
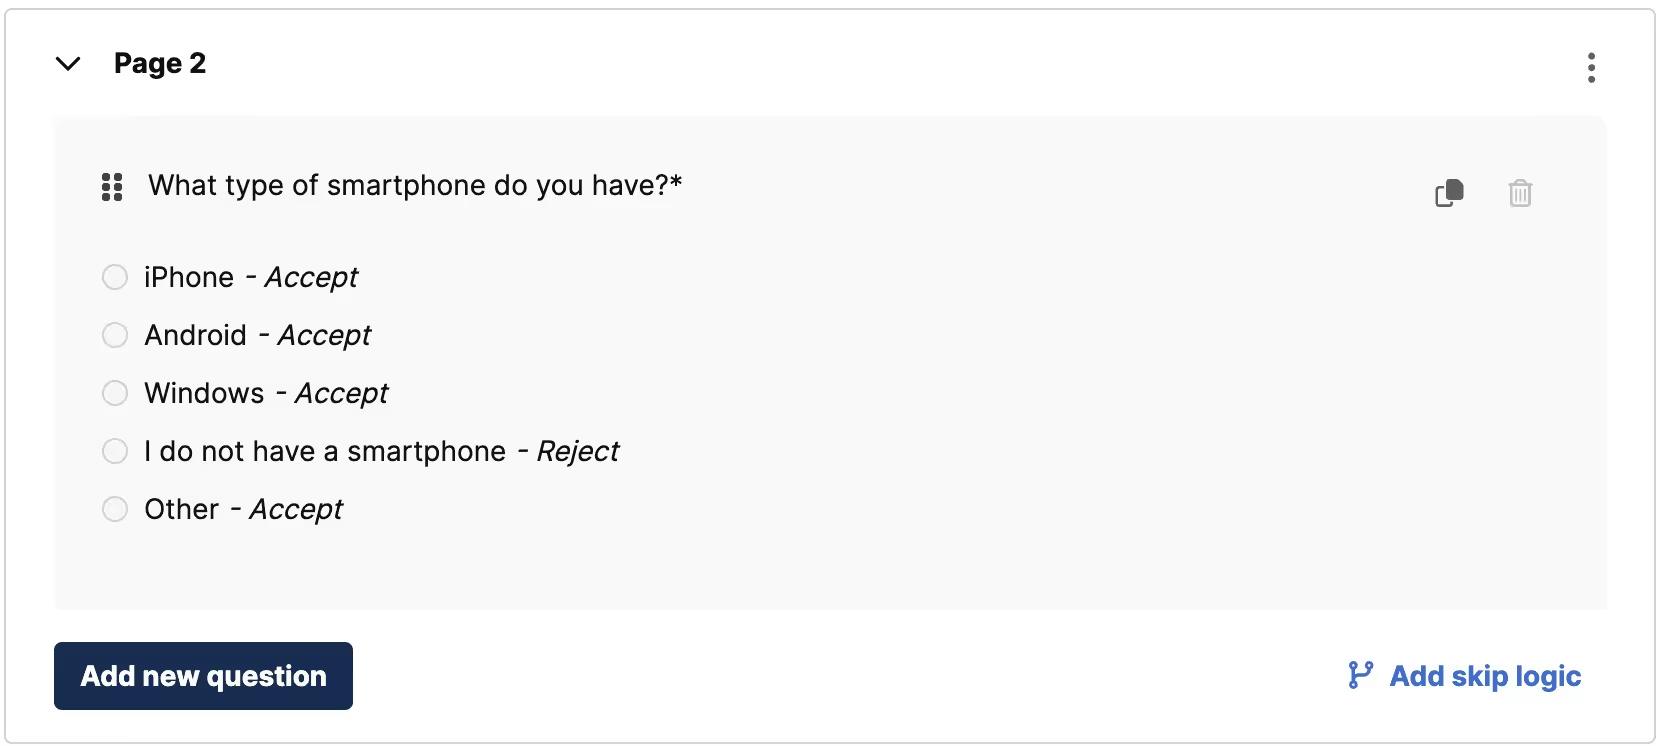
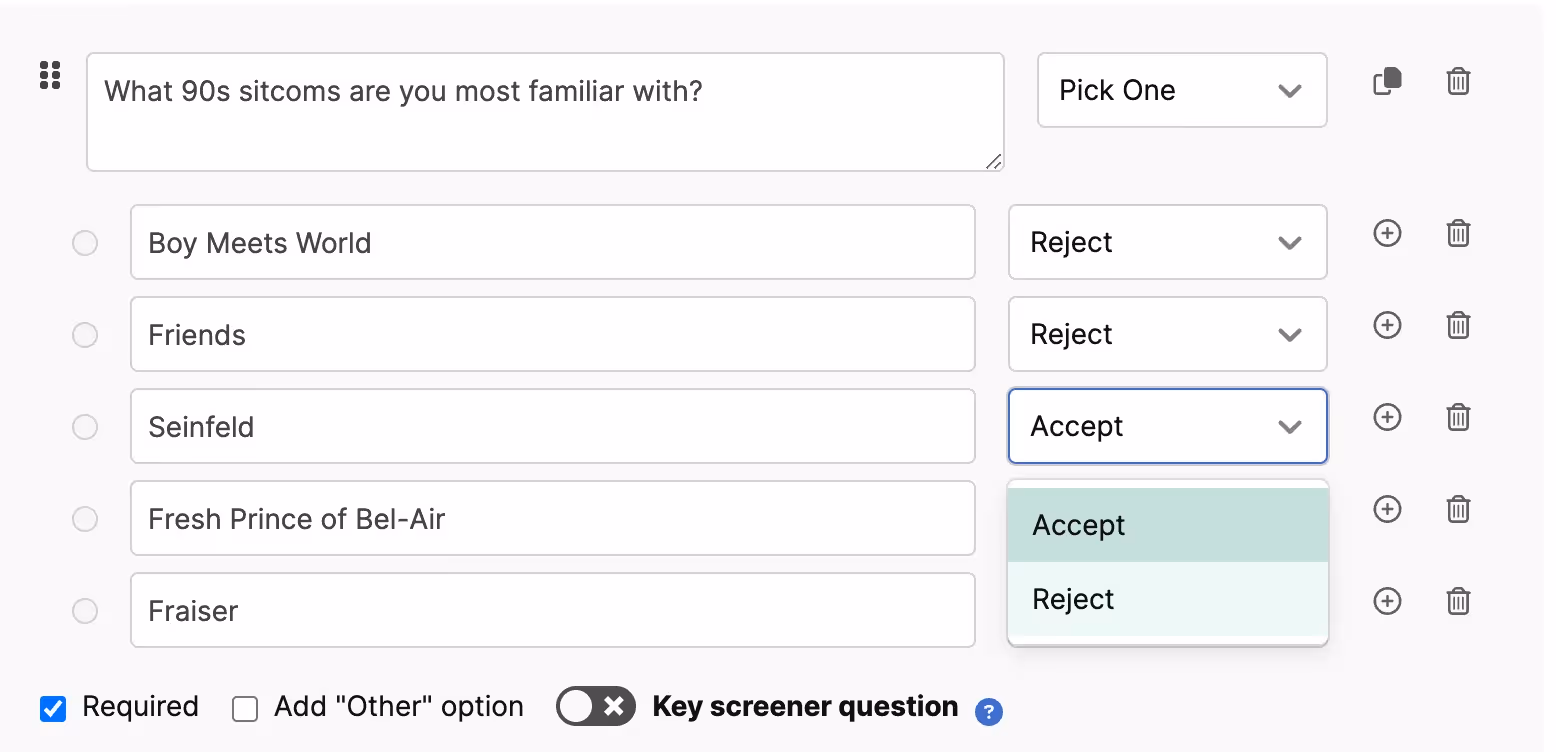
Changing response criteria
If you’d like to change the criteria behind a specific response (accept, reject, etc), click on the question. You'll see the criteria listed to the right of each response. Simply chose the criteria you'd like to apply to the response.
- You can set Pick One or Pick One - Grid responses to Accept or Reject applicants based on which options they select.
- You can set Pick Any or Pick Any - Grid responses as May Select, Must Select, or Reject.
Screener Versions
Below are a few important notes to keep in mind while editing your screeners:
- Every time you edit a screener and save your changes, a new version will be created. We recommend making most of your edits at once to reduce the number of versions.
- To view previous versions of the screener, go to the "Screener Survey" drawer and click on the "Screener Version" dropdown menu. You'll have read-only access to past screeners.
- You will not be able to reinstate an older screener version without manually making all changes again.
- In the Participant Management > Applicants section, you can view which screener version each participant completed. These details will also be available in each Participant's profile.
- When reviewing which participants you want to approve for your study, we recommend double checking the Screener Version a participant completed. If your accept and reject criteria changed, a participant may be inaccurately qualified or disqualified based on the Screener Version completed.
Any questions? Email our Project Coordinator team to assist.
⭐️ Screener surveys are a vital component of recruiting the best participants for your research. Learn how to master the screening process with our Screener Surveys Deep-Dive course on the User Interviews Academy.


