What kinds of unmoderated studies can I run with User Interviews?
The short answer is… you can run any kind of unmoderated study with User Interviews! Examples include surveys, usability tests, and mini assignments such as asking participants to record a video of themselves completing a specified task. Unmoderated research methods are those that involve participants completing a task on their own before a deadline. In other words, the kind of research where the researcher does not interface directly with the participant.
Learn everything you need to know about running effective unmoderated studies on the User Interviews Academy: Unmoderated Research with User Interviews 📚
How do I create an unmoderated project in User Interviews?
When you create a new study with User Interviews, you’ll be prompted to tell us what kind of study you’re running.
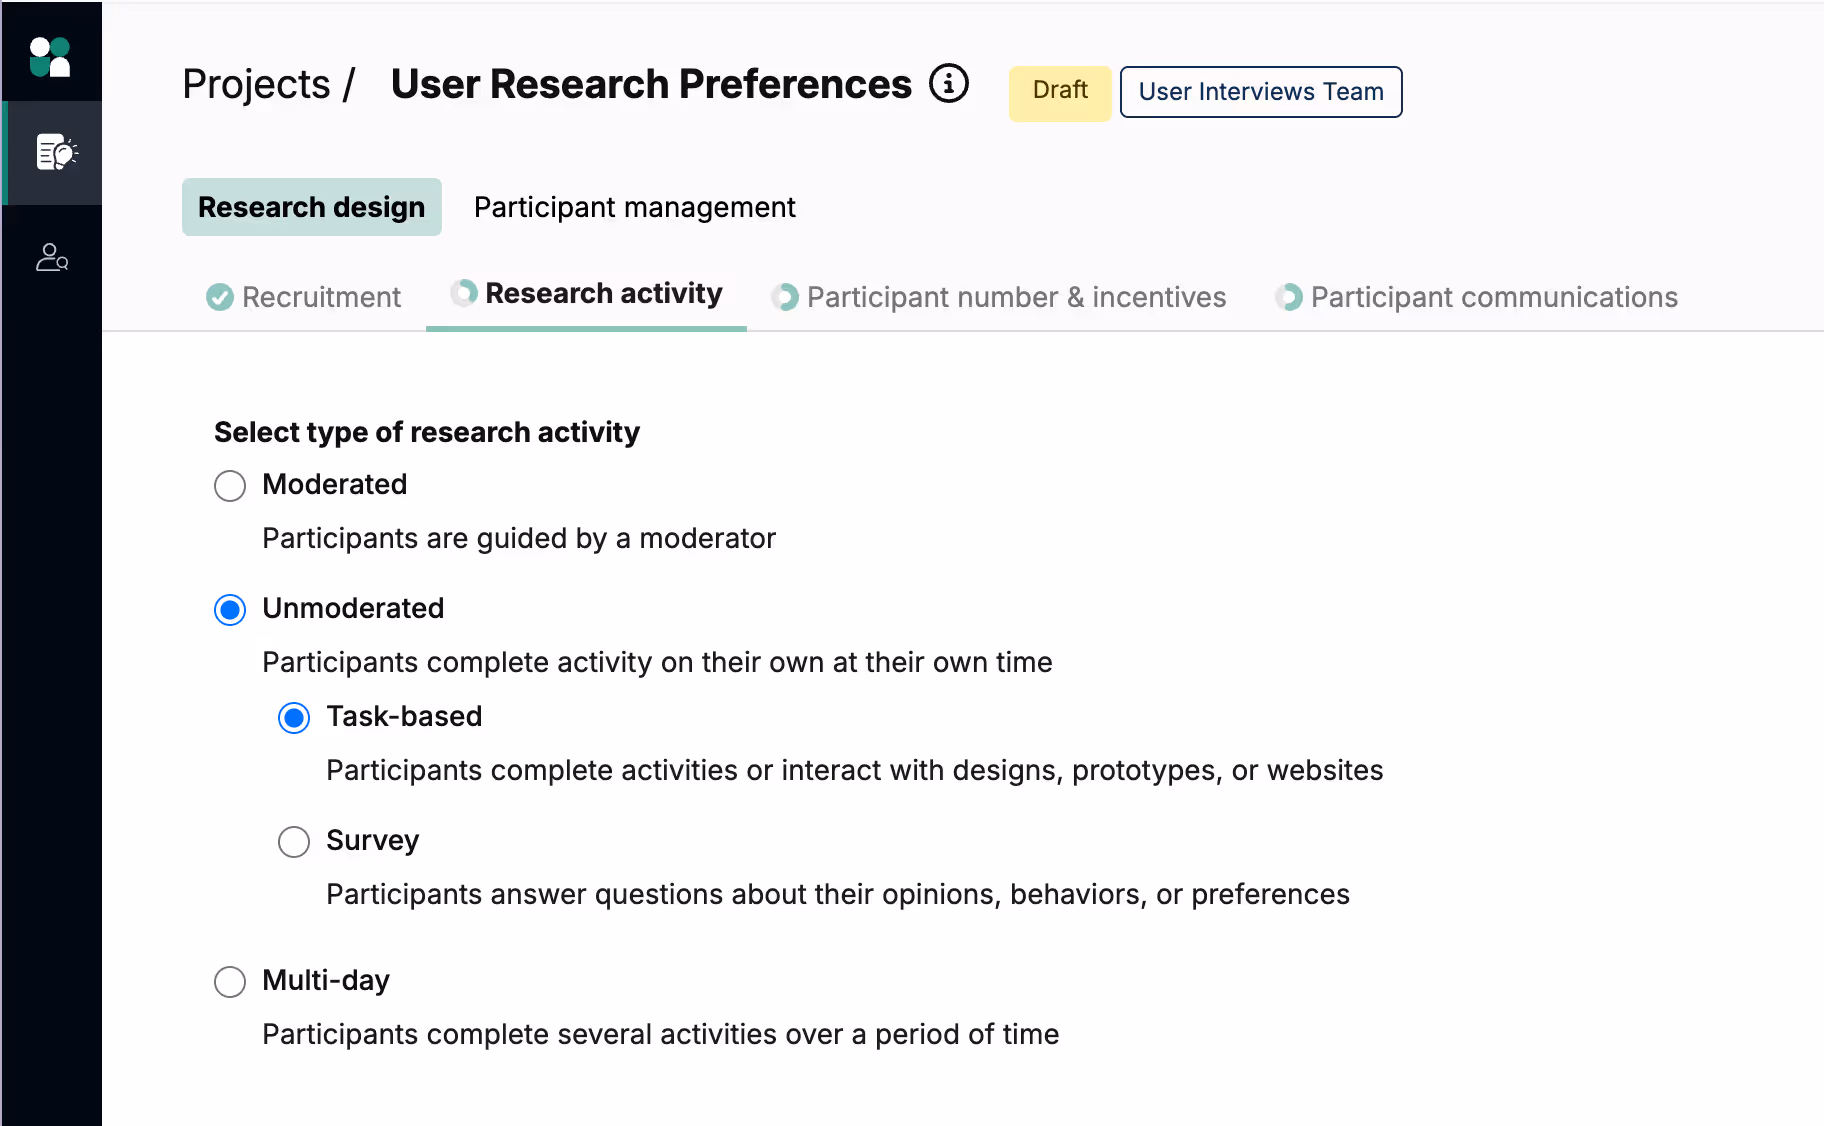
If you select “Unmoderated” at this step, you’ll have a choice between task-based and survey sessions.
- Task-based unmoderated studies let participants complete activities or interact with designs, prototypes, or live websites on their own time—without a moderator present.
- Surveys allow participants to answer structured questions about their opinions, behaviors, or preferences. They’re best for collecting quantitative feedback, validating assumptions at scale, and quickly capturing user sentiment across large audiences.
After selecting your unmoderated study type, your project builder will pre-populate below with the relevant inputs and templates, making it easy for you to set up your unmoderated study and communicate the right instructions to your participants. Proceed to fill out each of the following areas to build out your project:
📚 If you're regularly running unmoderated studies, this is an essential course for you: Unmoderated Research with User Interviews, on the UI Academy.
Unmoderated Studies: Best practices for writing task instructions
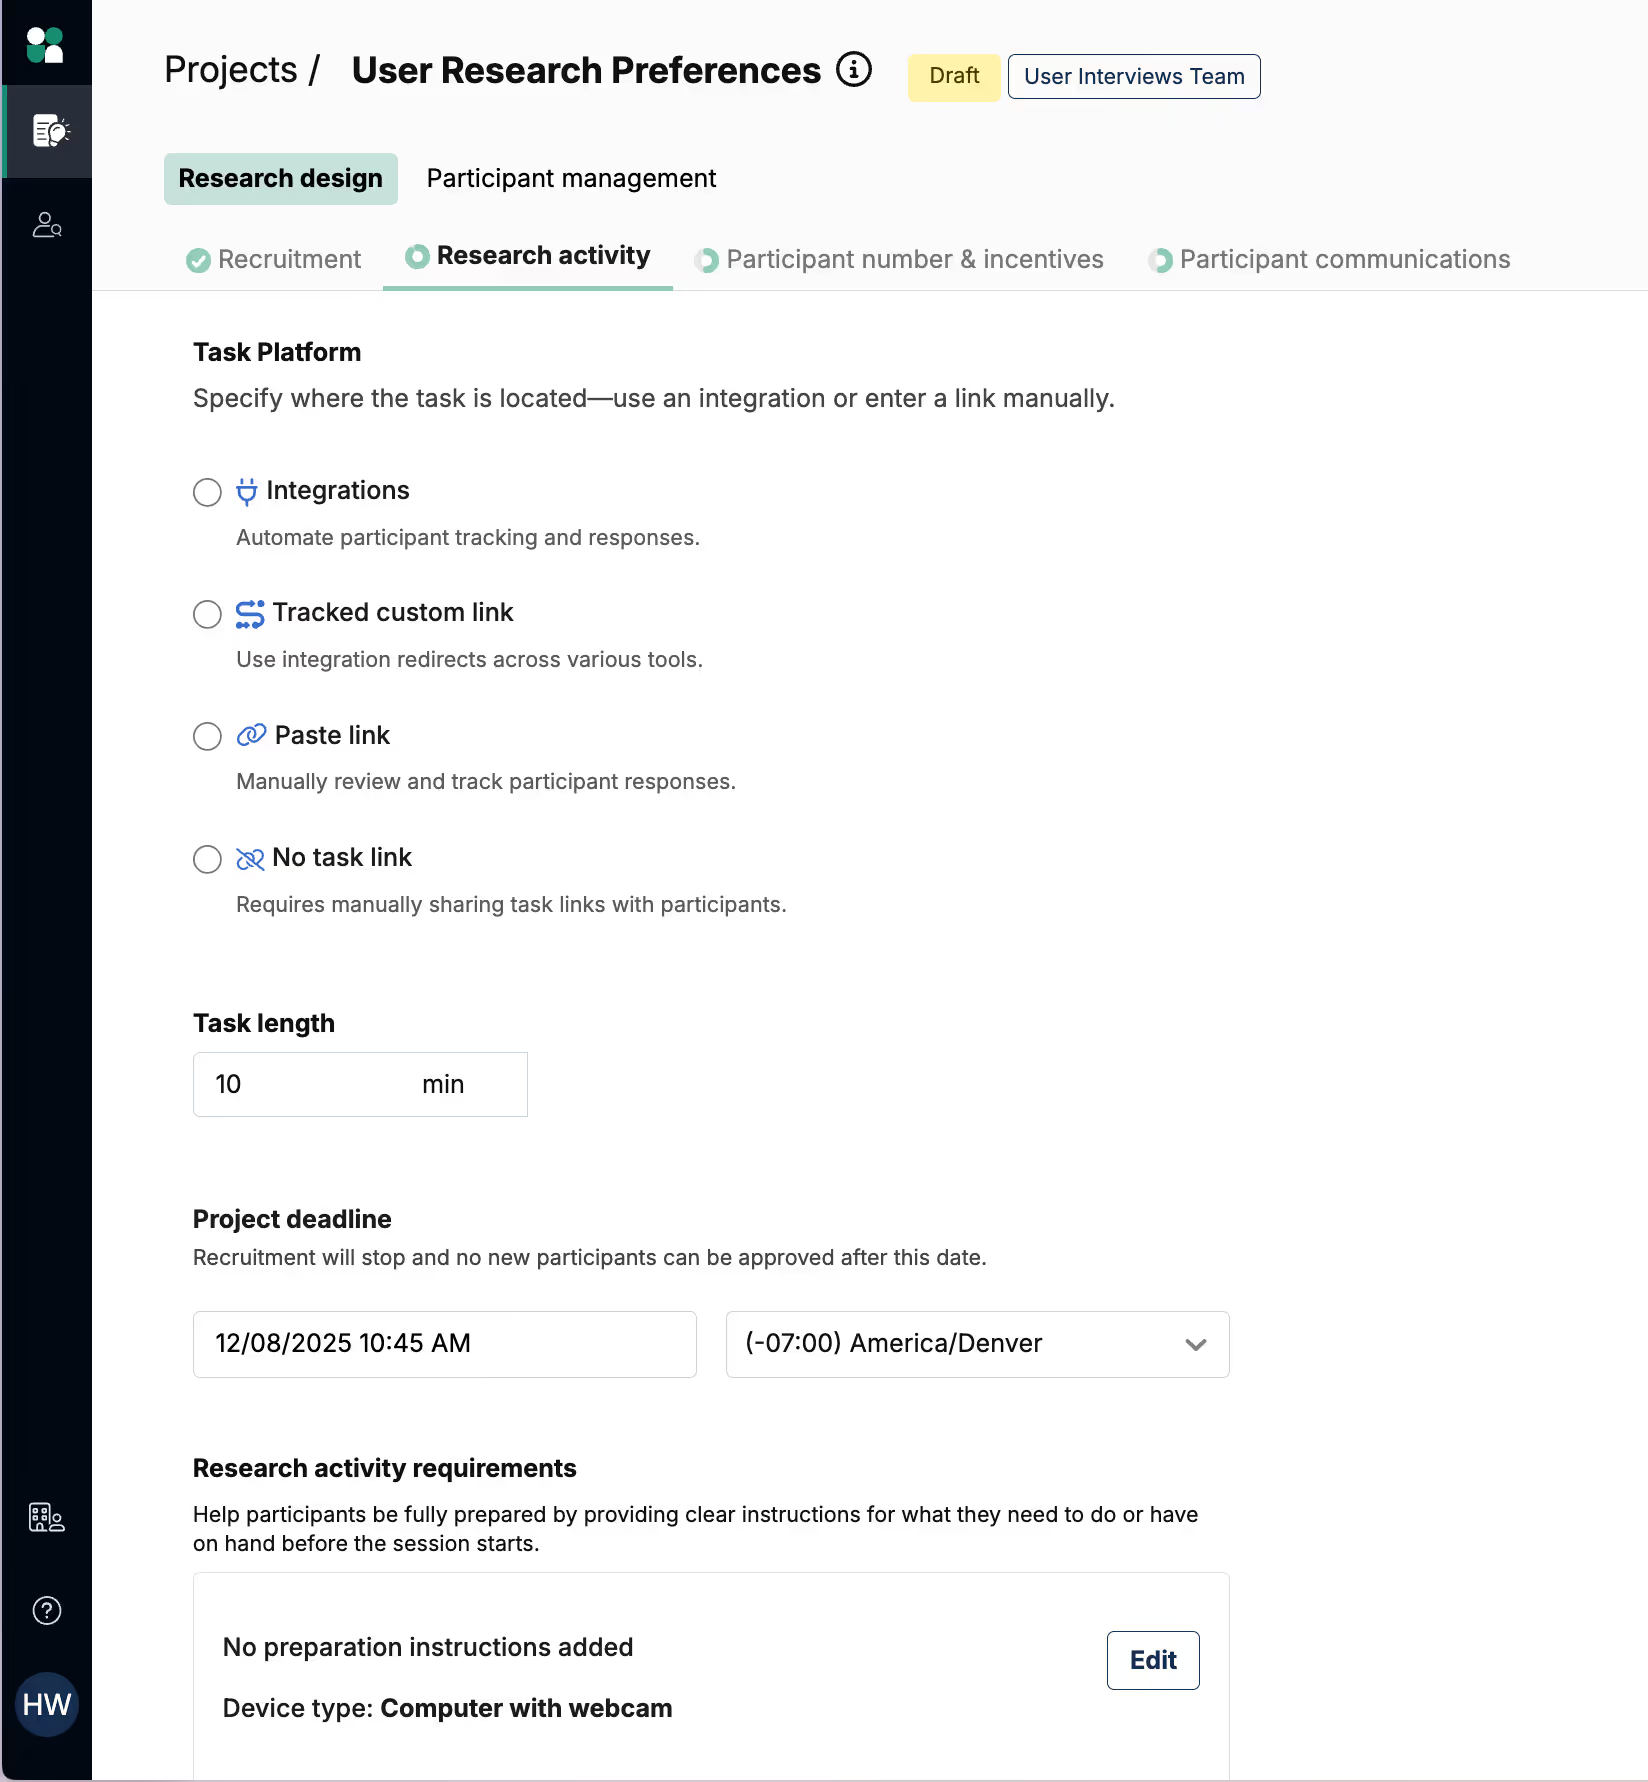
On the “Task details” page, there is a field for you to provide task instructions to your participants. This is an open text field you can use to help prepare participants and set their expectations for the task they’re about to complete. The instructions you provide here will dynamically display on task summary screens and emails sent to your participants.
Here are some examples of task instructions you may wish to include:
- Login or installation instructions: Does your task take place in another application that will require the participant to create an account or download and install software? If so, does that application provide participant-facing documentation that you could link to as a reference?
- Technical requirements: Does your task require the participant to use their webcam, speakers, microphone, screenshare, or a specific browser or device? While this information is included elsewhere on confirmation screens, it doesn’t hurt to remind participants to check their tech set up before attempting the task.
- Task instructions: Set expectations for what the participant will be expected to do once they open up your task. A simple and brief bulleted list is best here — you don’t need to provide all the details if the task itself contains directions.
- Tips for participating: Include anything else you’d like your participants to keep in mind as they complete your task. Examples may include finding a quiet space, minimizing distractions, or providing clear and thoughtful answers.
💡 While key study details such as task length and device requirements are already included in participant communication, this is your opportunity to add clarification and color to really set up your participants for success. Remember, they won’t have the benefit of a moderator guiding them through the session, so if there’s anything you’d like them to know, now’s your chance!
Hub Unmoderated Studies: Best practices for crafting an invitation email
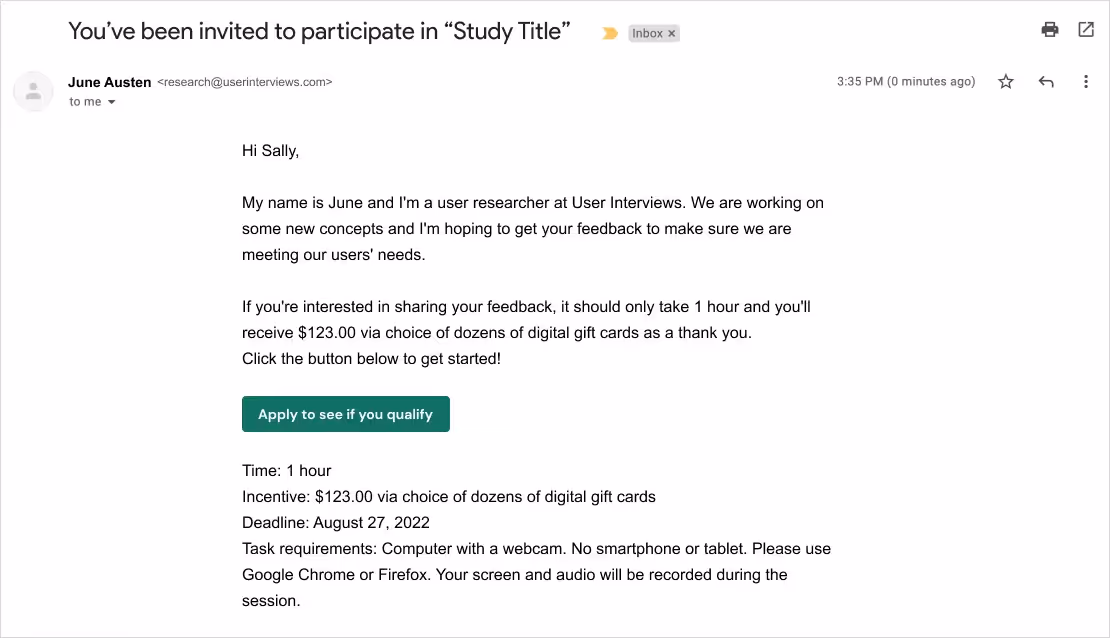
The default unmoderated study invite
For Hub studies, we provide a default email invitation for unmoderated studies that you can use as a starting point. This is a dynamic template that will automatically pull in key information about your study that you have inputted in the project builder. This includes information such as the incentive amount, session length, task deadline, device requirements, and other key things participants will need to know.

Customizing the study invite
For Hub studies, you can customize any of the copy within the email so it provides the most compelling details about your study to those who are considering applying. We strongly recommend customizing the copy on the sign up button so it aligns best with what the participant will experience — pay attention to how you’ve configured your study here.
You can customize the button copy by editing the text inside the quotation marks. By default, it will read “Apply to see if you qualify” but you can simply overwrite this text.
Here are some examples of calls-to-action you may use in various study configurations:
- If your study includes a screener survey, try “Apply to see if you qualify” or “Take the screener survey” --> This language will help set expectations for applicants that there is an application process.
- If your study doesn’t include a screener and you’ve selected automatic approval, try “Go to task” --> This tells participants that they can take the task right away — by clicking on the button they will launch their session.
- If your study doesn’t include a screener and you’ve selected manual approval, try “Sign up to participate” --> This indicates that there is a sign up form they’ll need to fill out as the first step.
You can send a test email to yourself at any time to preview your changes, and you can also reset to the default if you want to start over.
Unmoderated Studies: Best practices for building a screener survey
Creating a screener survey for your study is always optional, but researchers often find it helpful to ensure participants meet the qualifying criteria for their study. For general best practice tips on writing screener surveys, refer to this support guide.
Our screener survey template has been redesigned to clearly communicate to participants:
- The screener step is part of the application for the study, and not the study itself. This has been a point of confusion for participants in the past.
- An estimate for how long the screener survey will take to complete. The time estimate is automatically calculated based on the number, length, and complexity of questions in your screener.
- A summary of relevant information about the study. For example session length, incentive amount, and document signing requirements (if applicable). This info is presented in a box at the top of the screener survey which is condensed by default, but can be expanded by the participant.

Which unmoderated research tools is User Interviews compatible with?
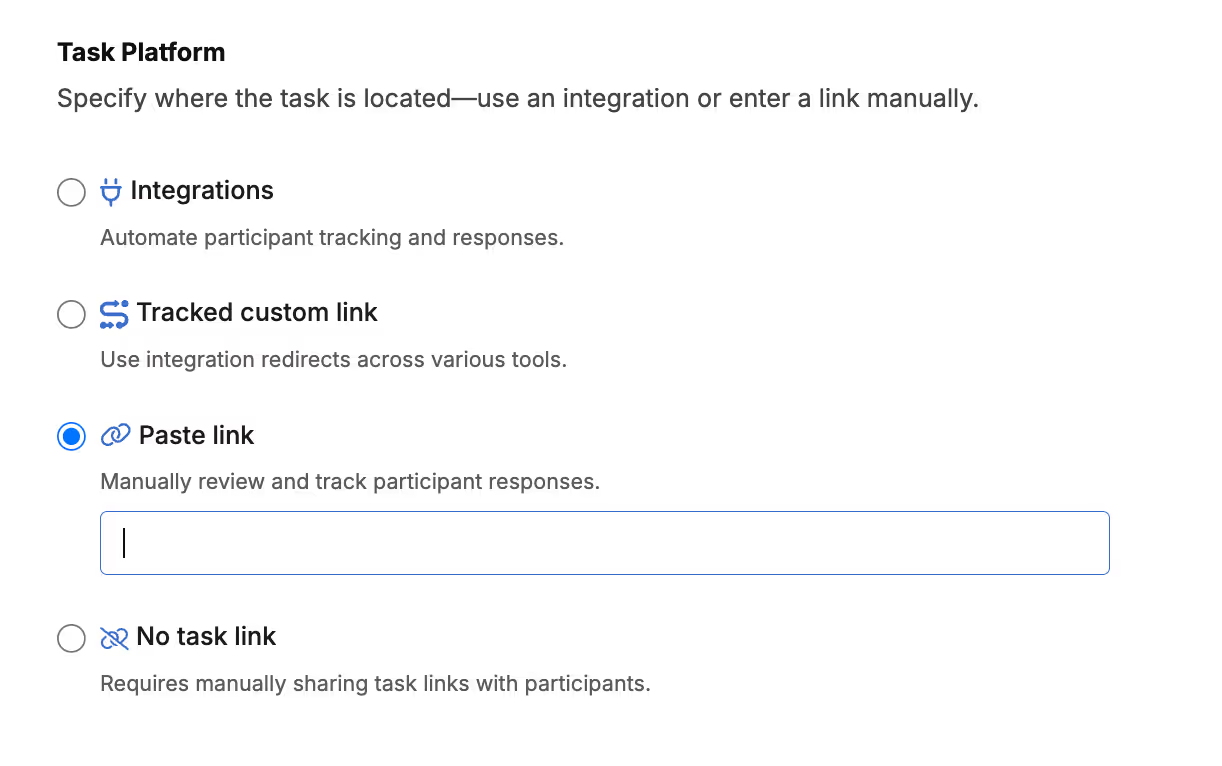
User Interviews offers direct integrations with a number of unmoderated testing tools — but you can actually use any research tool with our system by using a tracked custom link or by manually adding a task link in the project builder.
Integrations with unmoderated testing tools
We have integrations with Lookback, SurveyMonkey and more, making it really easy to track participant progress when using these tools for unmoderated research. When you connect these tools to User Interviews, participant tracking becomes fully automated so you can “set it and forget it”, and be confident that our system will collect all the information you need to move your study forward. More integrations with popular testing tools will be launching in the coming months — check out our integrations page for the latest.
To get started with any of these integrations, visit the integrations page in the app.

Adding a link manually
Even without an integration, User Interviews is compatible with any tool or method you wish to use, including survey tools, usability testing tools, video recording tools, and so on. As you’re filling out the “Task Platform” section of your project, simply select the option to “Paste link”, and copy and paste in the link that you want to direct participants to. This link will be shared with your confirmed participants in all the appropriate places — confirmation screens, reminder emails, and calendar events.