
Who is this article for?
🗣️ All researchers
⭐️ Available on any User Interviews plan
Extending your study is easy to do on User Interviews! We understand that schedules change and sometimes you need a little extra time to complete your research. To extend your study, you'll need to add future dates or extend your deadline, and increase the "Number of Participants" if your study is full. This will signify to your Project Coordinator that you're still looking for participants and we can continue recruitment.
Our team automatically closes projects within 7-10 business days following your final session (as long as all participation has been recorded). If you'd like to extend your project, we recommend adding future sessions to your calendar ASAP to avoid the project closing. If you'd like to close your project earlier, check out this support page.
Extending your study
Step #1: Update your calendar to reflect your new availability.
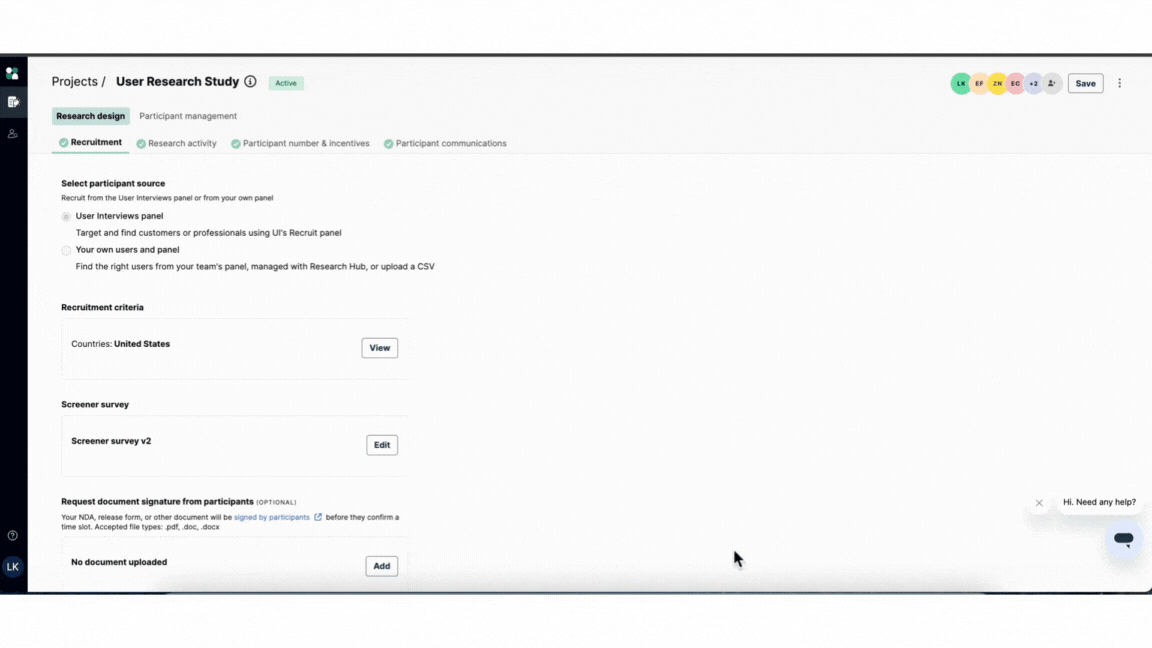
- Visit your project dashboard.
- Go to the Research Design section > Research Activity Tab > Session attendance, location, and scheduling > Edit. This will open the scheduling drawer.
- Click on future dates to create new time blocks within the calendar. Note: The number of sessions you add should be greater than or equal to the additional number of participants you want to confirm.
- Save your changes before closing the drawer.
Step #2: If your study is full and you need more Confirmed participants, increase the "Number of Participants"
- Navigate to Research Design section > Participant Number & Incentives Tab > Number of Participants.
- Increase the number of additional participants you’d like to recruit. For example, if you currently have 10 confirmed participants and would like 5 more, change this number to 15.
- Save your changes at the top right of the page or press enter
.gif)
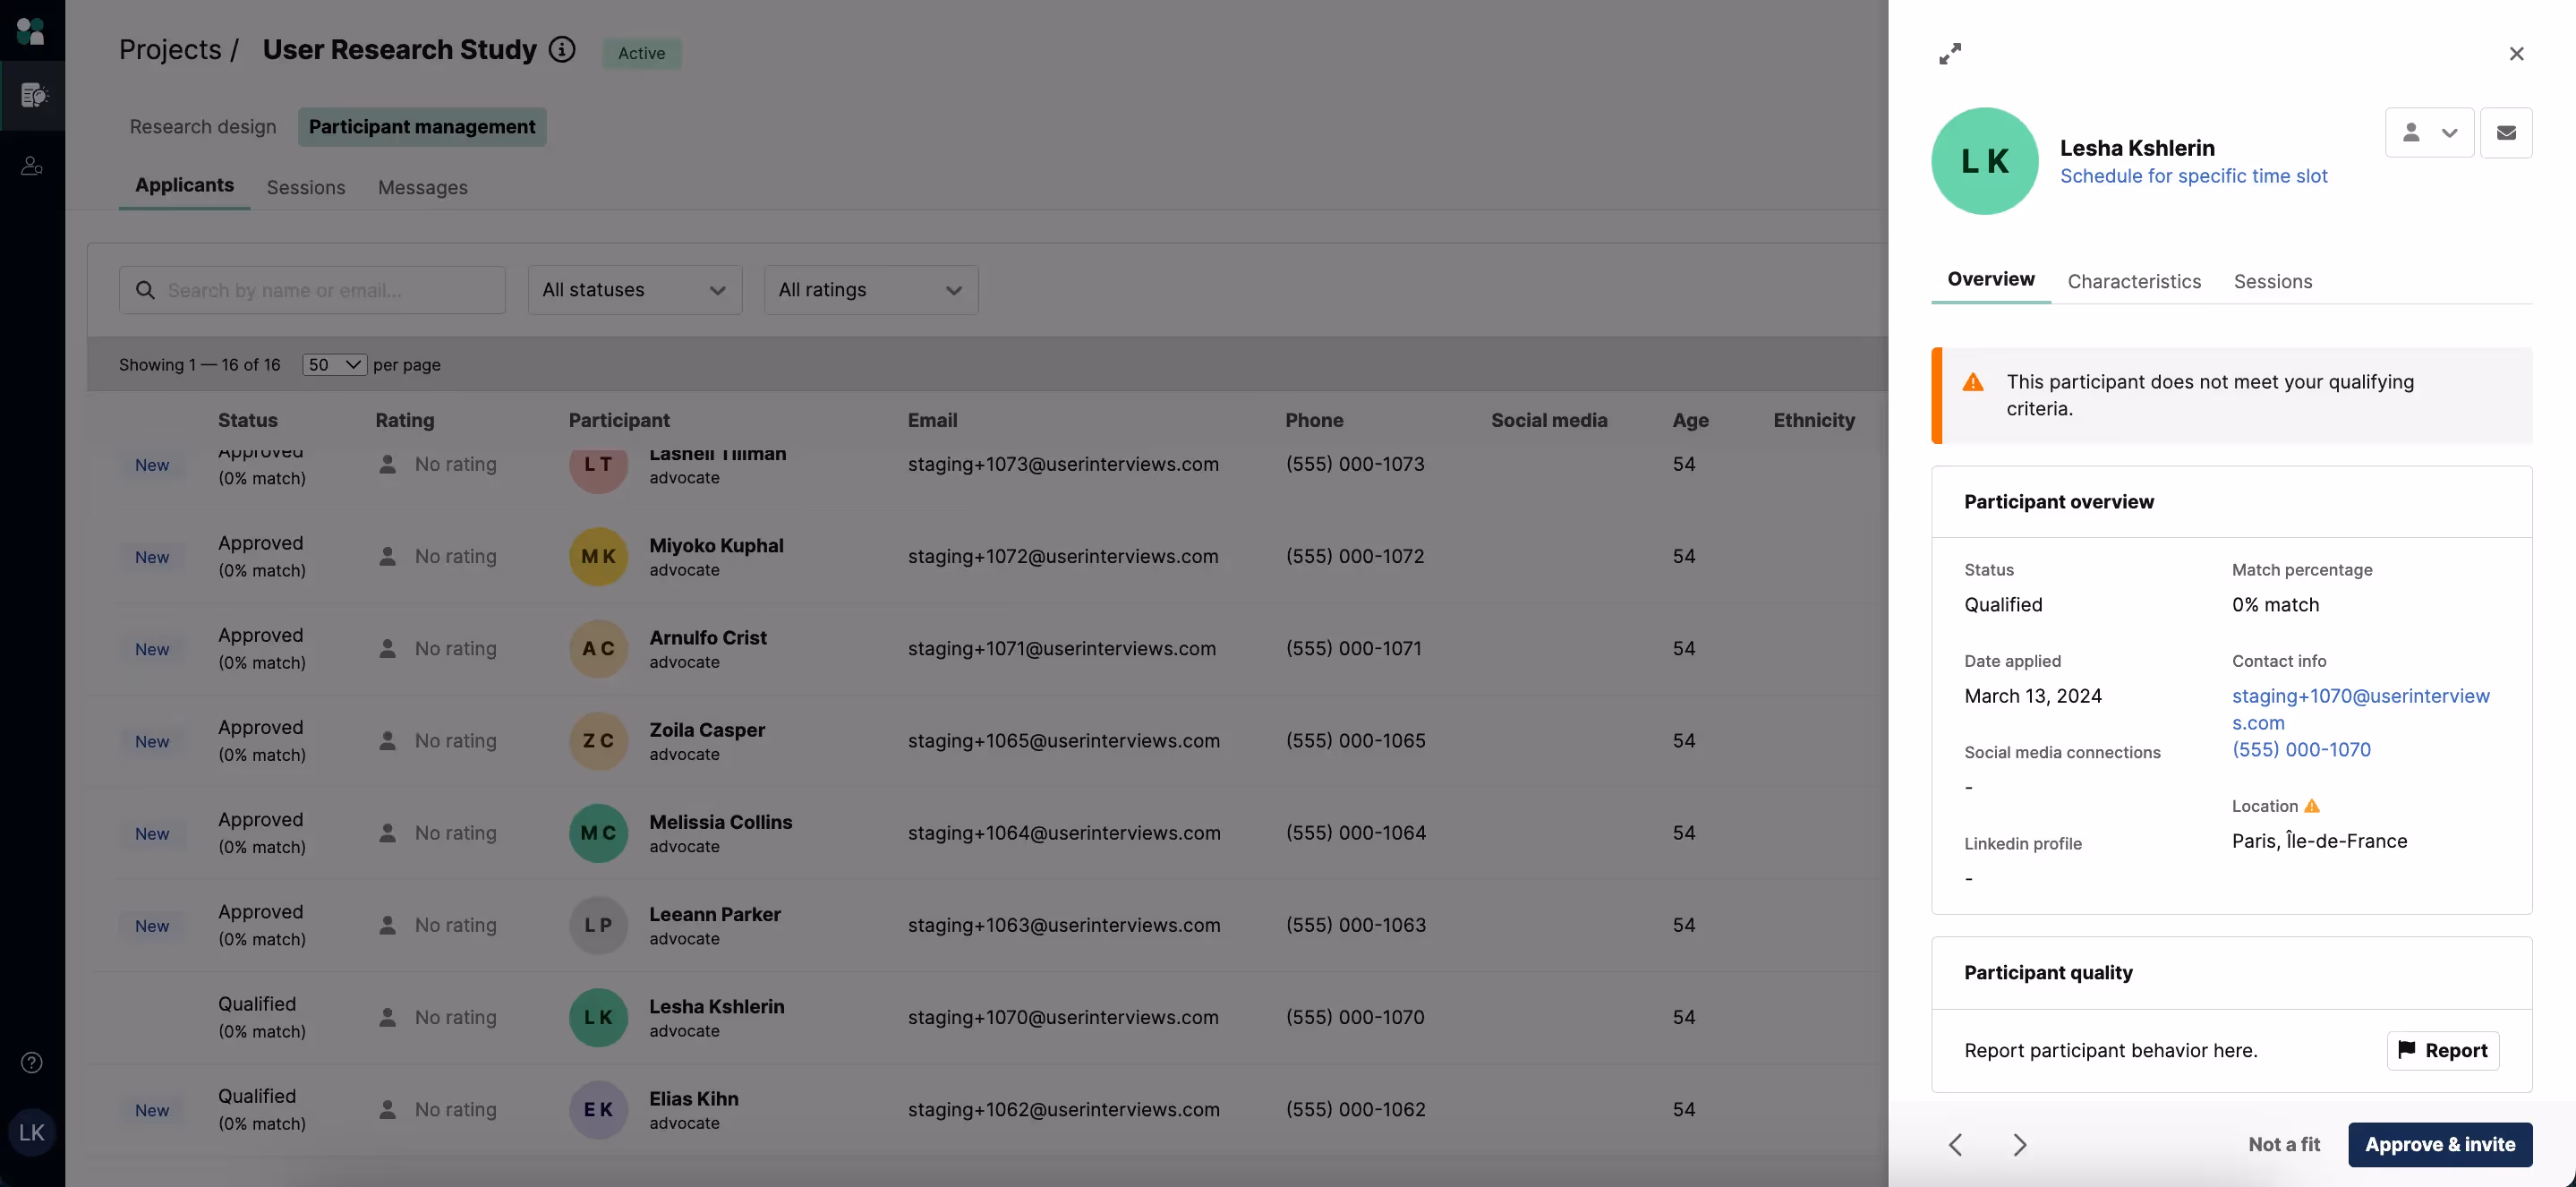
Step #3: Approve additional candidates. While our system will send new invitations to anyone who was approved and didn't schedule a session originally, we recommend approving a few more people to account for any changing availabilities. If you want to revoke an approval, you can mark a participant as "Not a fit".
- Visit the Participant Management section > Applicants to review individual participant profiles.
- Click the candidate you'd like to approve.
- Click "Approve and Invite" in the bottom right hand corner of your screen. To learn more about approving participants, please see our support page here
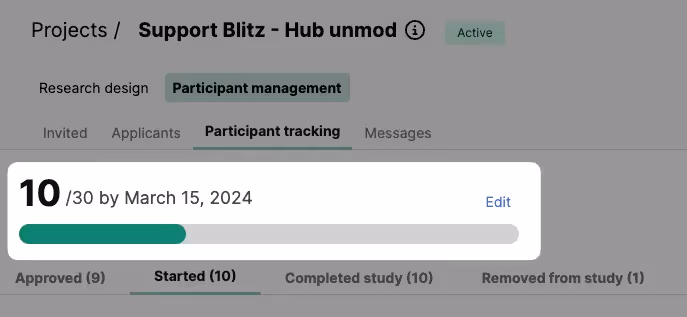
Step #4: Extend the task deadline for unmoderated projects. If you're running an unmoderated project and you want to give confirmed participants more time to complete the task, you can do so in the Participant Management section of your project builder.
- Visit the Participant Management section > Applicants.
- On the top of the page, you'll see a progress bar showing how many participants have completed the task, and their deadline for doing so.
- Click "edit."
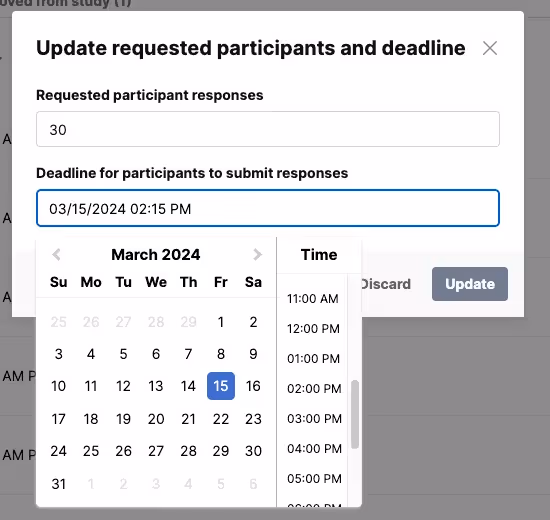
- A modal will pop up where you can choose a new due date. Click "update" and then you're done!
Questions? Email projects@userinterviews.com to reach your project coordinator.


