
Who is this article for?
🗣️ All Researchers (both admins and users)
⭐ Customers on any User Interviews plan
When it comes to managing scheduling for your projects, you have two options to choose from: use smart availability for a hands-off, automated approach to get sessions booked, or manual time blocks if you want more control over your calendar. With either option, you can set scheduling preferences to limit when participants can book sessions.
Smart availability scheduling for projects
With smart availability, simply set up your calendar, availability, and scheduling preferences, and our system will automate booking confirmed sessions within these guidelines. Smart availability is available for all 1:1 moderated projects, both Google and Outlook calendar.
⛳ To use smart availability for scheduling, you (and your collaborators) must all have your calendars connected to User Interviews.
Connect your calendar
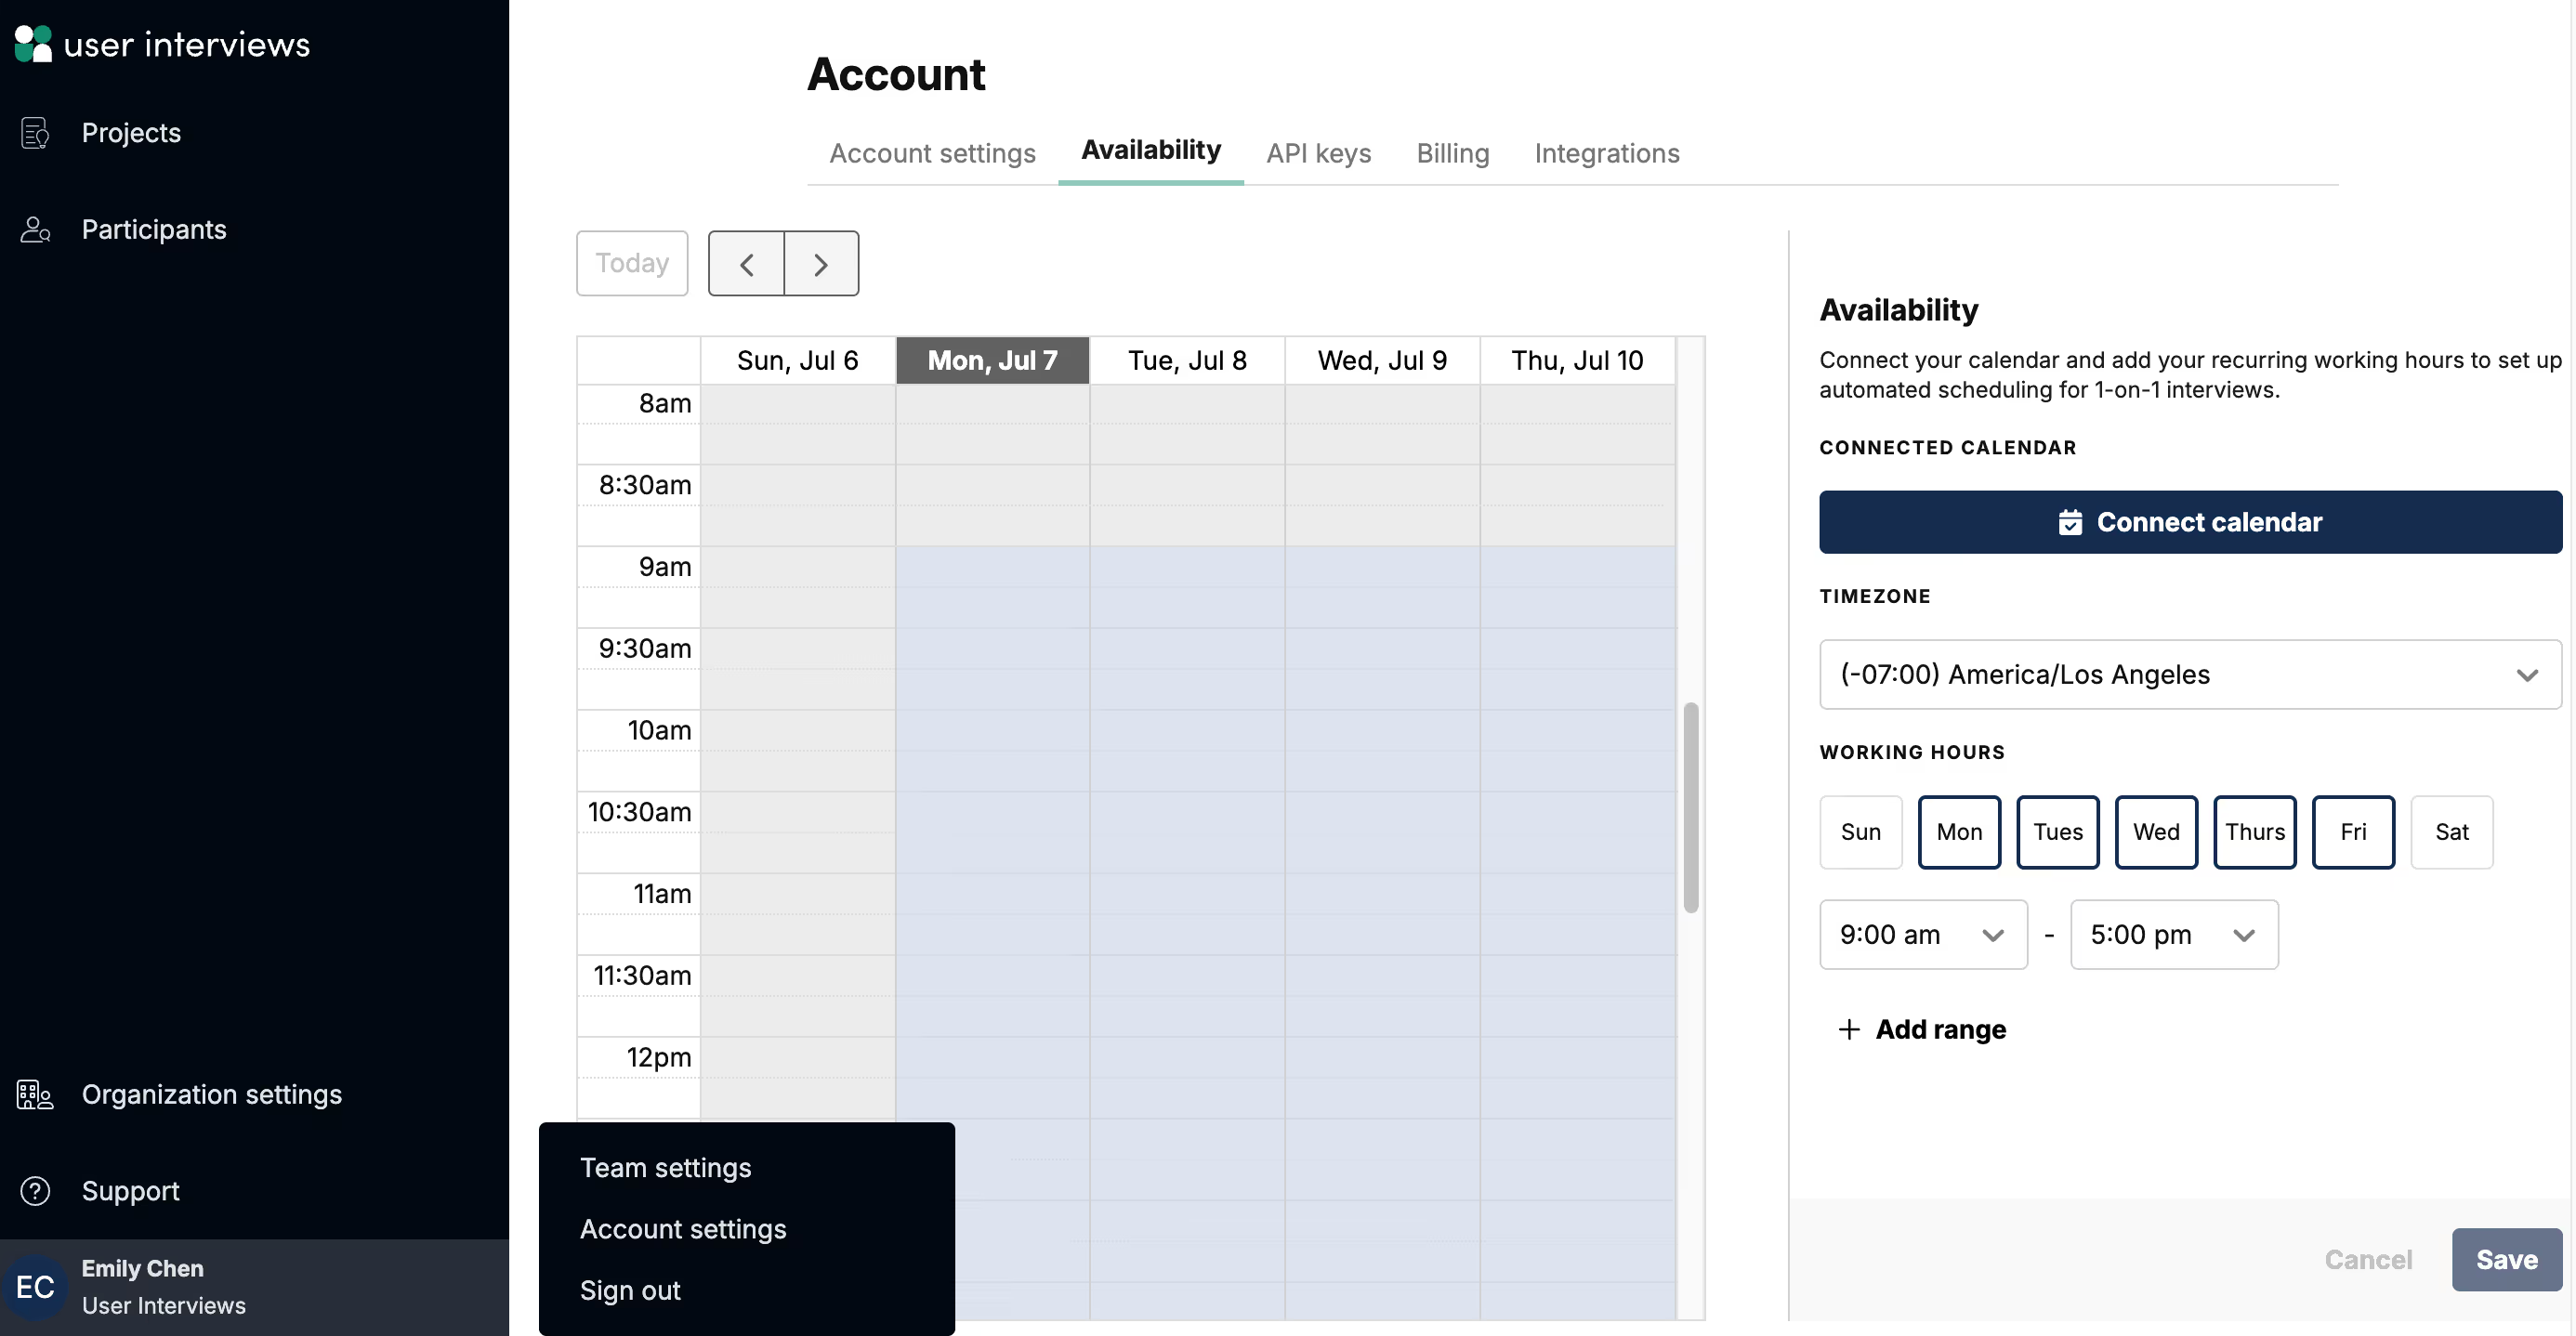
1. Connect your calendar to User Interviews from the Availability page. Click on your username when logged in, select "Account settings" from the menu, and select the “Availability” tab.
Note: You can also connect your calendar from the Integrations page under “Account settings”, or from within the workspace.
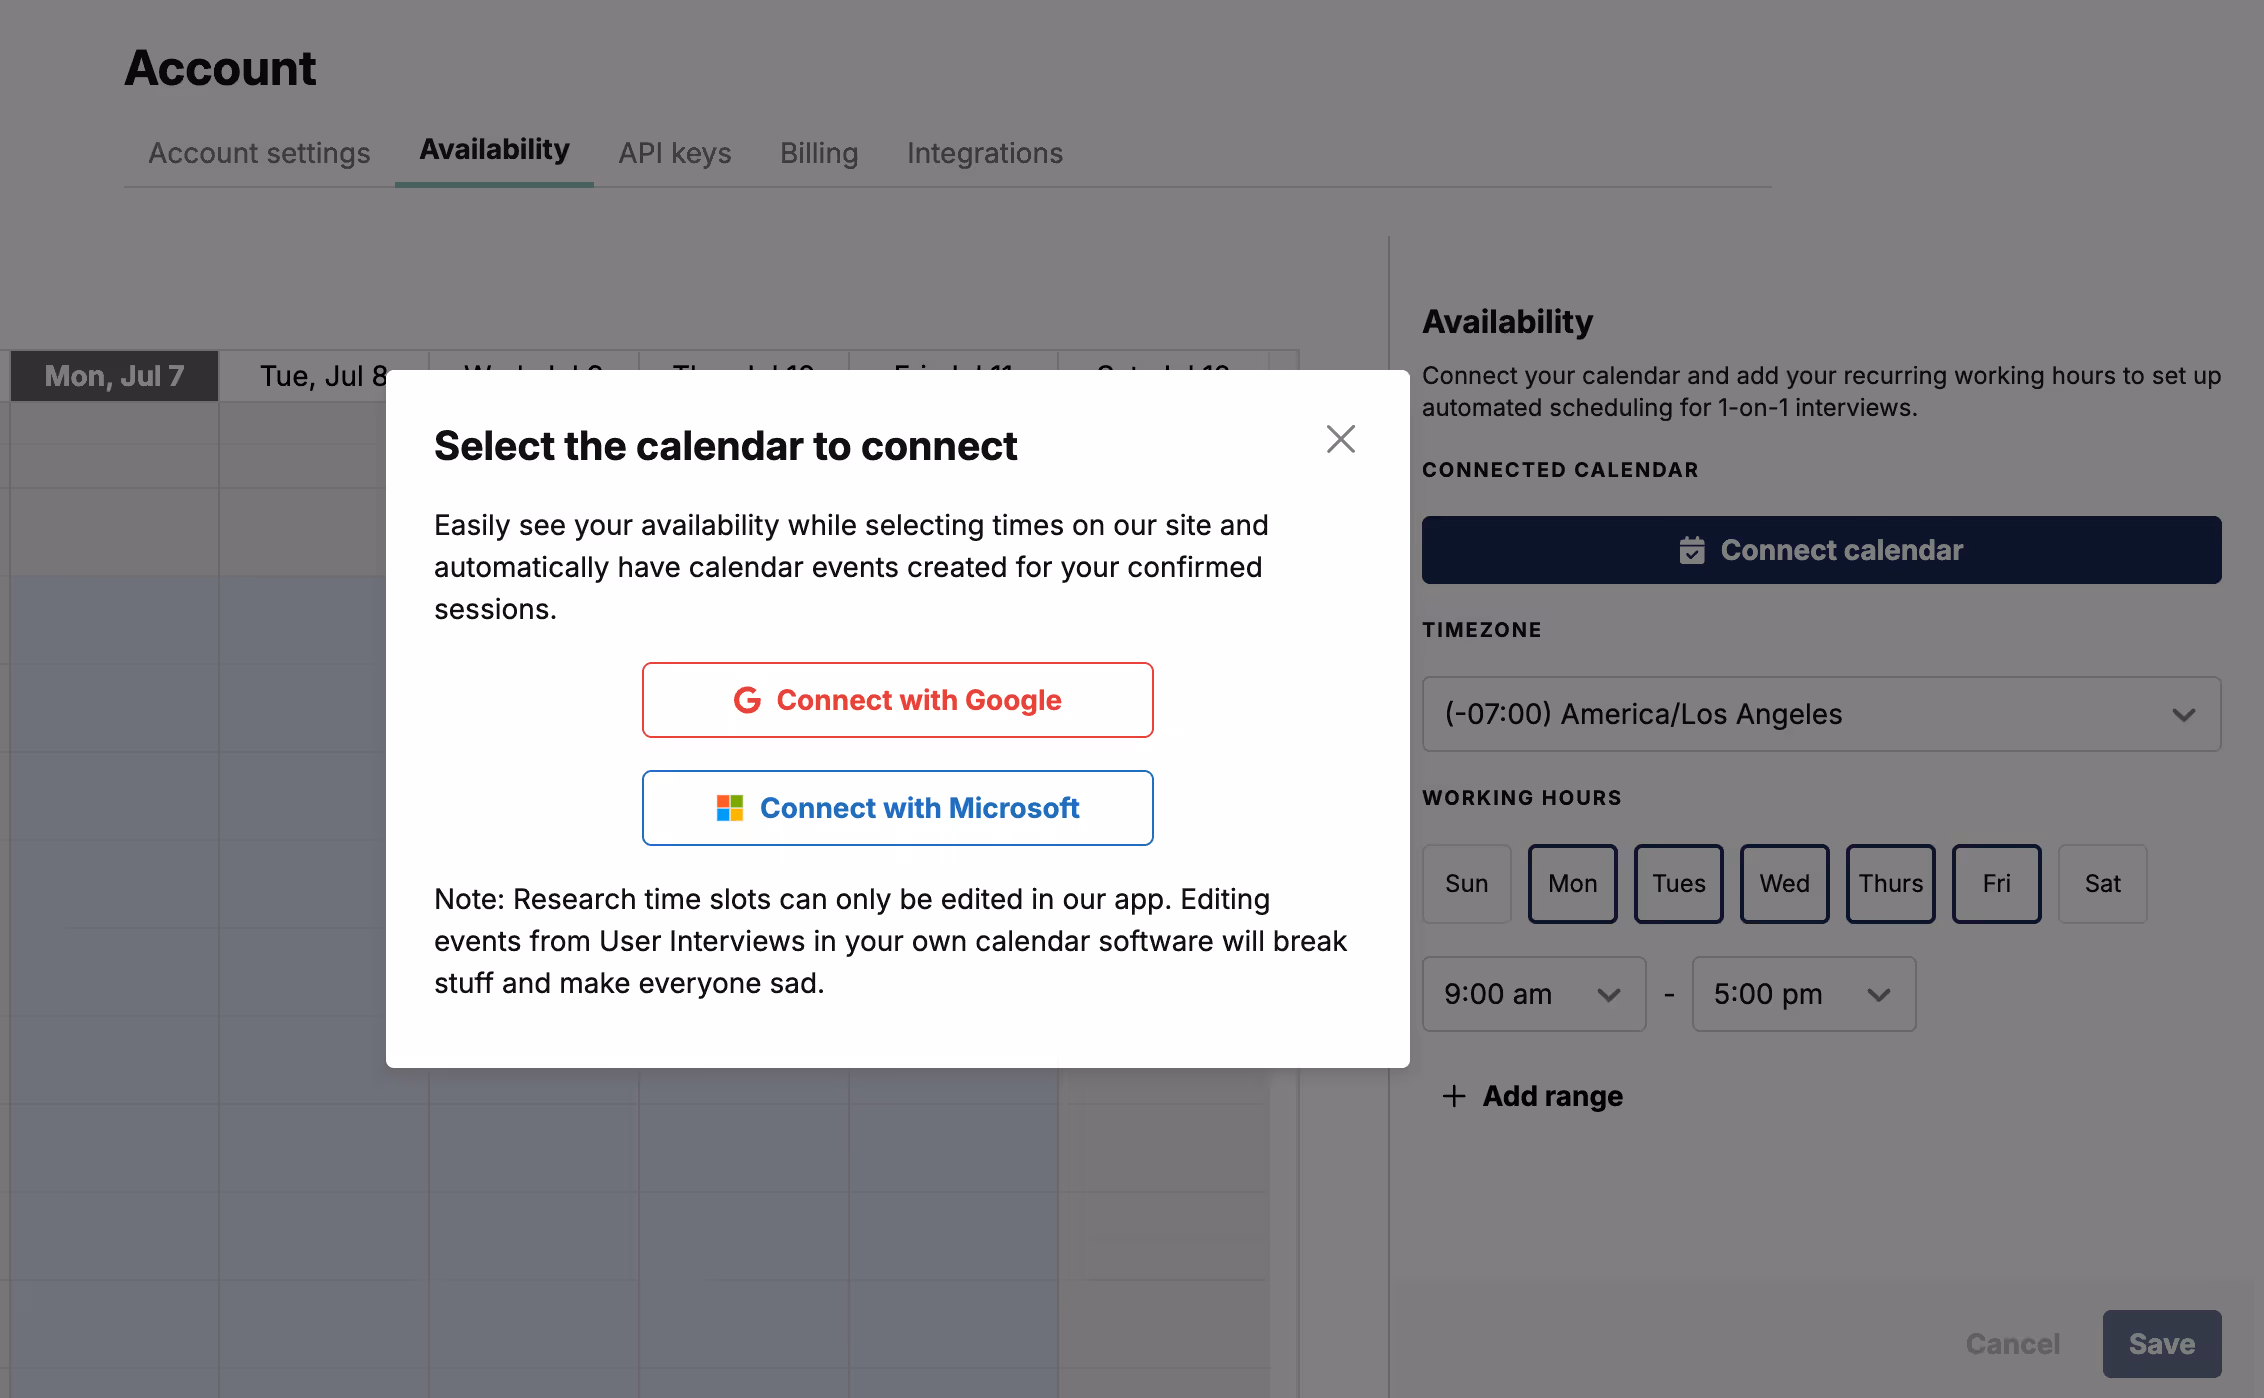
2. Click the “Connect calendar” button. Connecting your calendar will allow you to easily see your availability and automatically have calendar events created for your confirmed sessions. You should now be able to see your synced calendar in the view.
3. Set your timezone and availability range for your working hours in the right sidebar. This setting applies to the individual account level and will affect all 1:1 projects launched (only applies to smart availability).
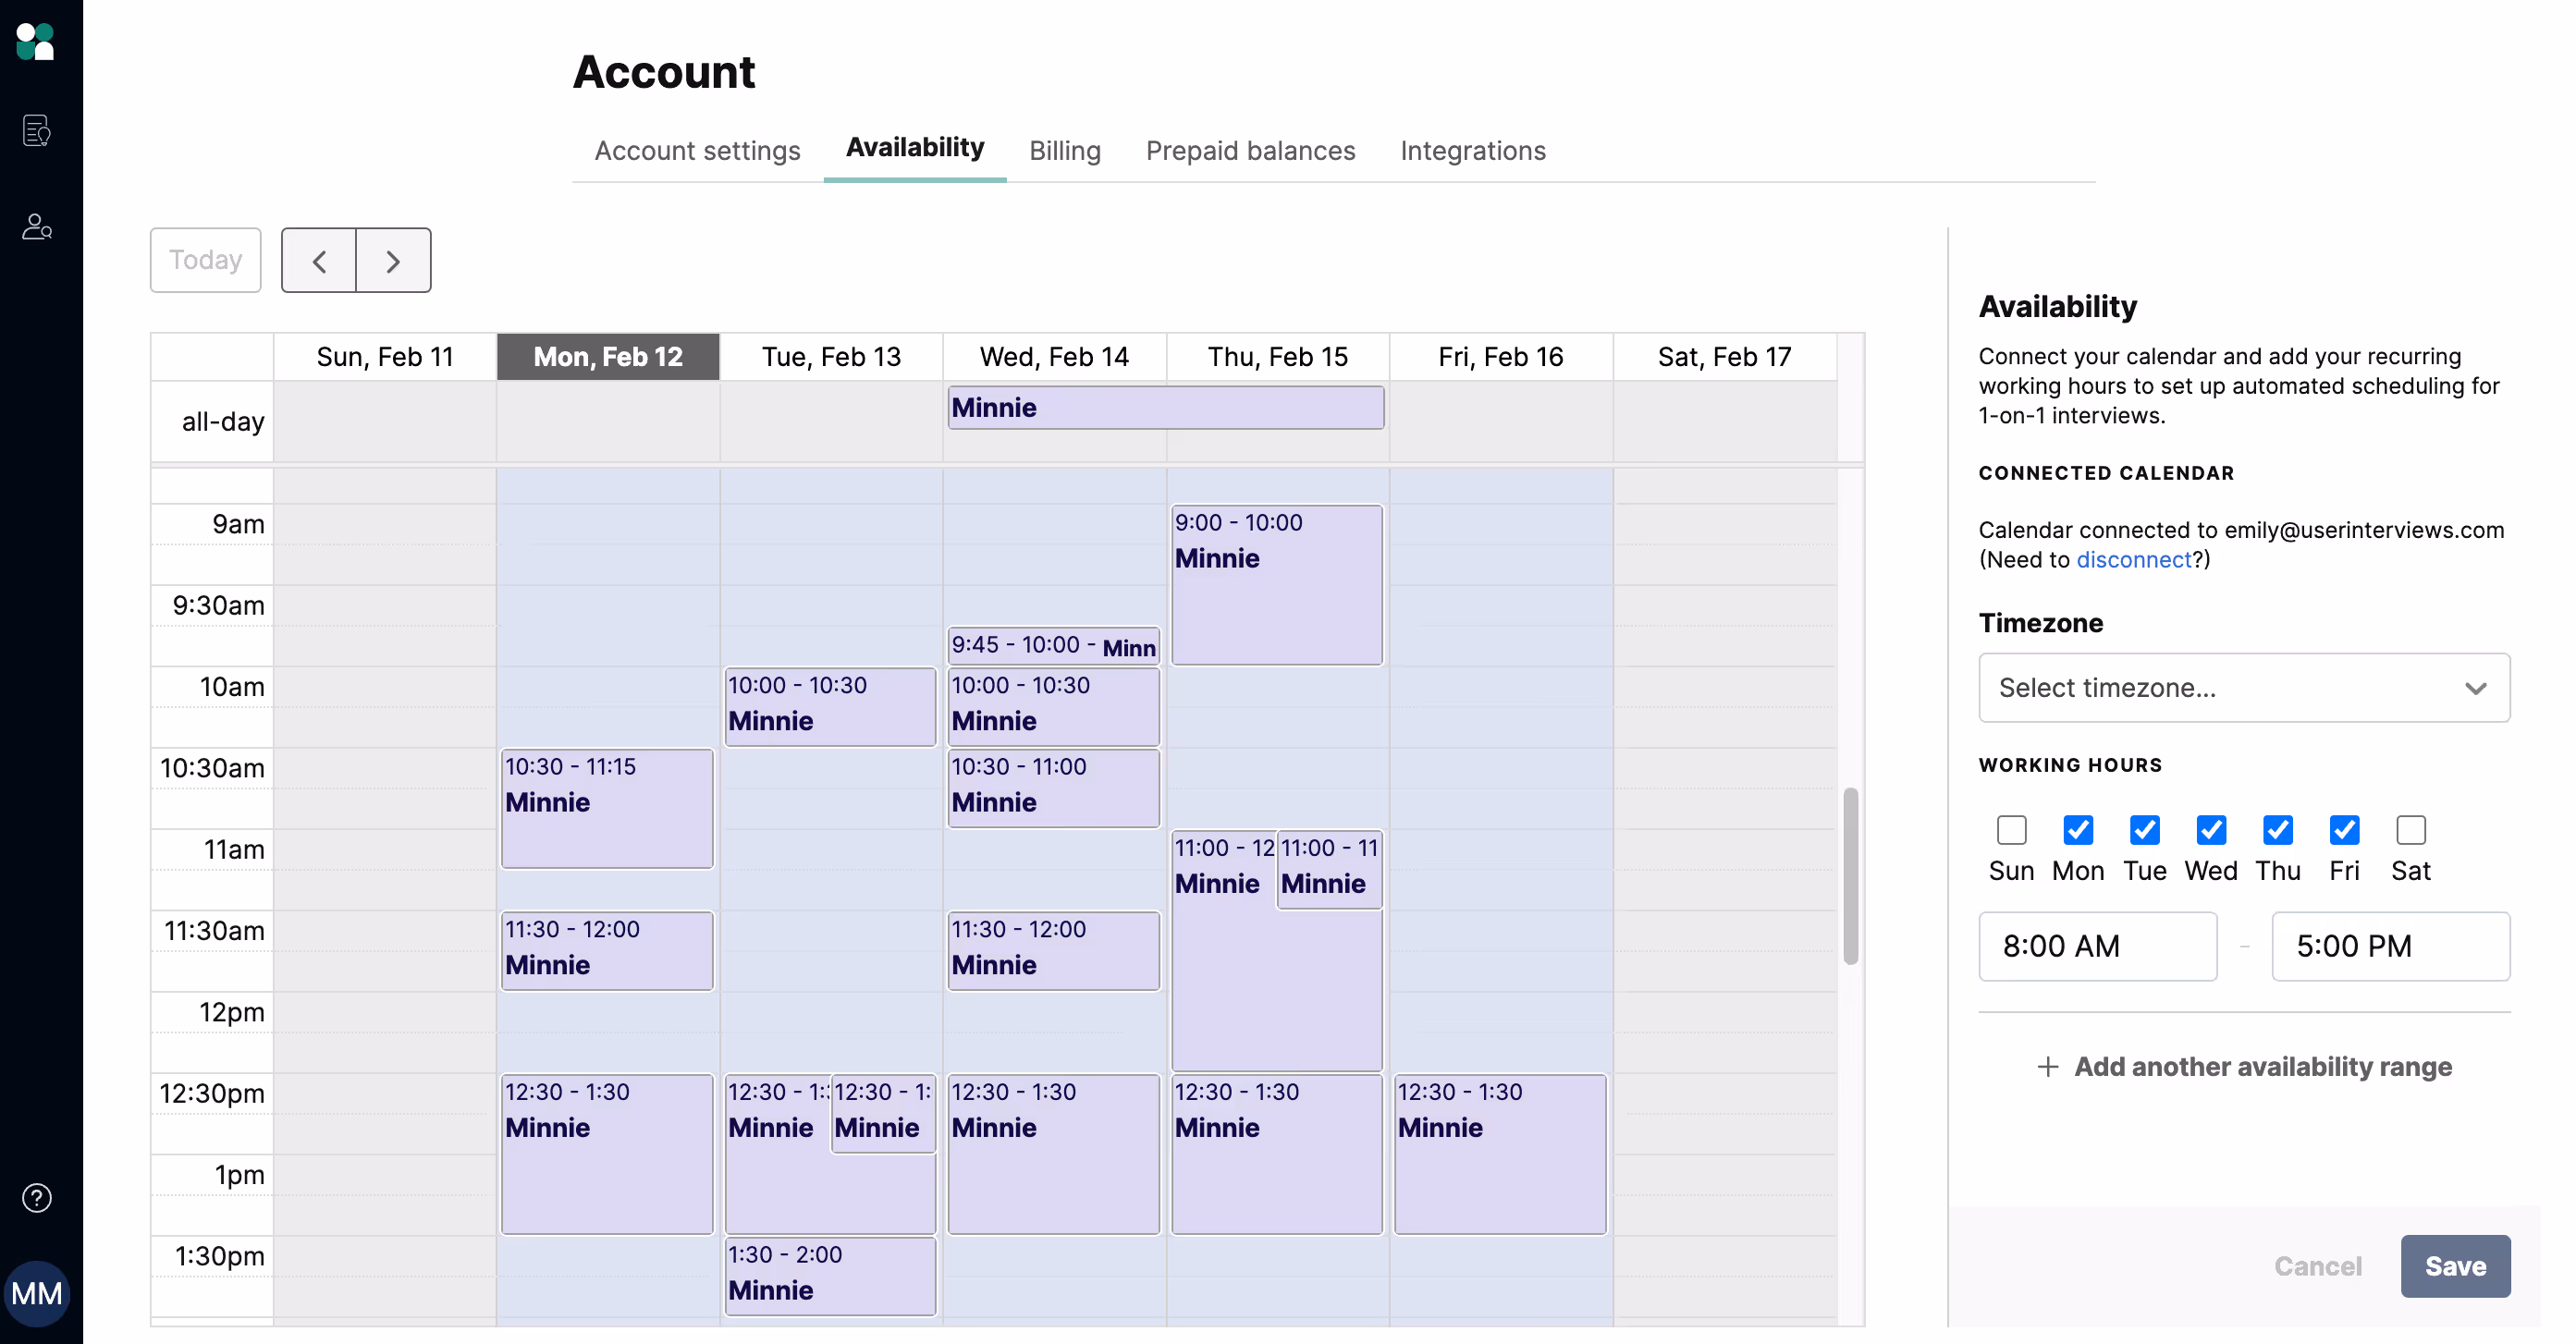
4. Your calendar and availability are now set up and ready for scheduling sessions!
How to set up smart availability
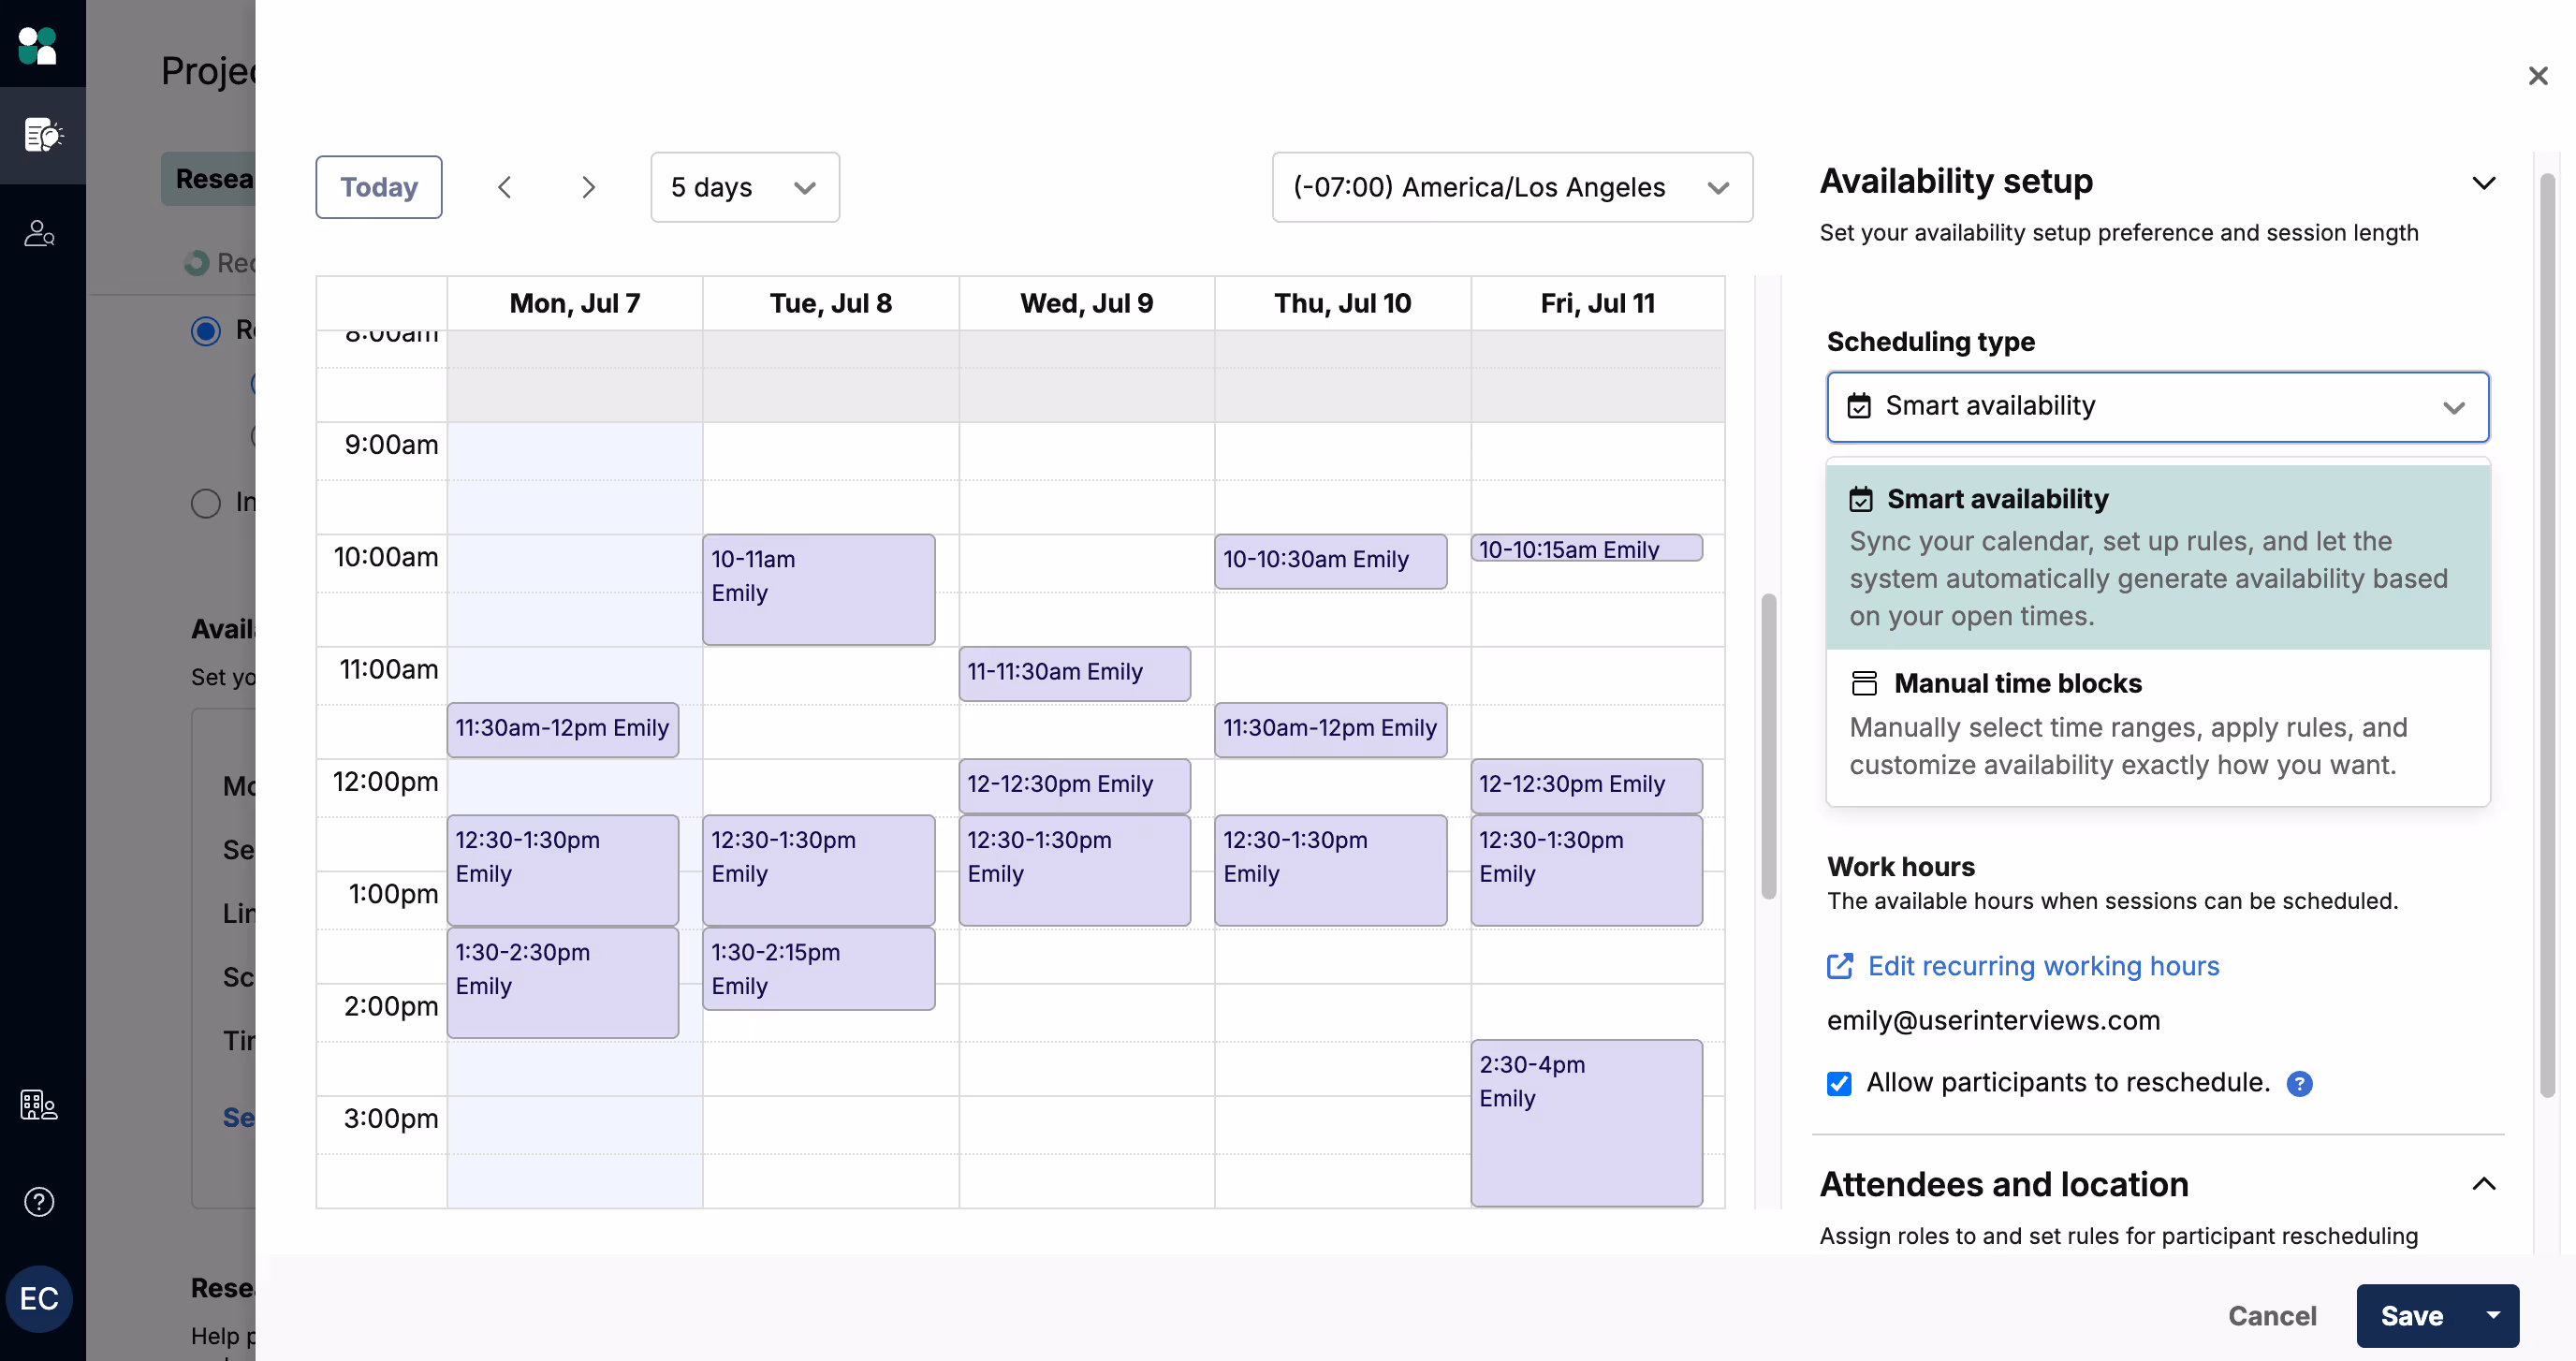
1. In the “Research activity” tab, navigate to the “Availability, attendees and location” section. Click the “Edit” button to open the scheduling drawer.
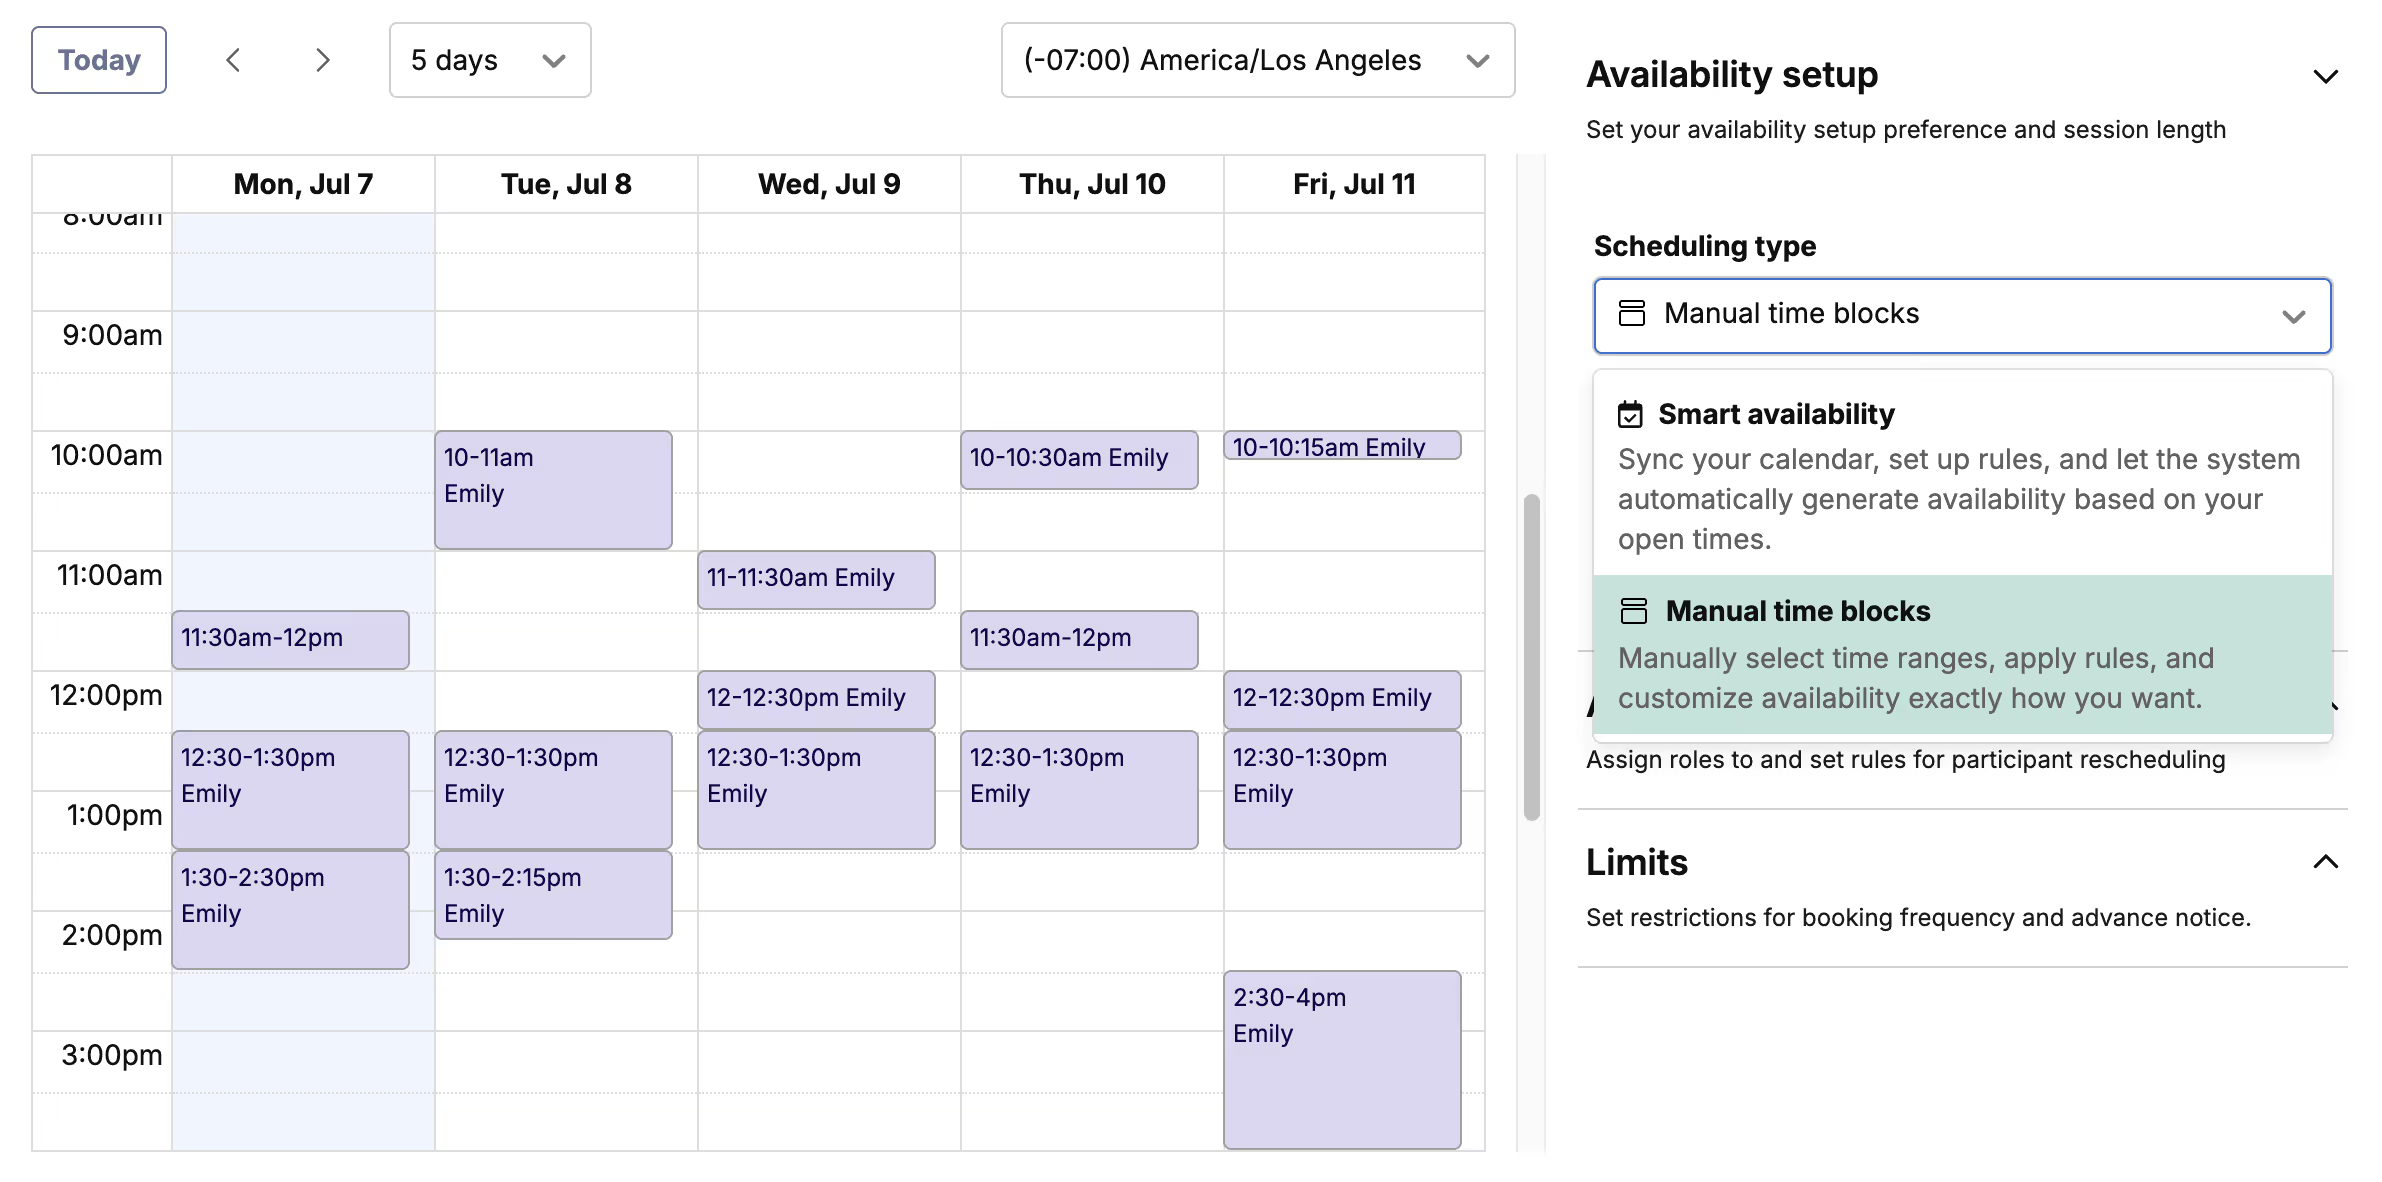
2. Select “Smart availability” from the “Scheduling type” dropdown.
3. Invite collaborators to your project, if you’d like to include them in scheduling sessions.

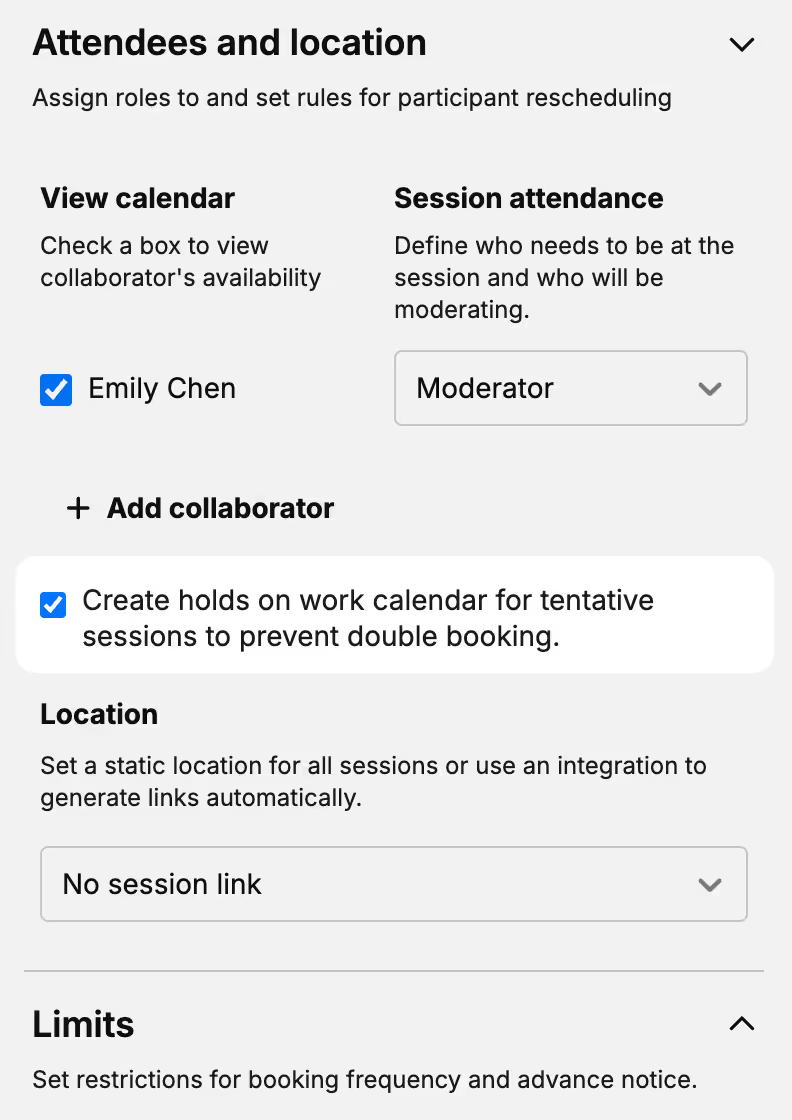
4. Assign attendance defaults for each collaborator—UI will automatically use these attendance rules for every confirmed session.
You can set the following session attendance options:
- Moderator: This person is the moderator of the session and will be invited
- Required: This person's attendance is required (e.g. for note taking) and will be invited
- Optional: This person's attendance is optional but will be included on calendar invites
- Not included: This person isn't expected to come and will not be invited
5. Set the session location. You’ll see the option to set a manual session link, or use the moderator’s connected Google Meet, Zoom, or WebEx account to generate meeting links automatically.
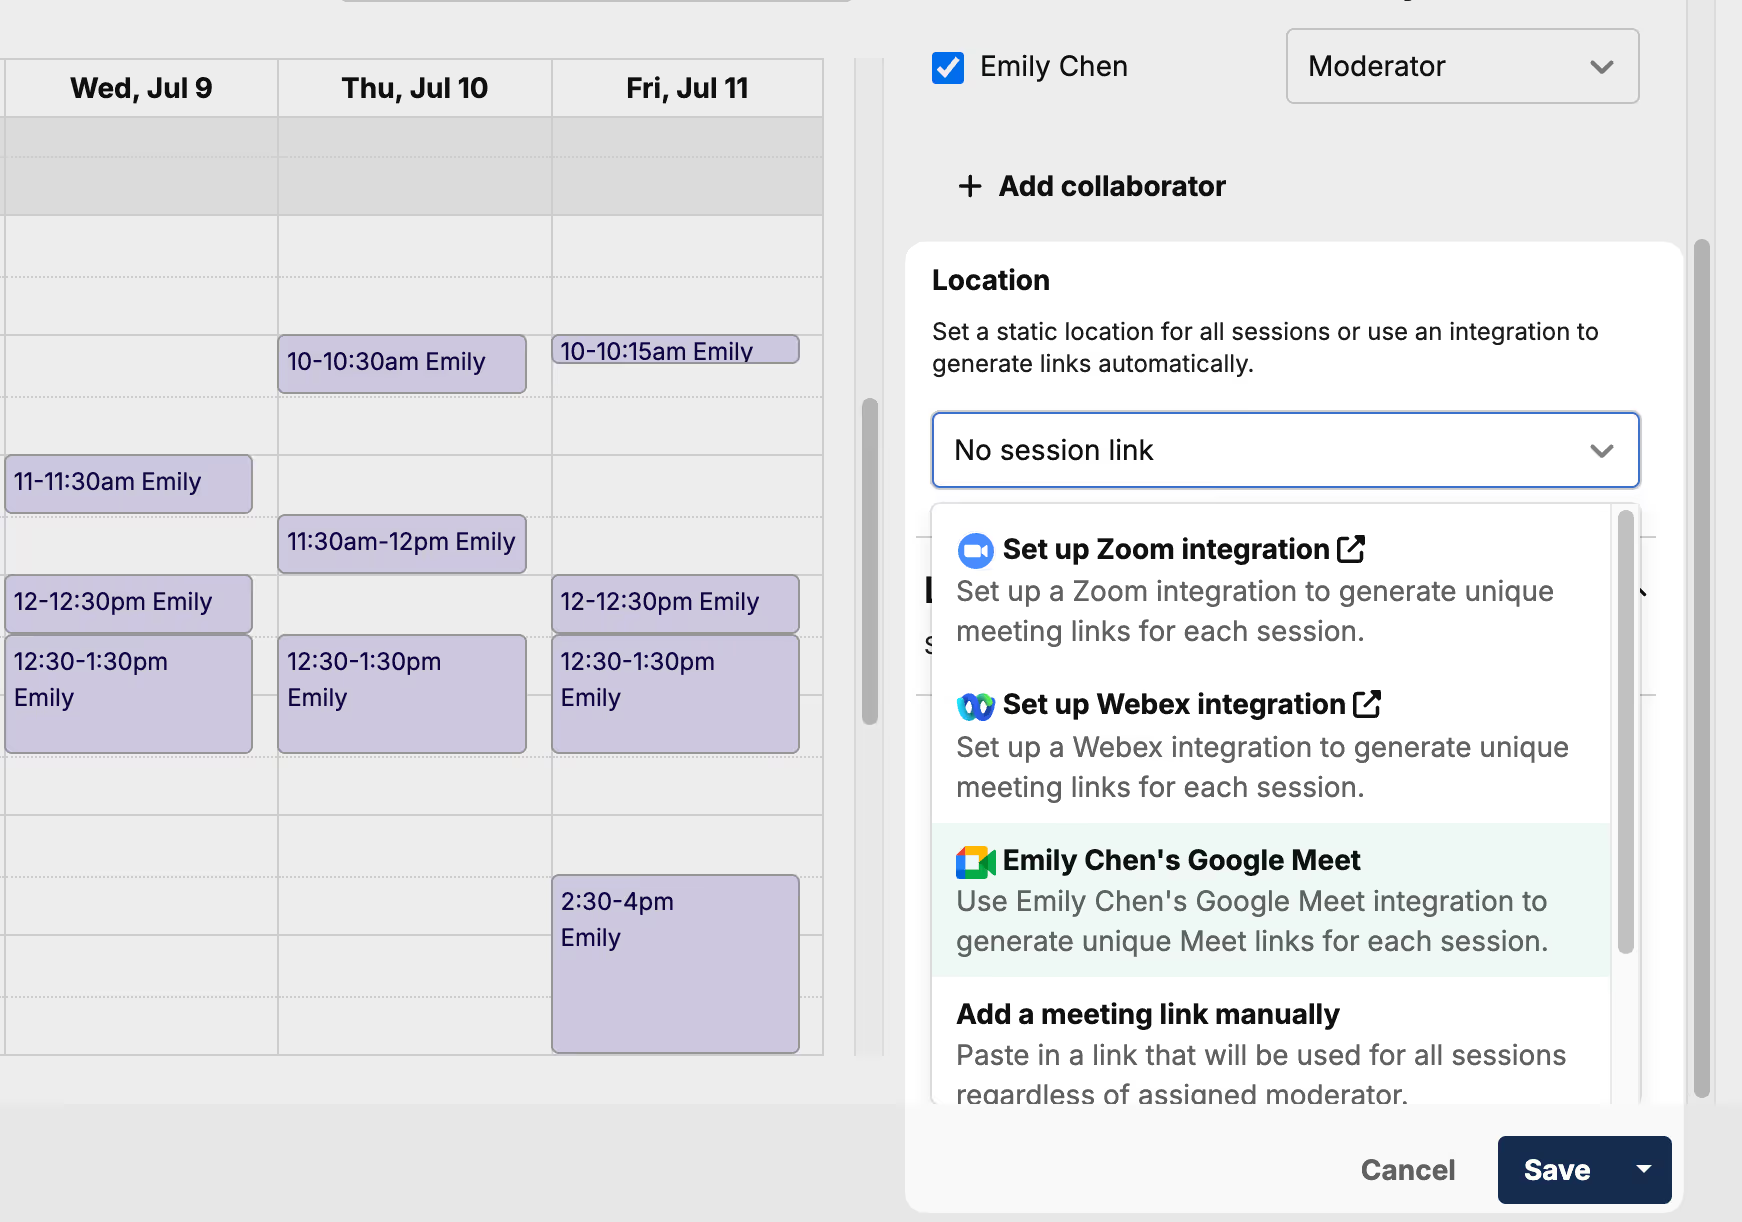
User Interviews will always default the session location to the moderator’s connected account. So if you need to change moderators for any reason, simply update that person’s role to “Moderator”, and the session location options will update to the new moderator’s connected accounts.
For ReOps folks, this means you (as the project owner) can easily set up a project on the behalf of someone else (the session moderator), setting the session location to their connected account—without receiving any unnecessary calendar invites.
6. Set your availability setup preferences and scheduling limits. Set the project:
- Session length
- Start and end dates
- Allow/do not allow participants to reschedule (will respect your minimum scheduling notice)
- Minimum notice
- Maximum sessions (option to add a weekly limit)
- Buffer time
- Start time increment

7. And that’s it! Our system will cross check all calendars and automate booking confirmed sessions within these guidelines.
Note: If you are using smart availability with no collaborators, the setup process is the same—as the session moderator, you will be the default owner of the calendar event, and the session location will default to your connected account. You can add collaborators to your project at any time!
Manual time block scheduling for projects
Scheduling with manual time blocks is useful when you want a balance of both control and flexibility. Just drag and drop on your calendar to create blocks of time you’re available for research, and participants can book within those blocks and your scheduling rules.
🟢 No calendar connection is required to use manual time blocks.
How to set up manual time blocks
1. In the “Research activity” tab, navigate to the “Availability, attendees and location” section. Click the “Edit” button to open the scheduling drawer.
2. Select “Manual time blocks” from the “Scheduling type” dropdown.
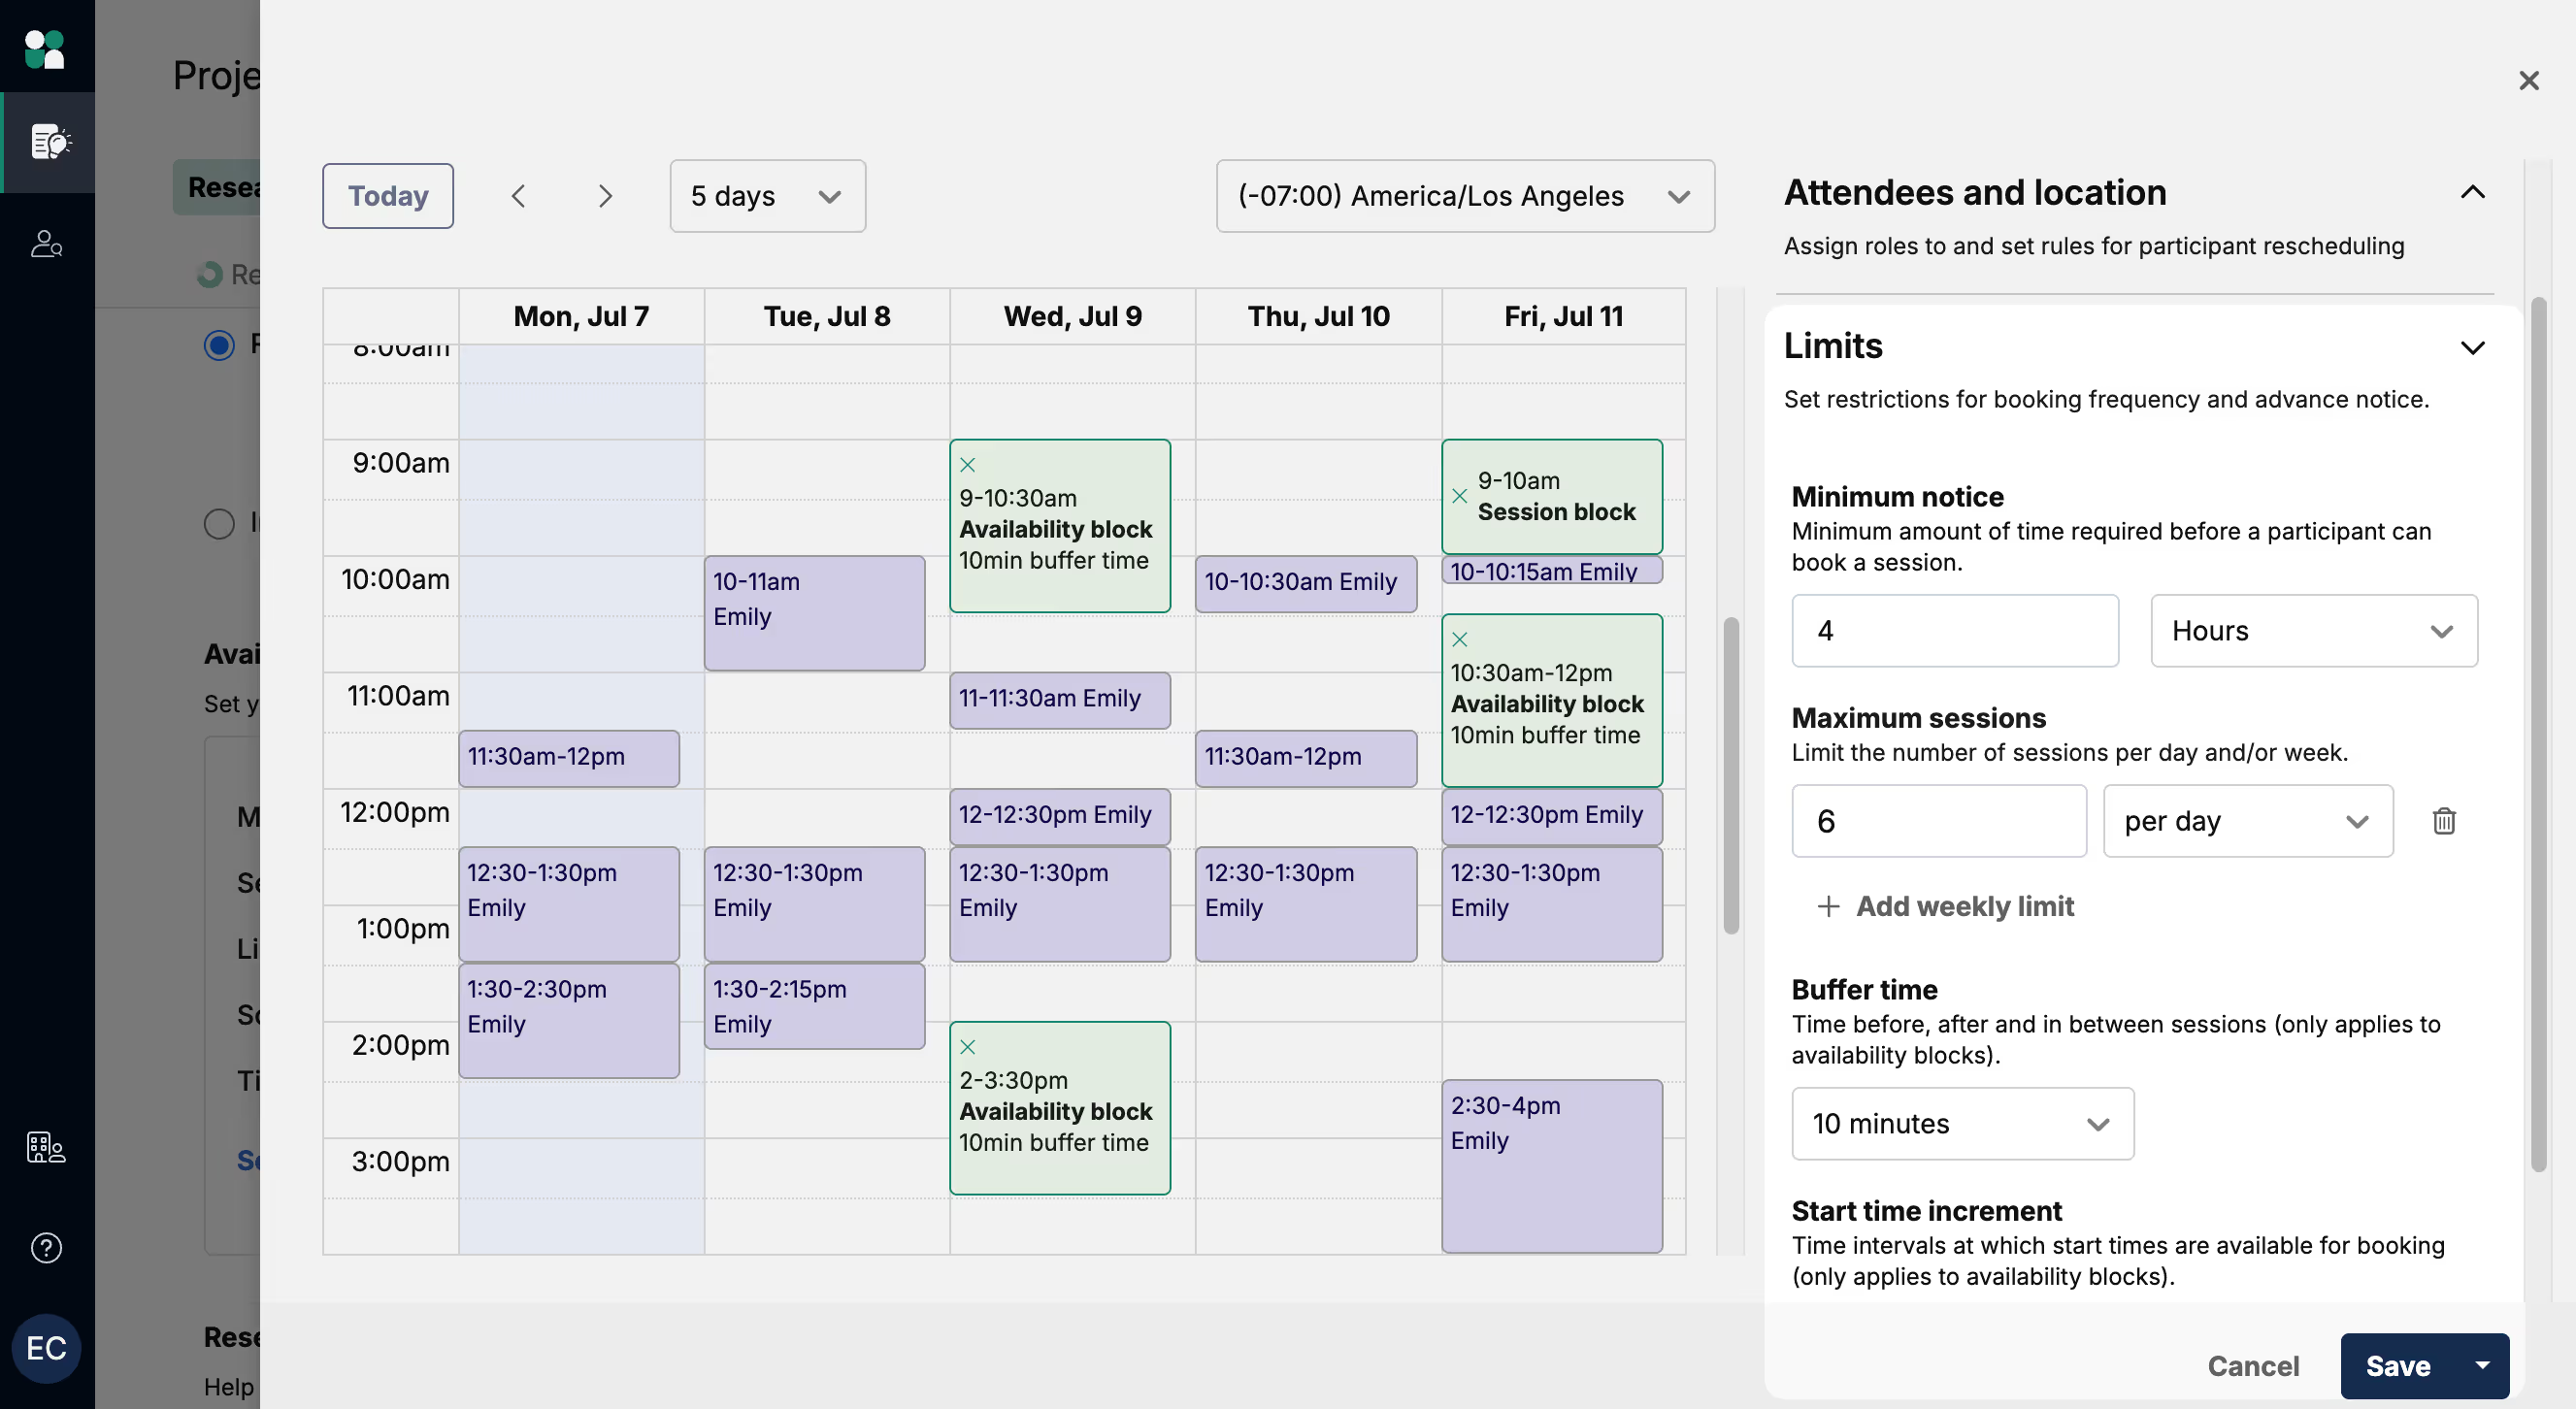
3. Click and drag on your calendar to create custom blocks of time when you’re available.
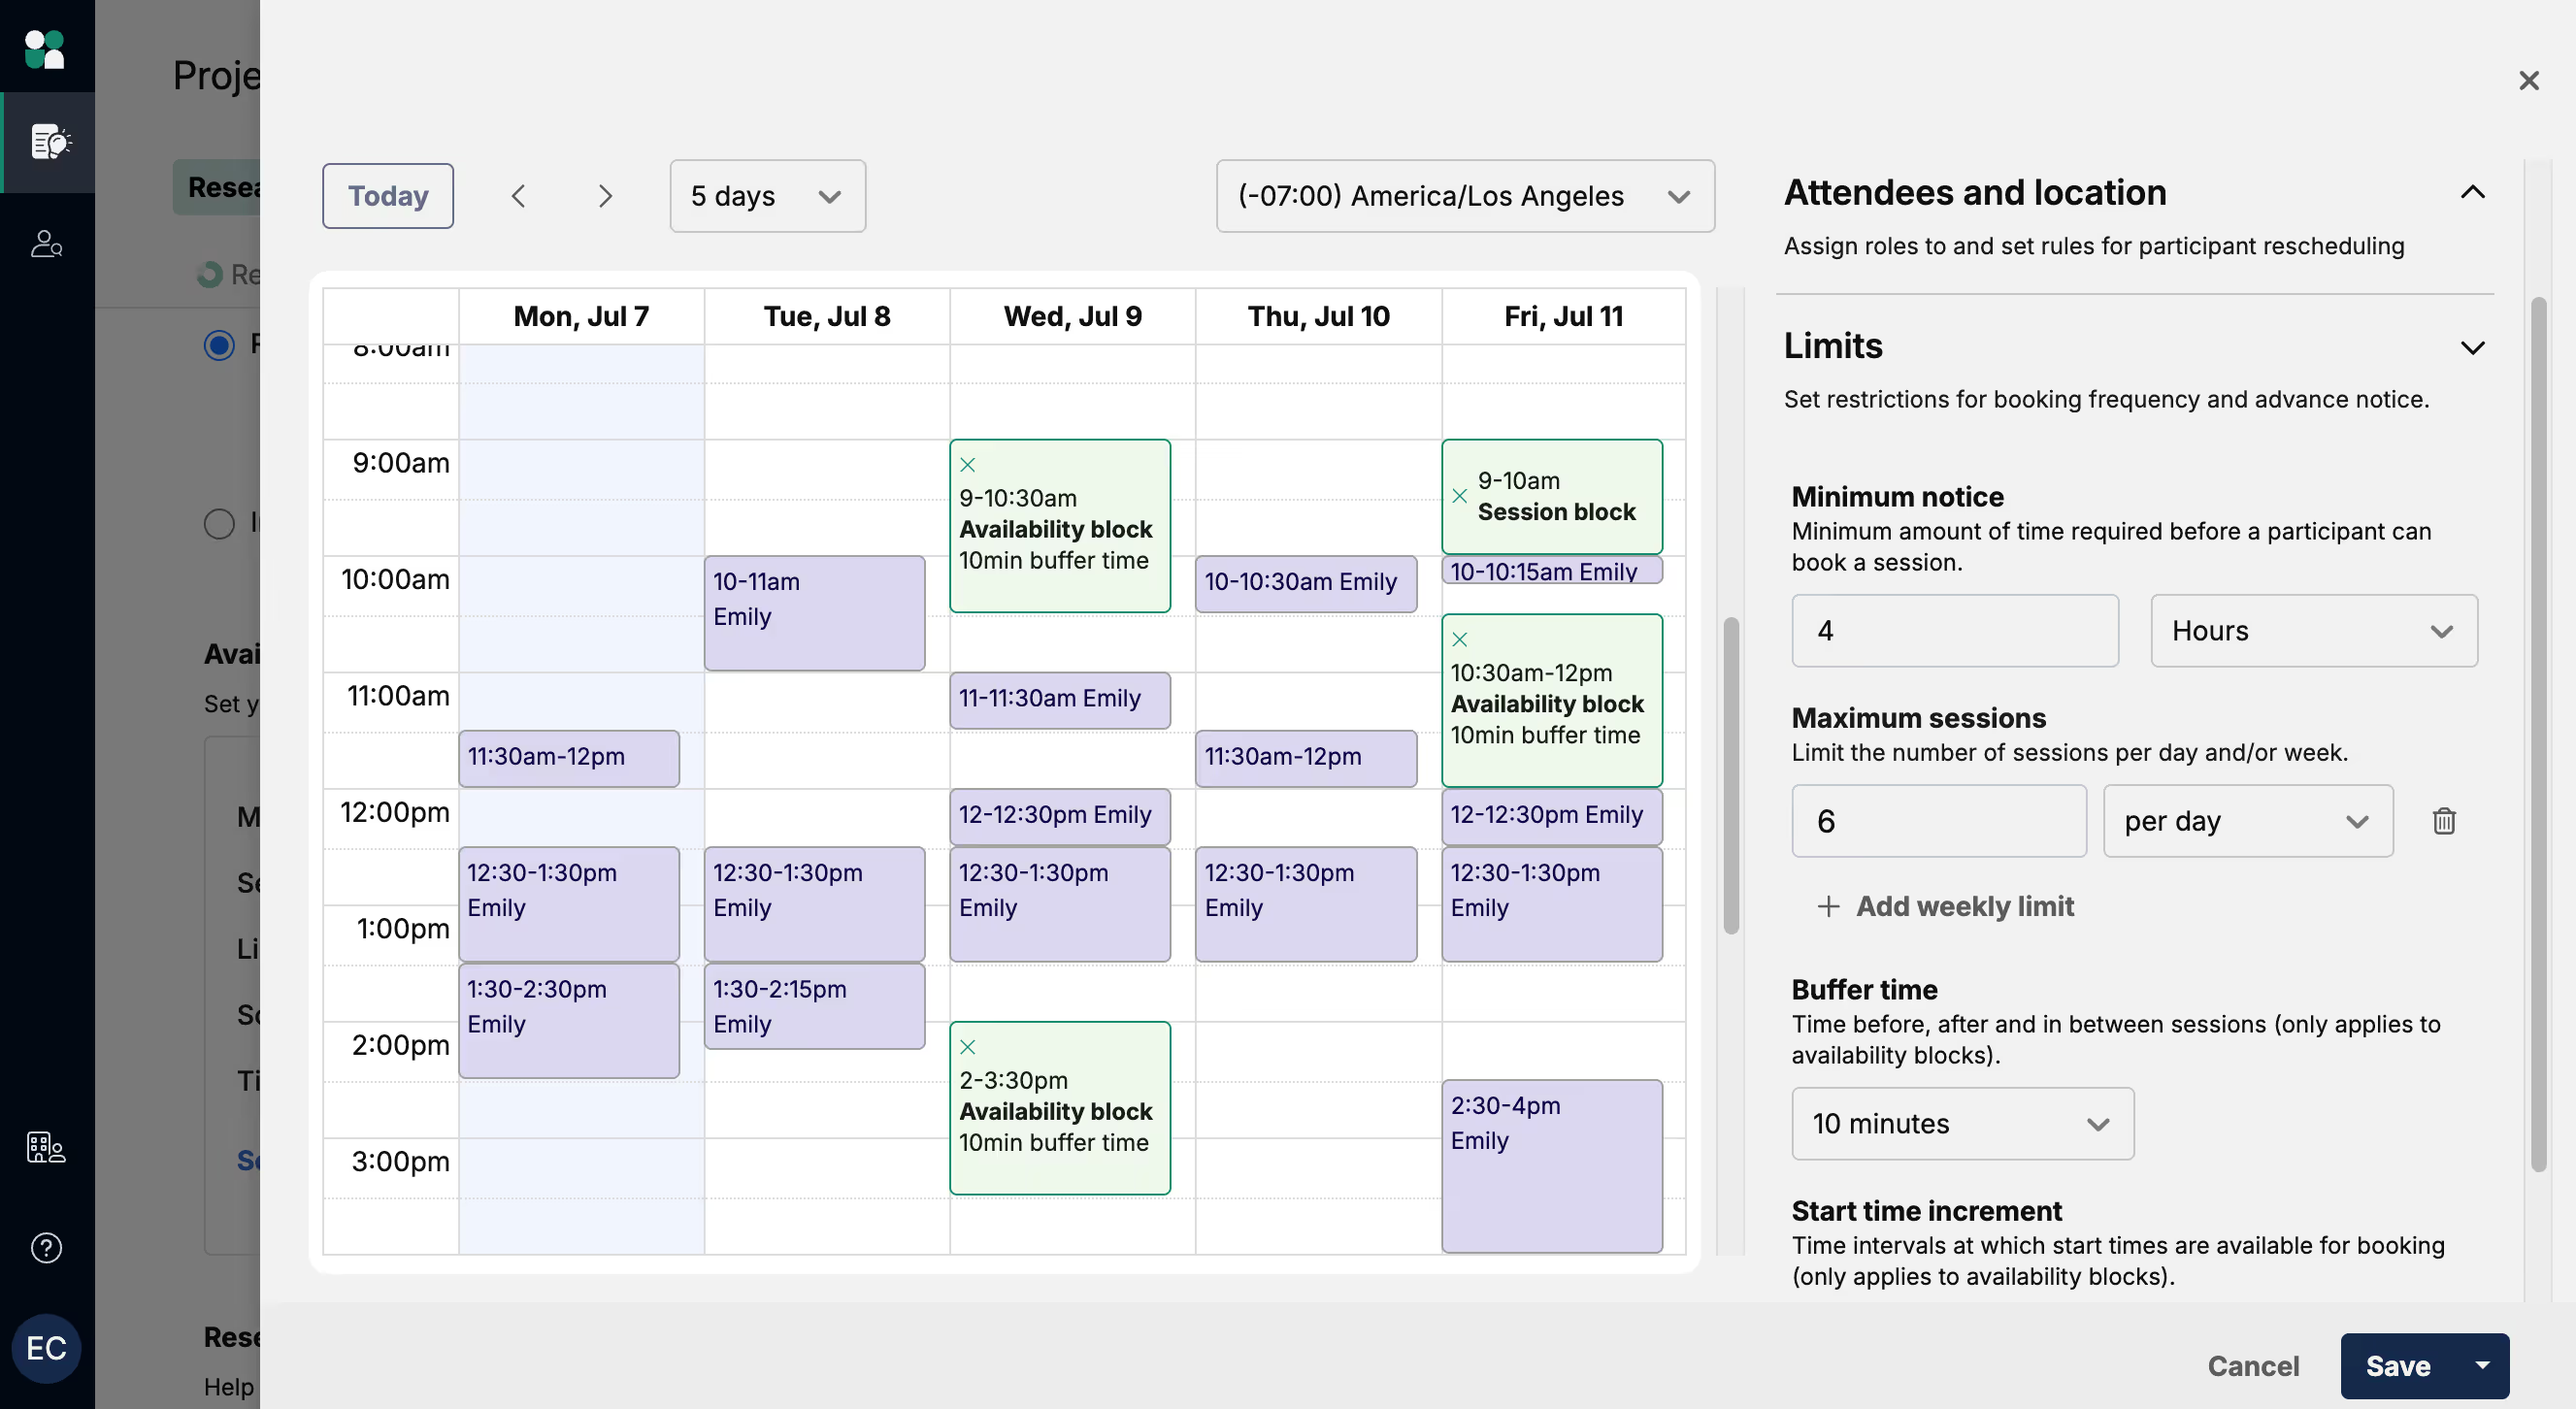
4. Set your scheduling preferences and limits for booking frequency and advance notice. The blocks will present options to participants based on the limits you’ve set.
💡Enable tentative session holds on your calendar to prevent double booking—just select the checkbox and tentative sessions will automatically appear on your calendar.
Any questions or feedback? Reach us at projects@userinterviews.com.


