_1.avif)
Importing a CSV of existing contacts is one of the easiest ways to start building your Hub panel.
This is the most popular panel building method for teams using Hub for the first time. You could pull a list of customer data from another CRM tool, request a list from your data team, or export a spreadsheet of stored research contacts.
You can upload participants via CSV to your entire Hub population, or navigate to a specific panel to upload participants directly there.
In this article, you’ll learn:
- How to import a CSV file
- The data field requirements and best practices for creating CSVs
- How to map, edit, and delete custom data
- Answers to frequently asked questions
How to import a CSV file of participant contacts to Hub
🖇️ Import a CSV of contacts to your Hub panel
1. Create a CSV file with all the contacts you’d like to add to your Hub panel. Your CSV must include an email address for each participant.
2. Download the CSV file.
3. From the main User Interviews page, navigate to your Hub database (entire population or a specific panel)
4. Select Build > Import from CSV.
5. Select the CSV file from your computer.
6. Add labels to your uploaded batch of participants for easier filtering in the future.
7. Match the columns in your CSV to your User Interviews fields. If necessary, you can create new fields within UI to support your needs.
8. Click “upload participants."
9. When a list has been successfully uploaded, you’ll receive a confirmation email.
Required data fields for your CSV
The most important field in your CSV file is the email. Email addresses are the only required data point, and without this import the file will not work.
We also recommend including fields for first and last names. These are available by default in User Interviews and allow you to send more personalized emails when inviting your participants to a project.
As you continue building your CSV, feel free to add any fields you need! During the import process, you can map any column in your CSV to a custom field that you create in Hub.
The custom fields can be any of the following data types:
- Text (i.e. Premium)
- Number (i.e. 234)
- Date (i.e. 2018-08-11), Note: date columns must use the YYYY-MM-DD format.
- True/False (i.e. True)
Be careful to select the right data type when you’re creating a new field.
To get started, use our sample CSV file as a template.
🚩 Having trouble? Excel and Numbers sometimes mishandle things like special characters, line breaks, and formulas that may exist in the original file when creating a new CSV file. If you’re having issues, we recommend importing the file to a Google Sheet and creating the CSV there.
Best practices for creating a CSV
1. Include a header row. This will make it easier to map your fields during the import.
- Use short, succinct column names in your header row. When you create a new custom field in our system, we default to using the data in the header row as the field name. Things can go haywire with excessively long column names.
2. Pay attention when creating a CSV from another file format. Here are some tips for common tools.
- Microsoft Excel → “save as” select “CSV UTF-8” or “Comma Separated Values” as the format option when saving.
- Google Sheets → “download as comma-separated values” works reliably and there are no options to select.
- Numbers → “export to CSV” then check advanced options to make sure the text encoding is set to Unicode (UTF-8).
3. In general, keep the original sheet as simple as possible before converting to a CSV.
- Avoid complex formulas.
- When possible, copy calculated fields that include formulas and re-paste them as values before converting. You might even consider replacing the formula with its result.
- Stick to a single worksheet in the original document, if possible. Otherwise, be mindful to only export the worksheet you need to import.
Tips and tricks for a successful CSV import
Our system is designed to allow you to import the same participant (as determined by email) multiple times—this can be used to your advantage!
Recommended workflow
1. Upload your entire population of users by choosing “Import from CSV” with all of the data you need and map everything to custom fields.

2. Break your master CSV into smaller CSV files that correspond to user segments.
3. Upload those smaller CSV files and apply labels during the import process to easily segment the users in our system.
4. If you’ve previously mapped all of the custom data you need on these users, you will only need to map the email column this time around.
Mapping, editing, and deleting custom data
When uploading a CSV to your panel, you'll be asked to map existing or add new columns to your panel. Some columns are synced to participant activity data, so they cannot be edited or removed even if they have no information. These non-editable columns include:
- First name
- Last name
- Phone
- Date added
- Last invited
- Last applied
- Last participated
- Unsubscribe
To edit or remove custom fields, click “Manage” in the top right corner.

You can rename or delete columns. If you delete a column, all data will be erased and no longer retrievable (even by us!).
Importing CSVs with multi-select responses
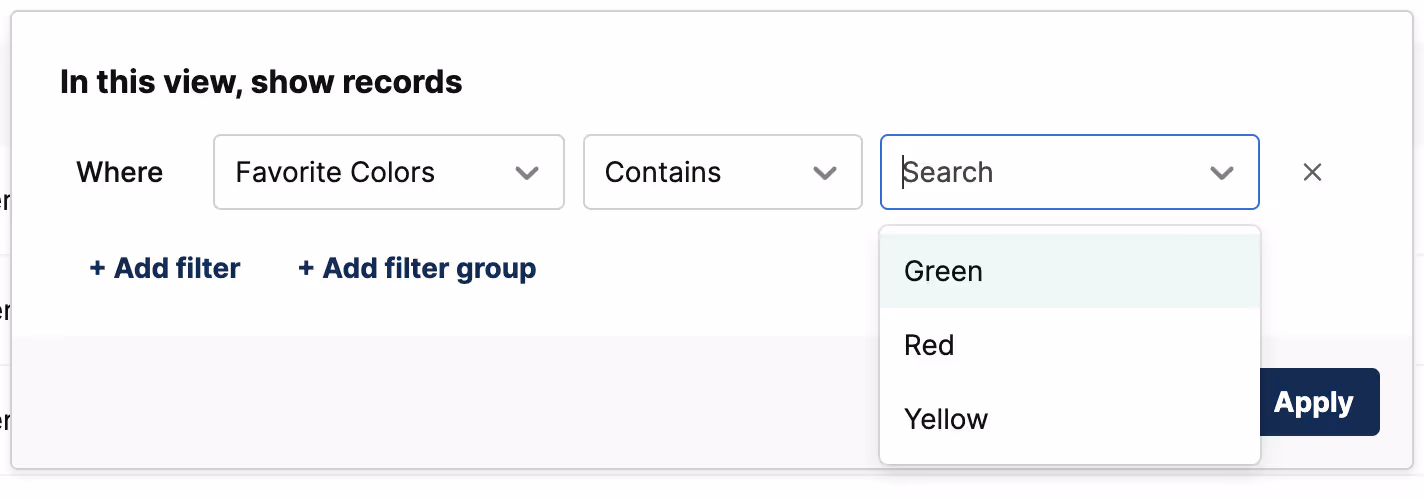
If your team is importing a CSV with multi-select responses, you’ll want to use a specific format to ensure UI can properly display each value in the filter dropdown. We will separate out any values concatenated with the delimiter double semicolon + space (;; ) as distinct values in the filter dropdown.
An example: If a “Favorite Colors” column in Hub contains a value formatted like this: Red;; Green;; Yellow, then you would see Red, Green, and Yellow as separate items in the filter dropdown.
How to format CSVs with multi-select responses
1. Start with a CSV containing the multi-select responses concatenated with some other delimiter. Note: Be sure to include participant email addresses, as these are the identifiers for each record.
- Export from Research Hub, if the data has already been uploaded into our tool, or
- Export from whatever tool you’re using to collect multi-select responses from participants
2. Use “Find & replace” to change your delimiter to a double semicolon + space (;; ) between each value.
3. Upload your CSV to Hub. Note: Fields will only be updated if there is a new value provided and this field is mapped properly.
4. Now, any multi-select responses will display as distinct values in the filter dropdown.
Import confirmation
When a list has been successfully uploaded, the individual who imported that list will be sent an email. It will look like this:

FAQ
Why did my CSV import fail?
The most common reasons a CSV import fails are:
- Duplicate phone numbers. No two participants can have the same phone number.
- Formatting errors. See the required fields and best practices sections above to double-check that your CSV is formatted correctly. When in doubt, use our sample CSV file as a template.
- Two header rows. One, succinct header row is recommended.
- Mapping custom fields. See our column mapping article for more information.
- Too many invites. It’s helpful to split your CSV up into smaller batches. You may experience performance issues with large uploads.
I don’t have a CSV of existing contacts. How else can I build my Research Hub panel?
Although uploading a CSV is the most popular method, there are other available options for building your panel, including:
- Creating opt-in forms to grow your panel with highly engaged users
- Adding a single participant directly to your panel
- Sending invitations to a live study — sign ups will be stored in Hub
- Feeding live data into Hub with the API


