
Who is this article for?
🗣️ All researchers (both admins and users)
⭐ Available on Research Hub plans
Research Hub is a CRM designed for researchers. It helps you to recruit a panel of your own customers and manage their participation in research studies. With Research Hub, you’re able to build out your panel, organize participant data, create a branded customer experience, and automate all of your recruitment logistics.
📖 This guide is part of a 4-part onboarding series on getting started with Research Hub. Check out the other guides here: Get Started With Research Hub
Watch this short video introducing Research Hub, and describing a few of the ways you can build your panel.
Five ways to build your panel
The first step is to get your customers into Research Hub so you can start running studies with them. There are five methods which we will walk through in this article. Our customers often combine various methods to build large and engaged communities of research participants with Hub.
5️⃣ Five methods for populating your panel
1. Upload a CSV file of existing contacts (most popular method)
2. Create opt-in forms to grow your panel with highly engaged users
3. Add a single participant directly to your panel
4. Send invitations to a live study — sign ups will be stored in Hub
5. Feed live data into Hub with the API
1. Upload a CSV file of existing contacts
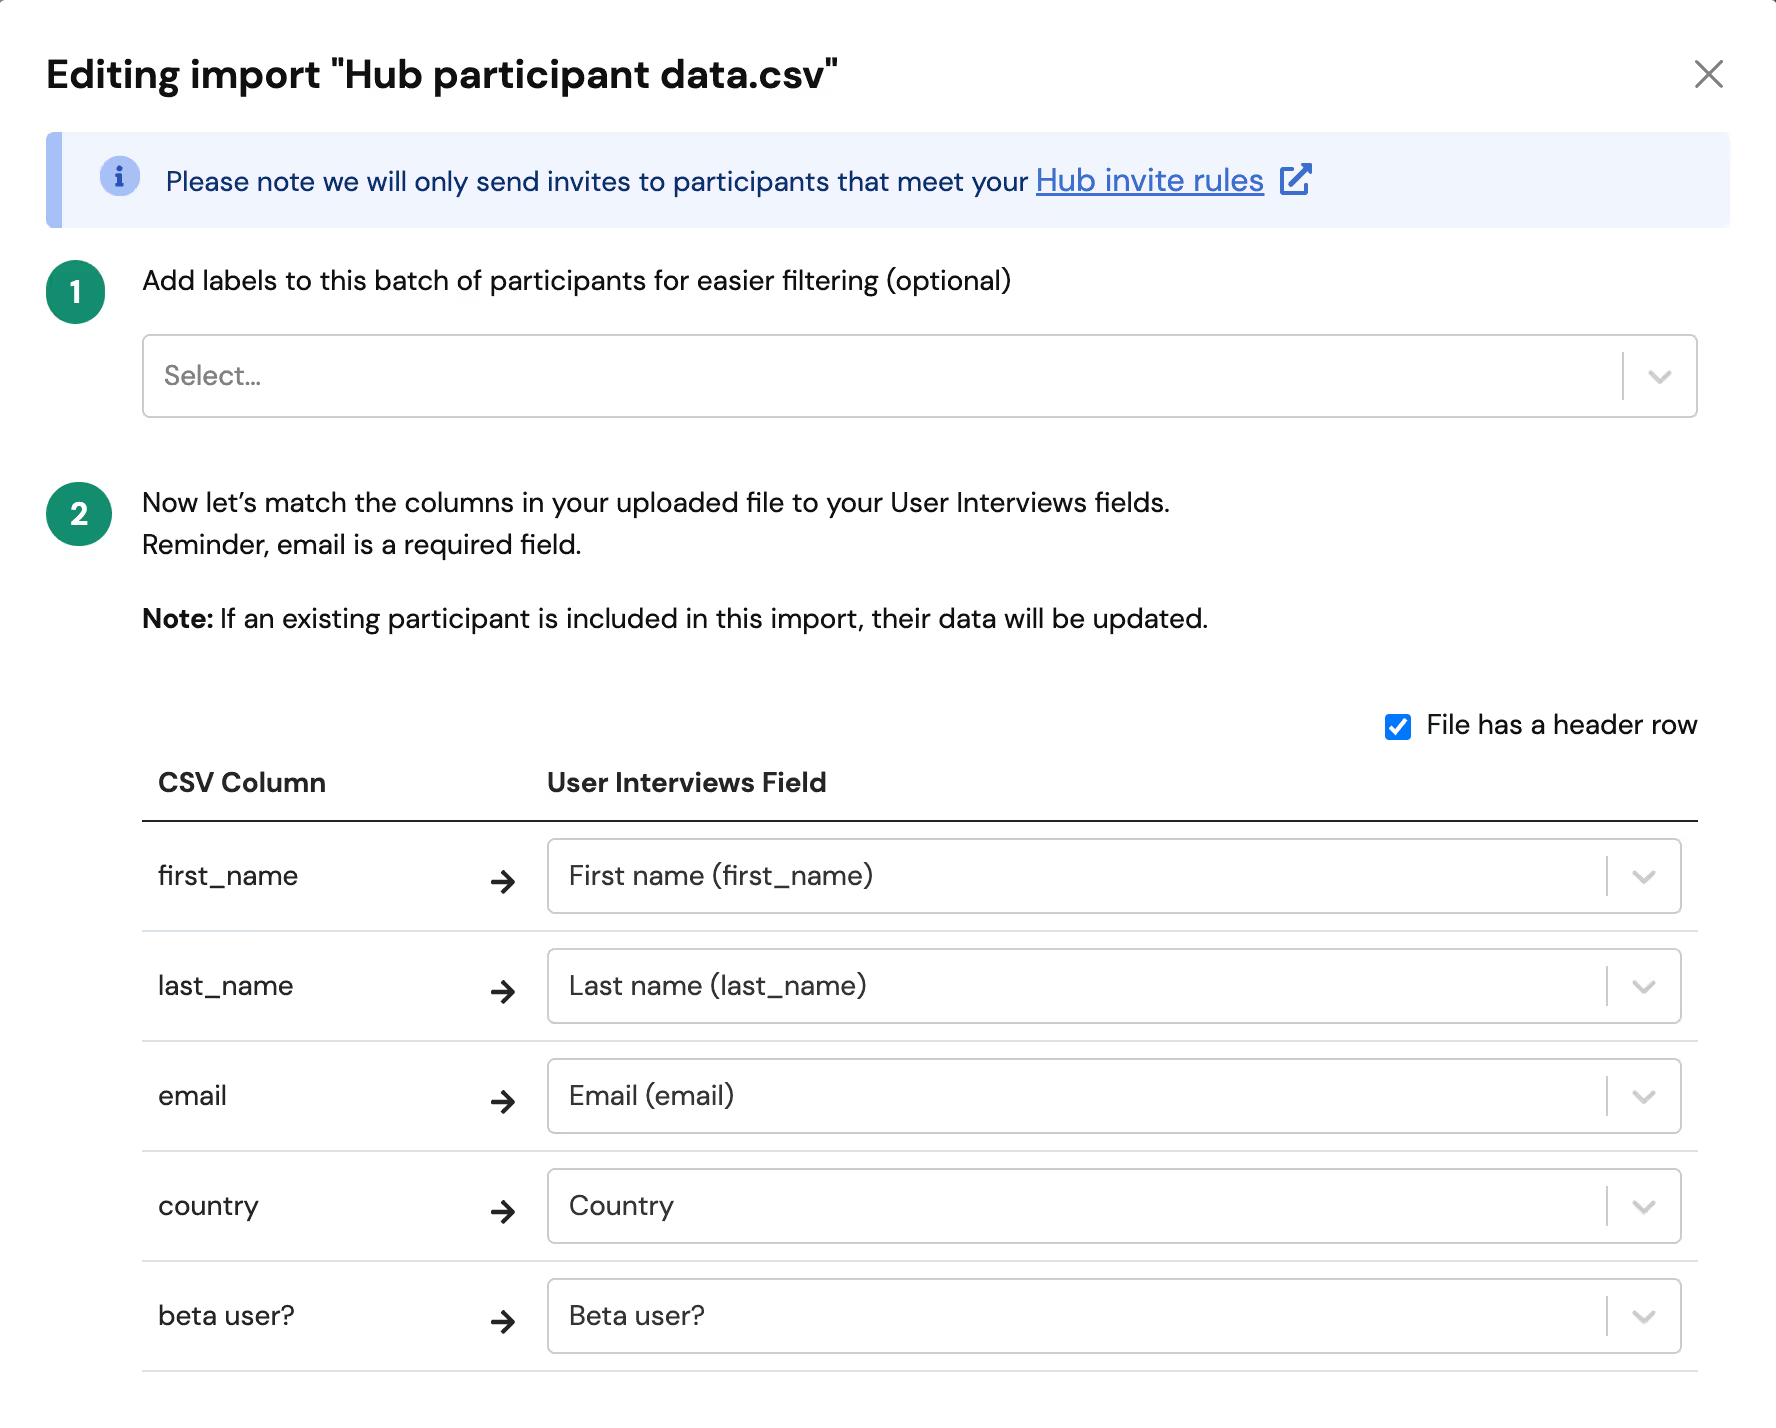
One of the easiest ways to get started is to import a CSV file of existing contacts. Simply import your contacts along with customer data that’s helpful for recruitment. The only required field is the email address, but consider all of the data points that you’ll find helpful to filter on and create targeted populations for future research studies.
You can map many kinds of data into custom fields:
- Text (e.g. company name)
- Numbers (e.g. user ID)
- Dates (e.g. sign up date)
- True/false values (e.g. beta user)
This is the most popular method for teams using Research Hub for the first time. As a starting point, you could pull a list of customer data from another CRM tool, request a list based on certain criteria from your data team, or perhaps you’ve been storing research contacts in a spreadsheet up until now that you can easily export as a CSV file.
Learn more about uploading a CSV of participant data, including a walkthrough of the full import workflow and tips for structuring your file.
Note that there’s also an option to upload a CSV file directly to a research project — either as you’re building the project, or after you launch it. You can read more about that workflow here: inviting participants to sign up for a Research Hub project.
2. Create opt-in forms to grow your panel
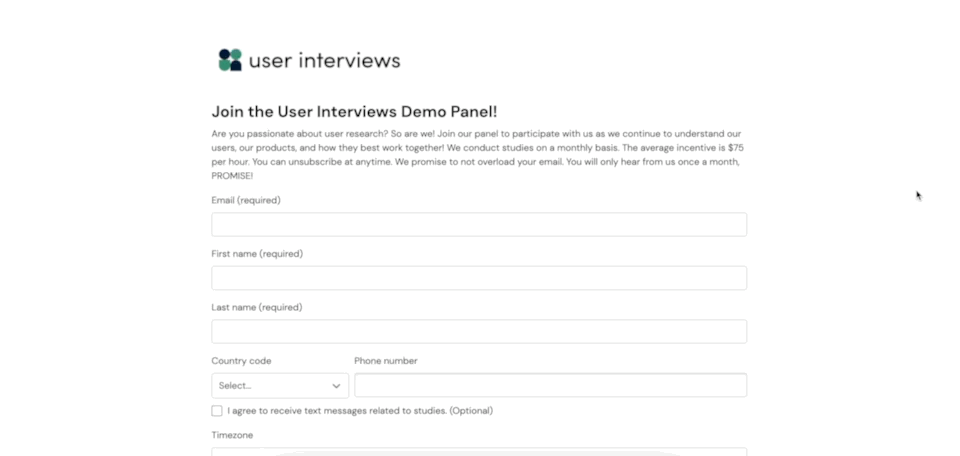
If you’re starting out with a small population of participants, Research Hub can help you grow your research community. One of the best ways to build an engaged audience is by using opt-in forms.
An opt-in form can be shared on your website, in emails, within your app, using an intercept, or via any form of communication. It lets your customers signal to you that they’re happy to participate in future research studies.
We’ve added some default questions so it’s easy to get started creating your first opt-in form. You can select which defaults you use, and create as many additional custom questions as you like to collect the data that’s important to you. The questions you ask will be mapped to custom fields in your Hub database. You can even create multiple versions of your opt-in form for different use cases.
Learn more about customizing and managing your opt-in forms here: using opt-in forms to build my Hub panel.
💡 Paid subscribers can also apply company branding to opt-in forms: adding my team’s logo.
3. Add a single participant directly to your panel
The third way to build your Hub panel is to add a single participant directly through the platform. This option is best when you only need to add a few participants to your Hub population for a last minute addition, to fill in missed contacts, or for testing purposes.
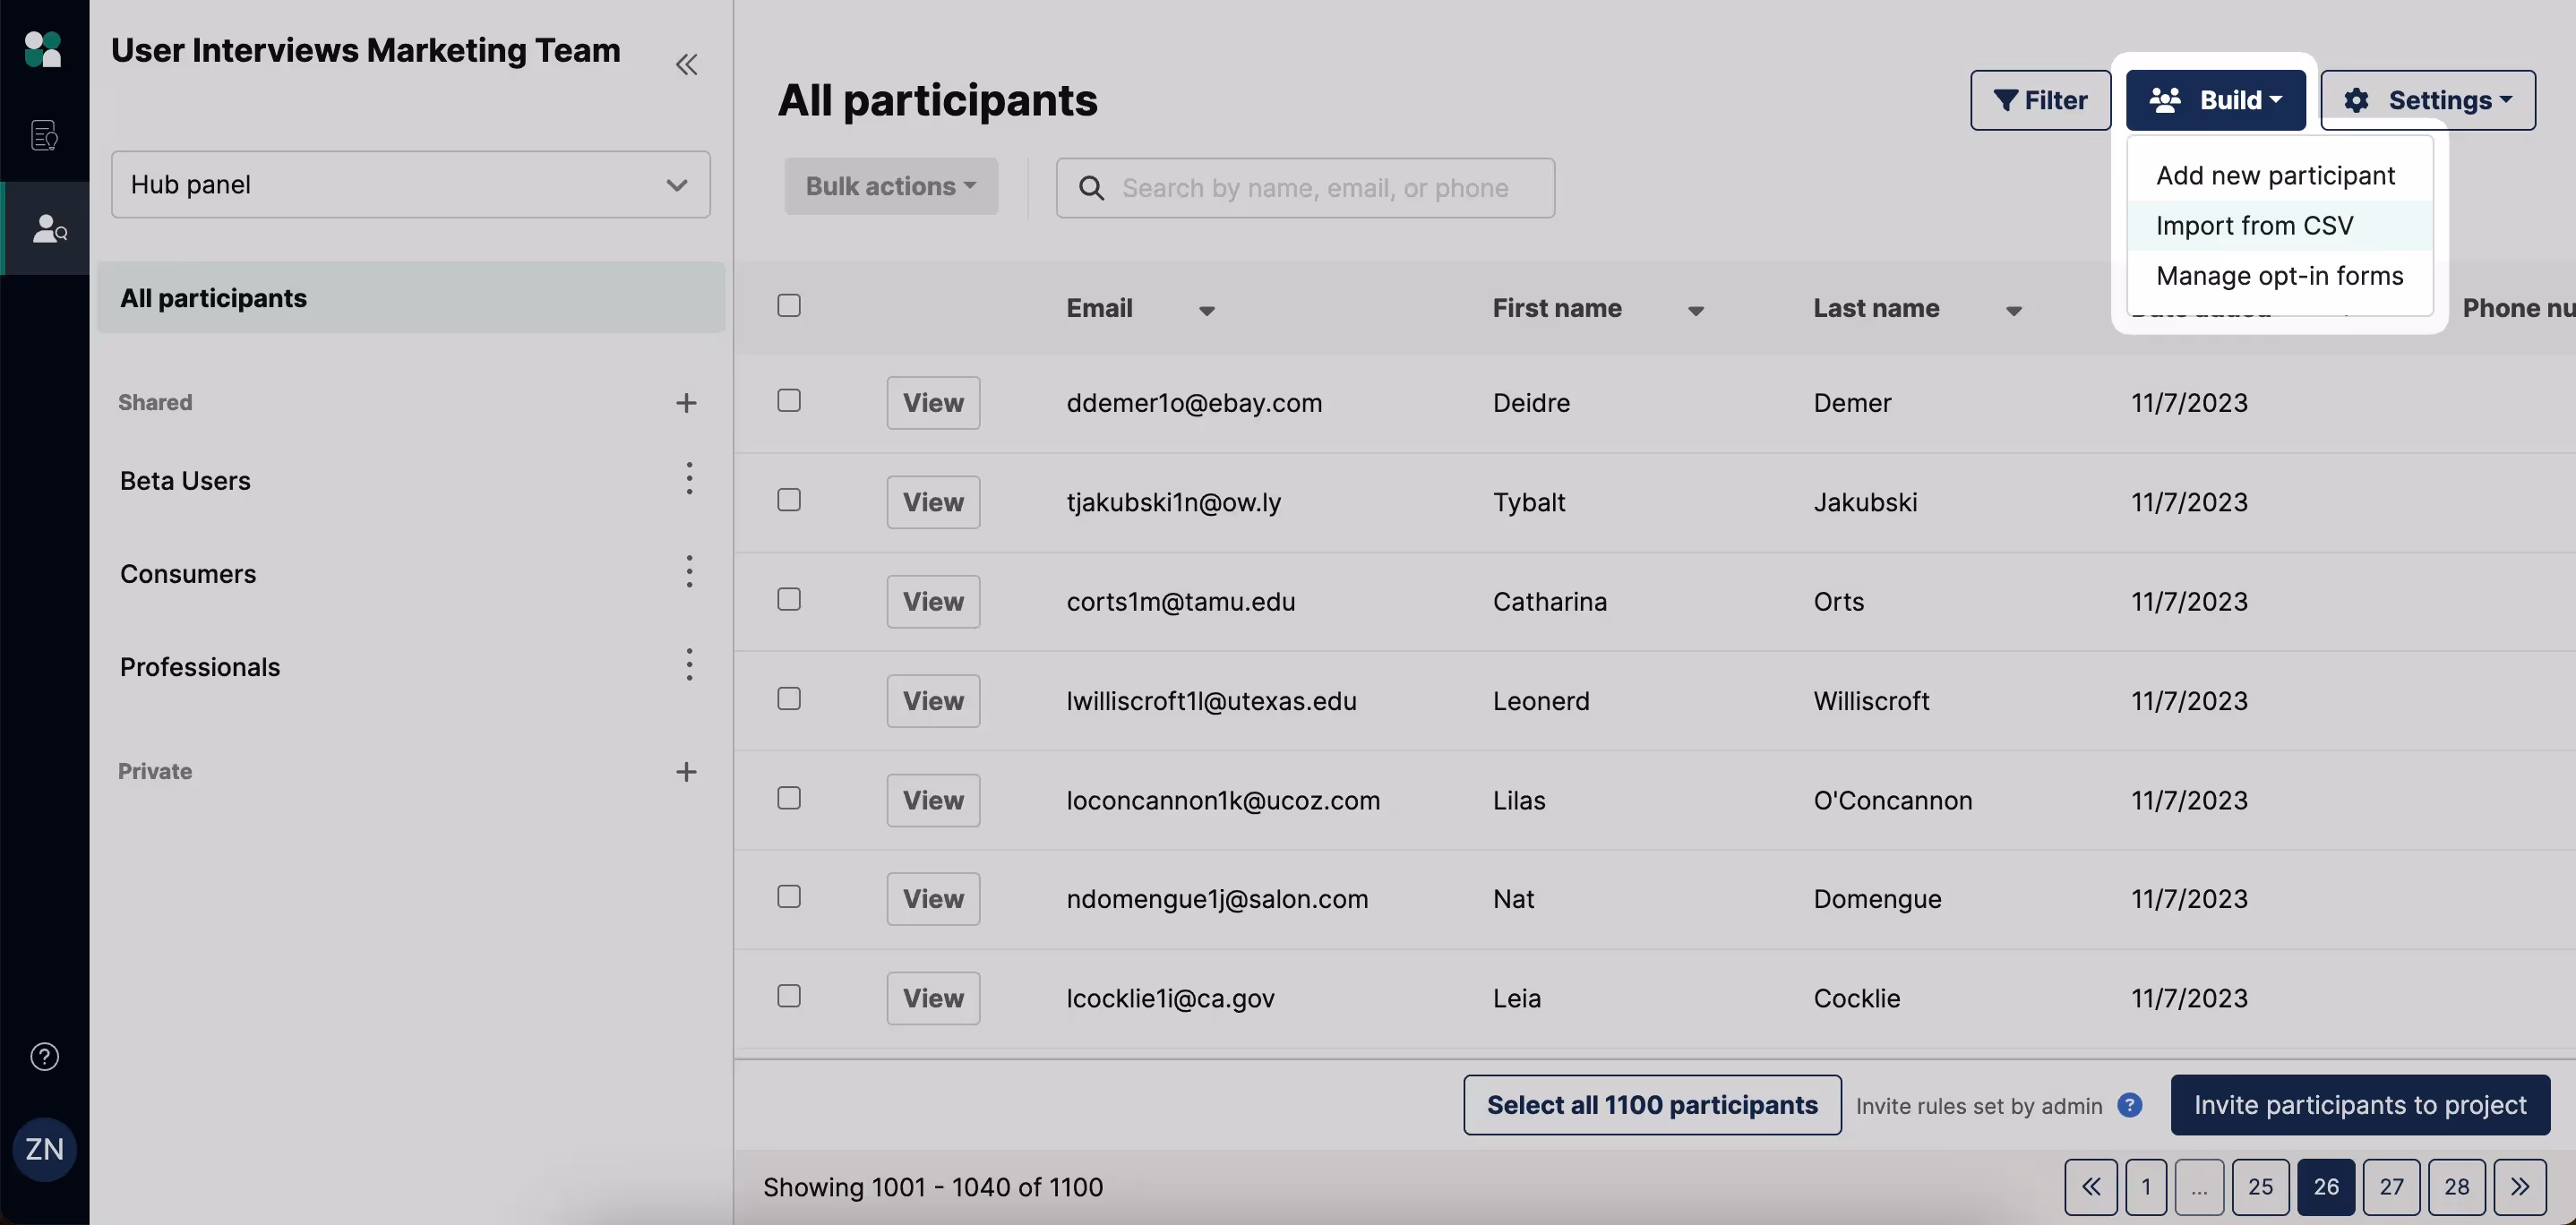
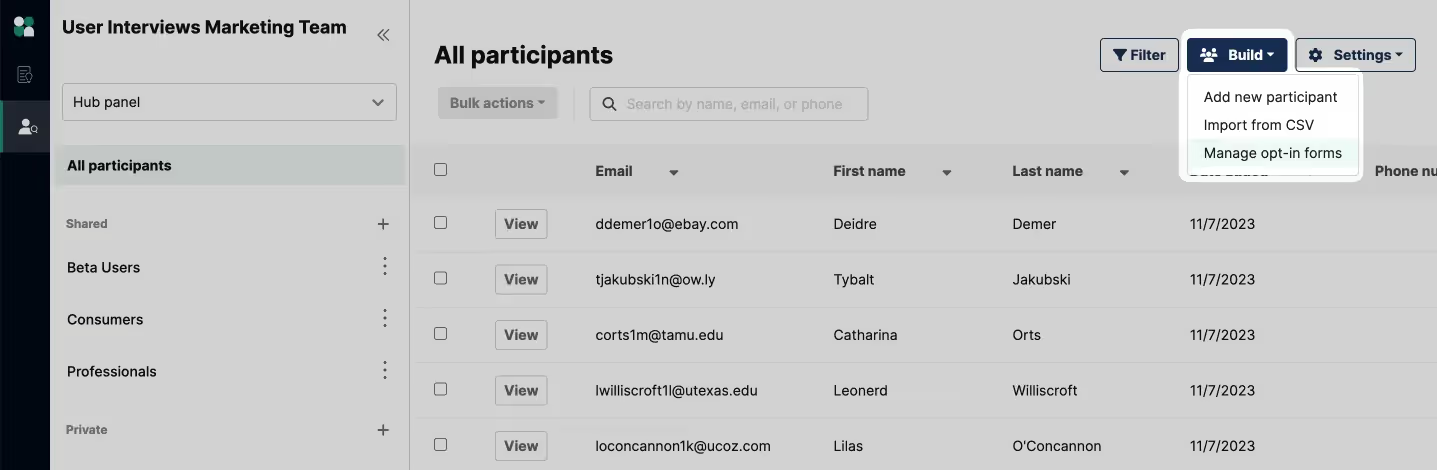
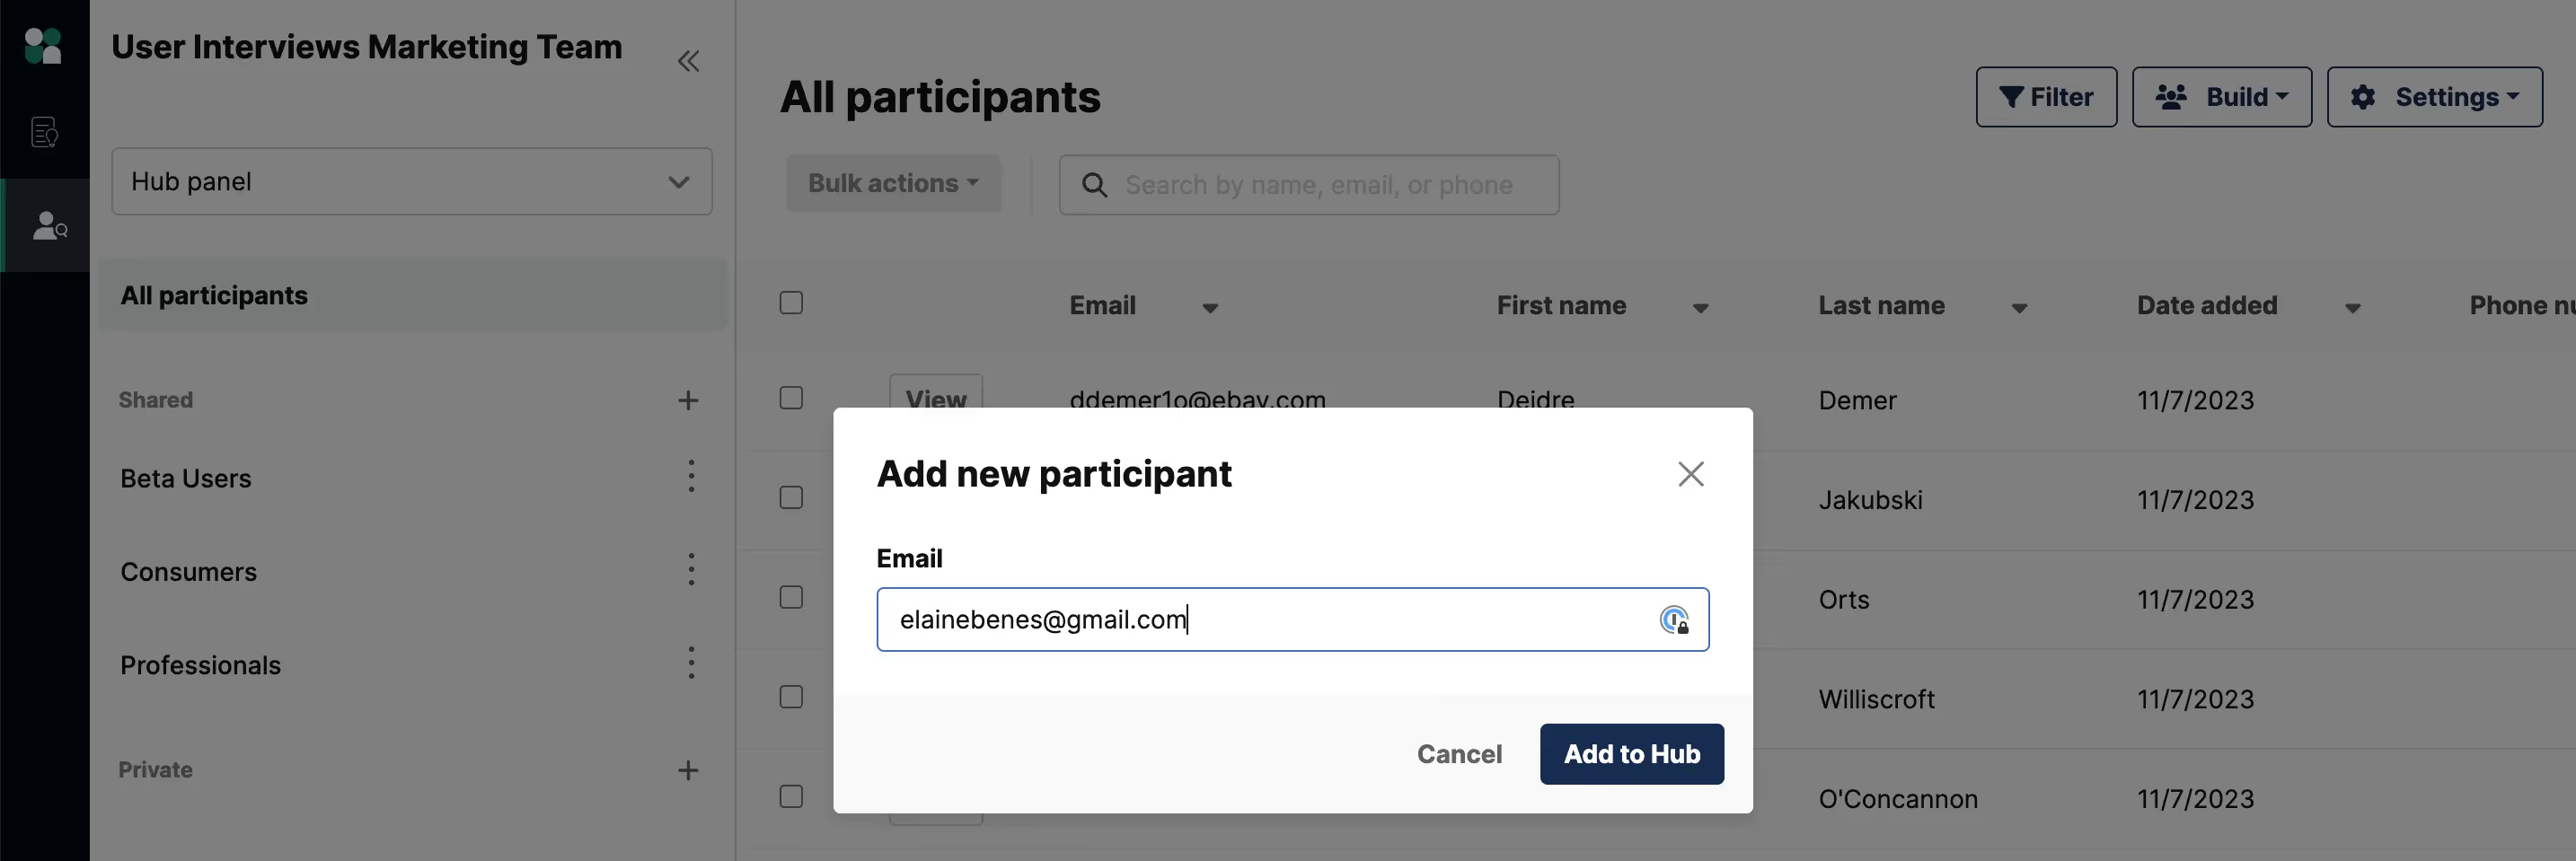
To add a participant, select "Add new participant" from the "Build" dropdown and enter your participant's email to add them to your Hub panel.
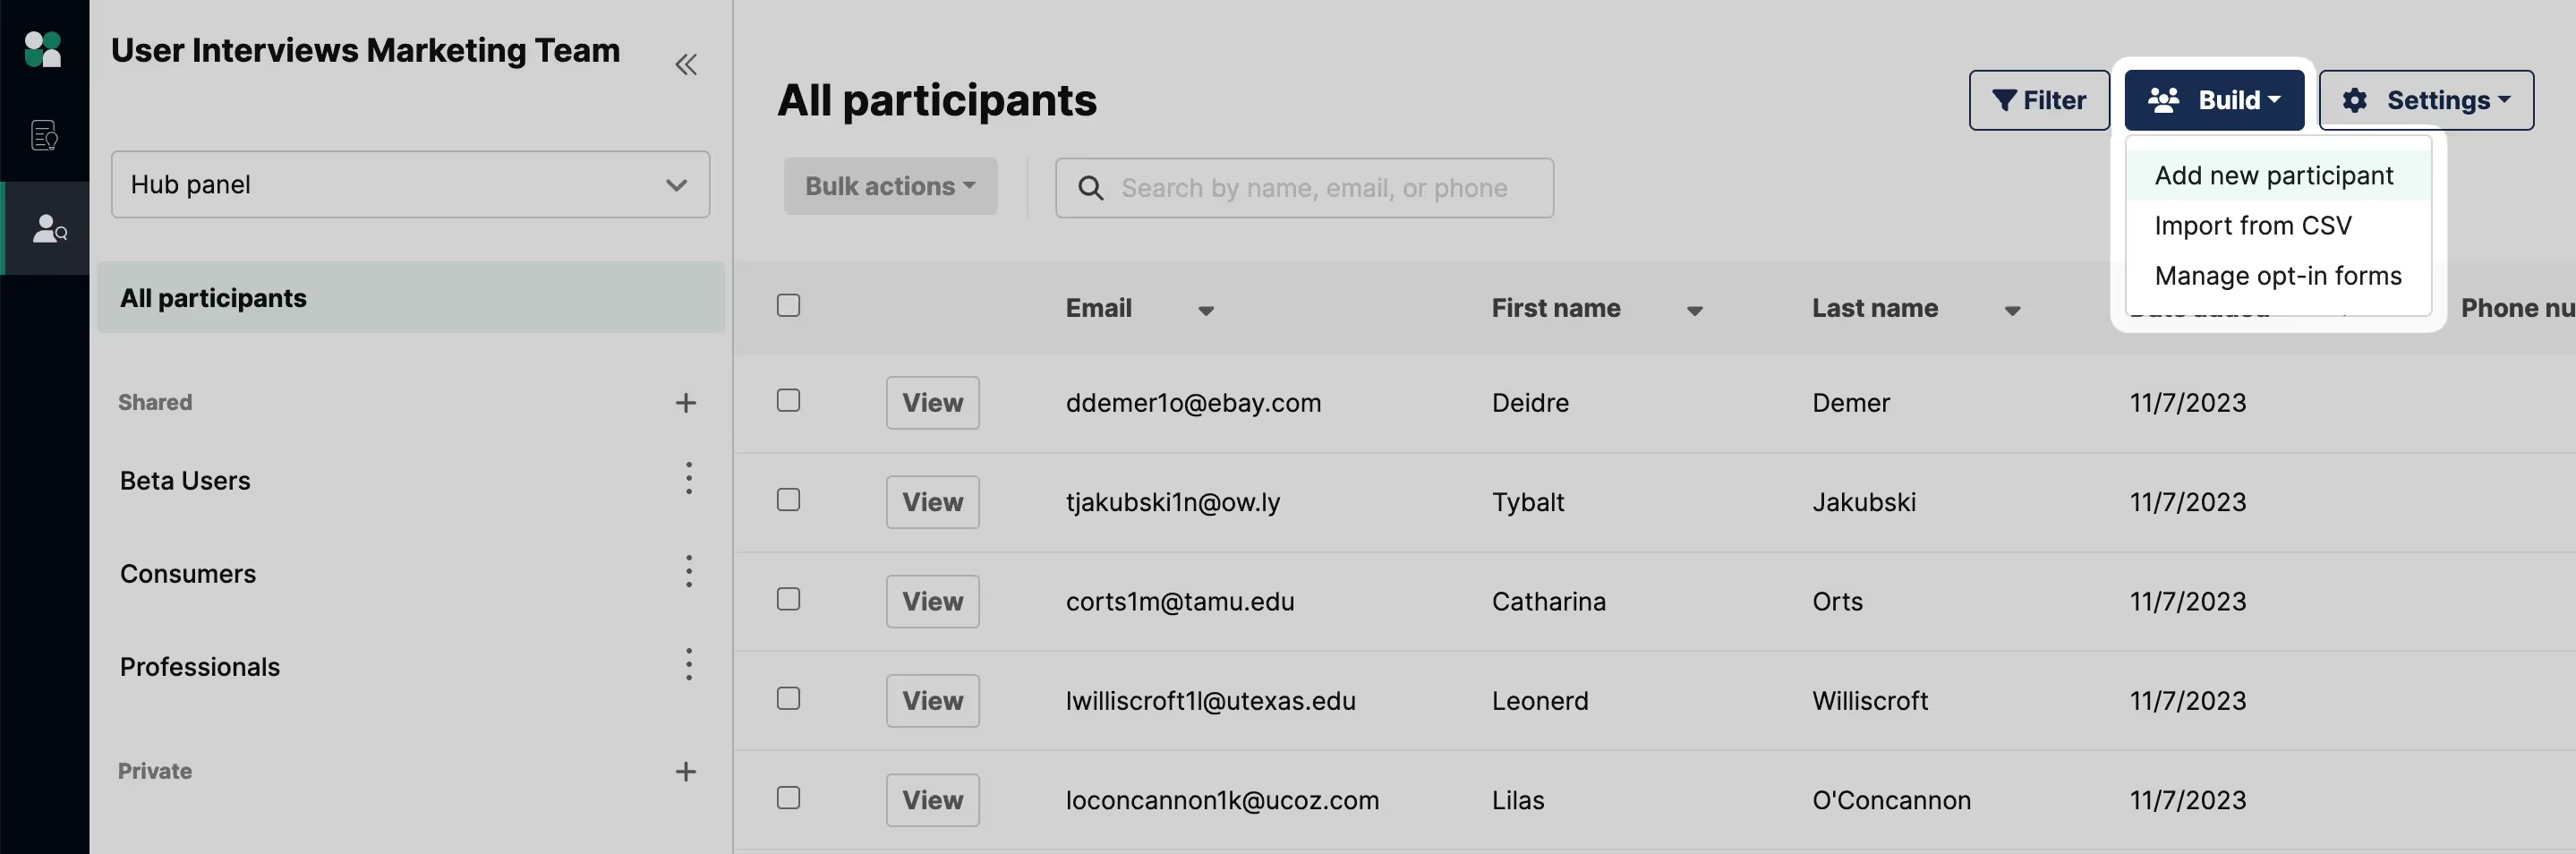
While the only required field is an email address, you can add additional data points by editing the participant in your Hub panel. Mapping user data into custom fields that can be filtered on later is what makes Research Hub’s segmentation capabilities so powerful.
4. Send invitations to a live study
The final way to build your panel is directly through a live research project. We save this method for last because you receive the least amount of information about participants, but it is a simple user experience and can be a good way to quickly fill a study.
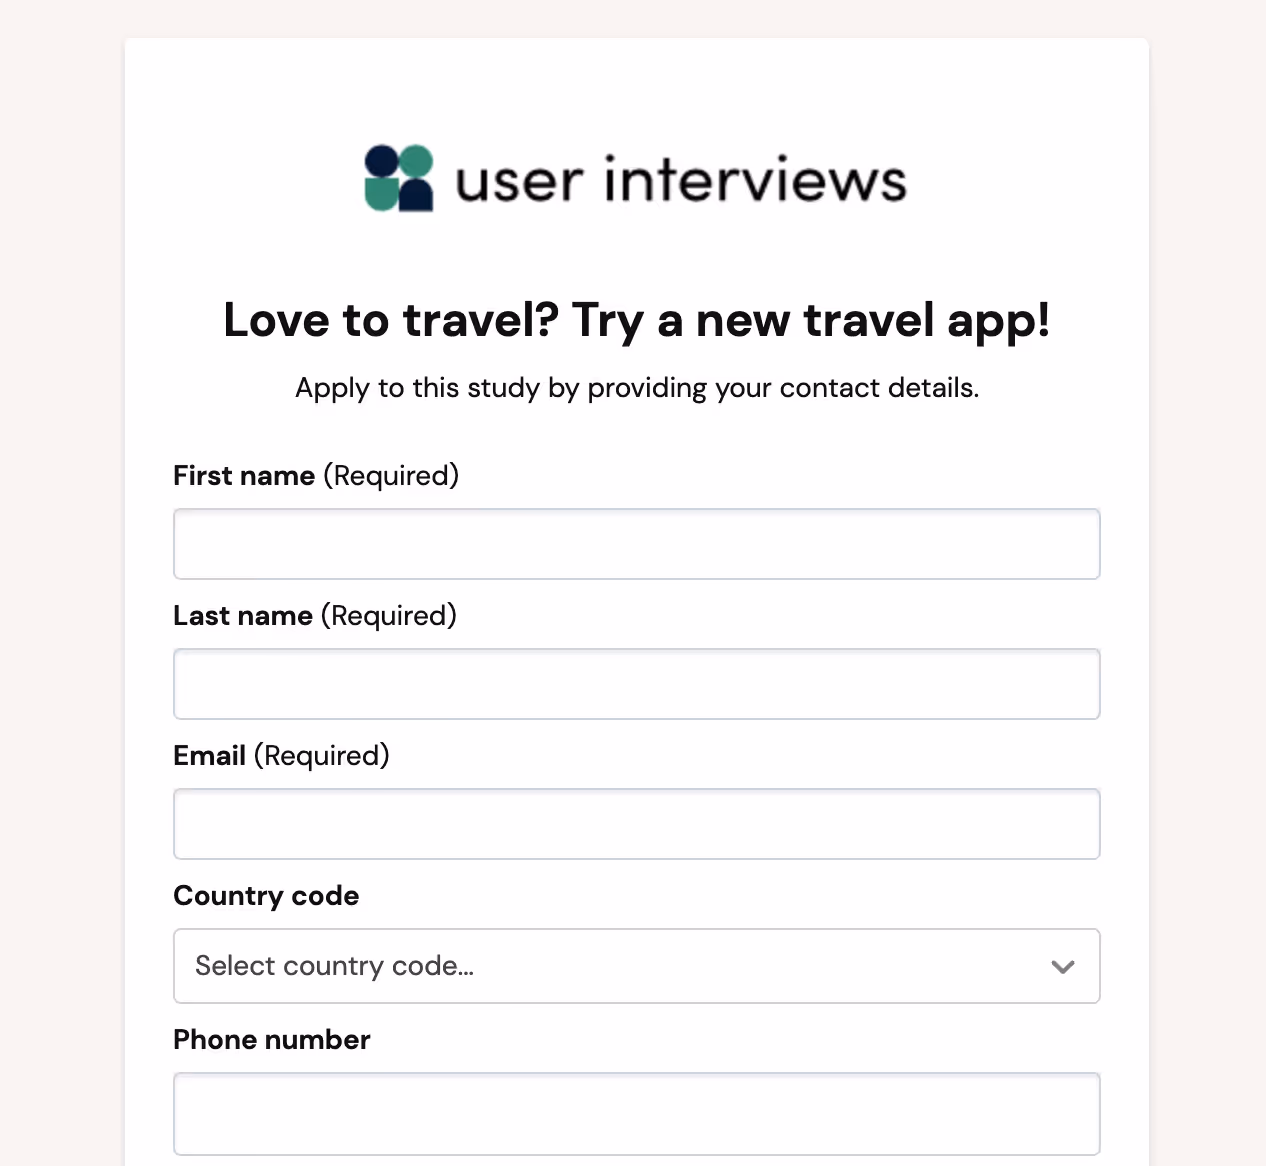
Once you've launched your project, navigate to the "Participant management" section and click on the "Invited" tab. Click the "Invite participants" button to find your project link. Copy and paste this link into an email, message, or any form of communication to invite your customers to apply to your study.
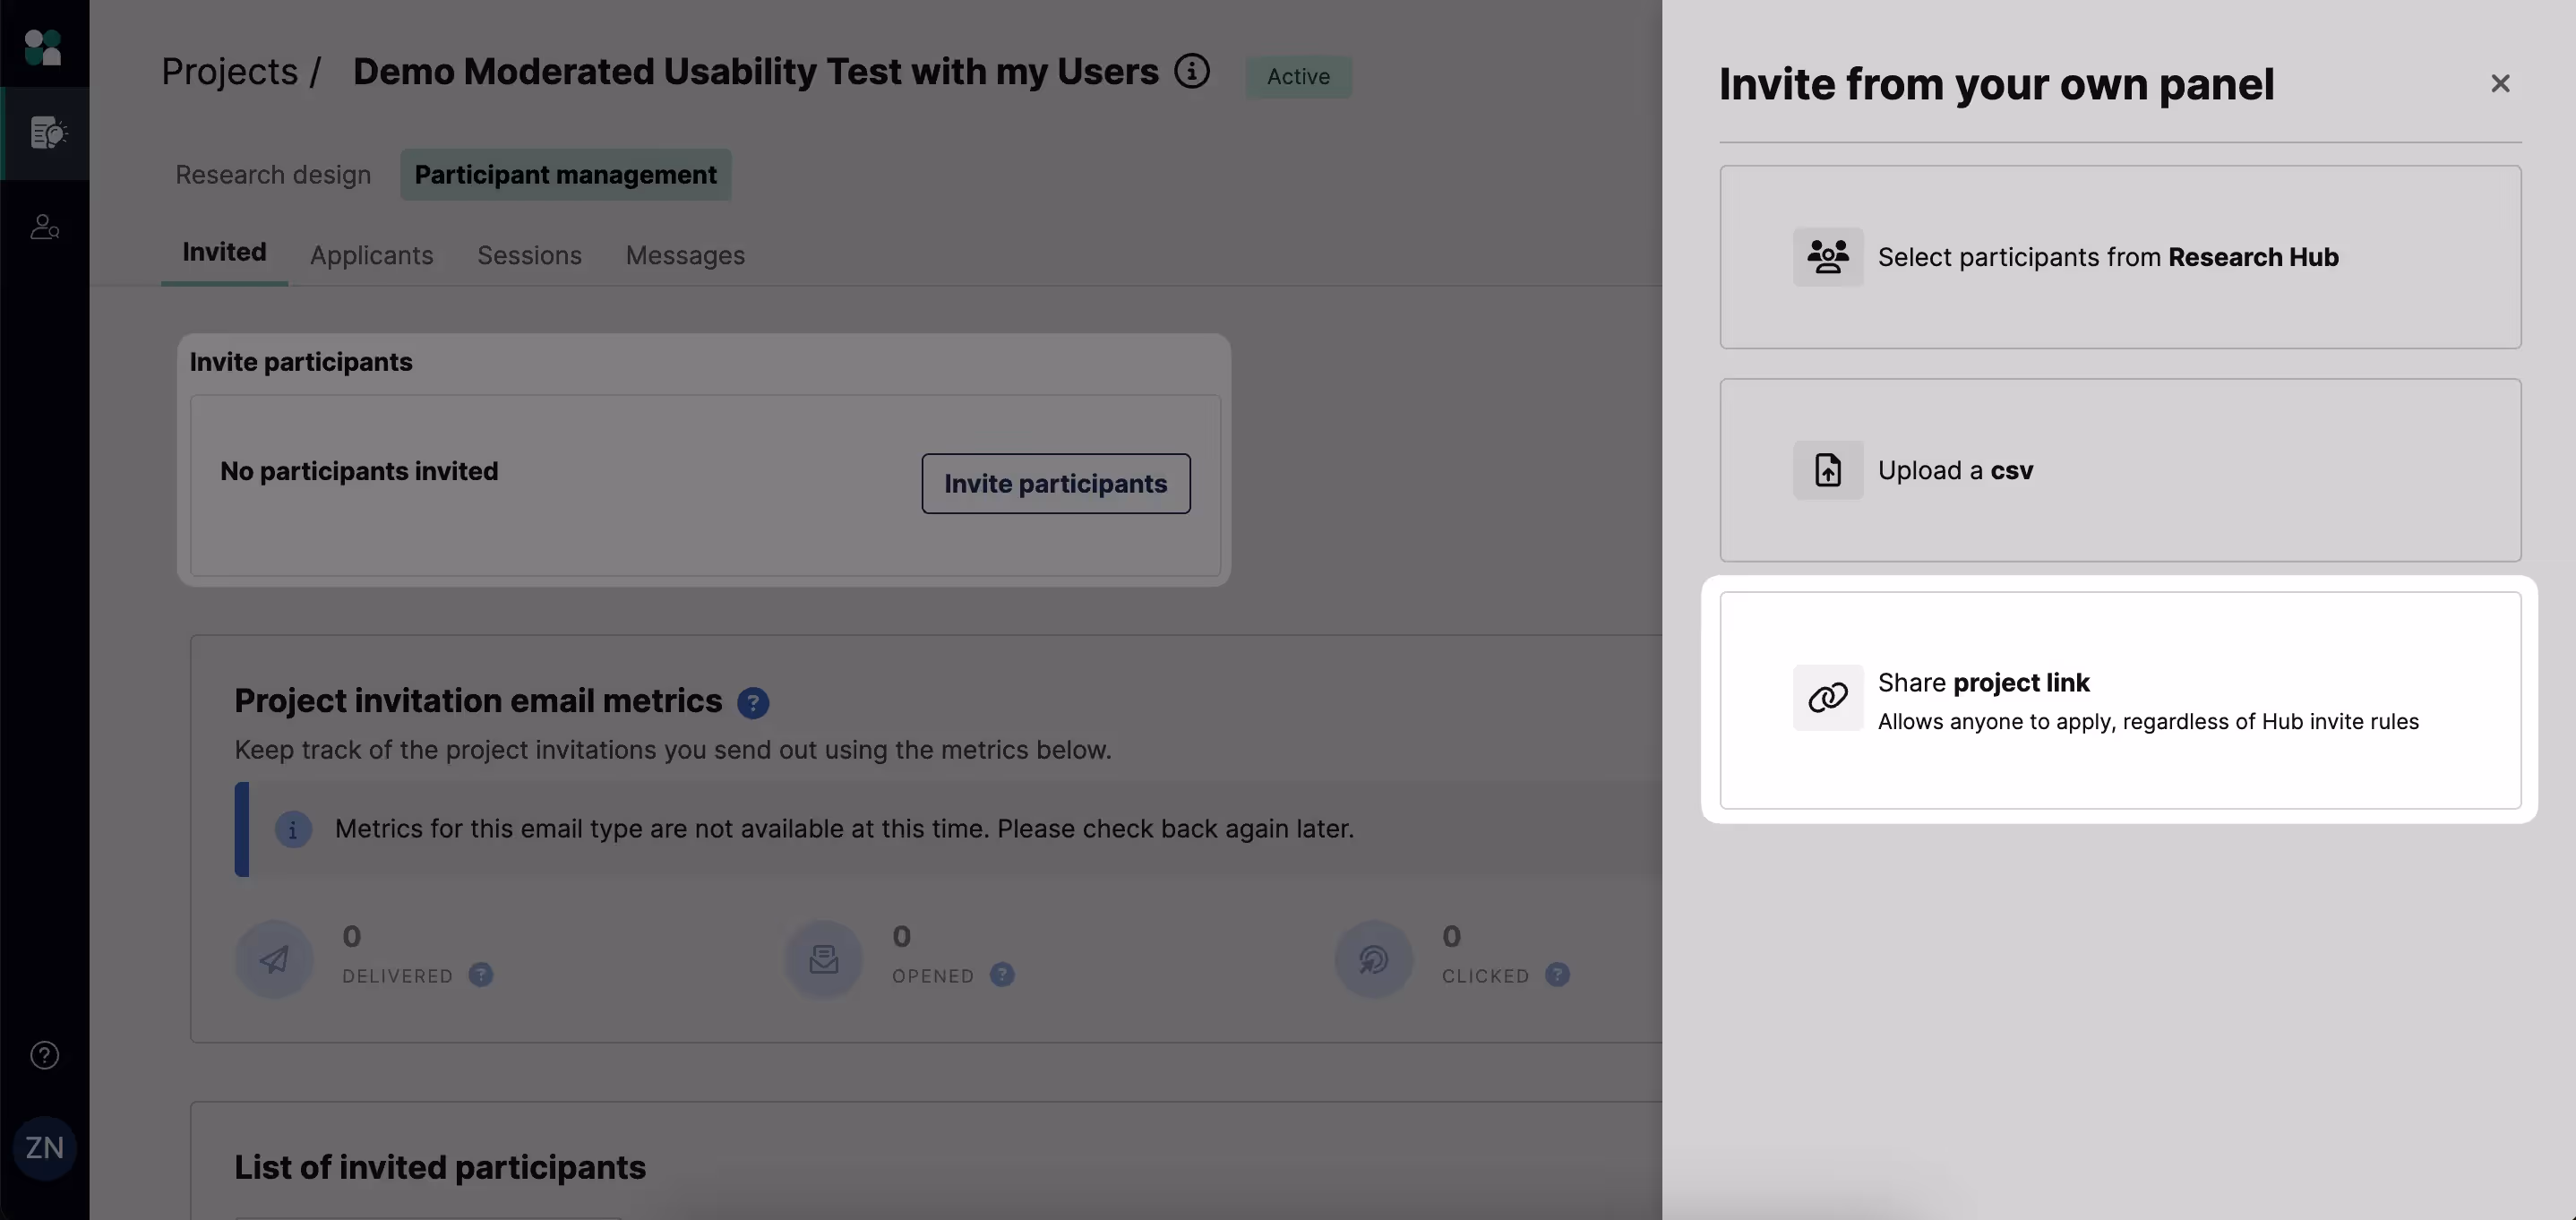
Any invitees who apply to your study via this application form will be added to your Hub panel so you can access them again in future. However, note that only their name and email address will be collected.
Learn more about the different ways to invite participants to sign up for your Hub project.
💡 The application form will only include your project title and ask for basic contact information, so we recommend including a few more details about the study in your invitation message to encourage customers to apply.
5. Use the API to feed live data into Hub
With the Hub Participant API, your team will always have the latest data about users stored in Hub. You can build integrations on top of our platform, connect to your tools of choice, and watch as your panel data gets automatically refreshed in real-time!
The API allows you to:
- Automatically add new participants to Hub
- Enrich user profiles with the latest info
- Scrub participant records to stay compliant
If you're interested, you can apply for API access. We'll review your use case and be in touch with API keys, technical docs, and all the information you’ll need to start building.
Keep learning with our Research Hub onboarding series
Congratulations on getting your first set of participants into Research Hub! Using these methods to build out your panel, you can have a thriving research community up and running in no time. Next up, let’s look at Part 2: Managing Your Panel.
📖 This guide is part of a 4-part onboarding series on getting started with Research Hub. Check out the other guides here: Get Started With Research Hub


