
Who is this article for?
🗣️ All researchers (both admins and users)
⭐ Available on Research Hub plans
Once you’ve gotten your customers into Research Hub, there are helpful participant management features that enable you to maintain a well-organized and healthy panel. These include filters, labels, and invite rules.
📖 This guide is part of a 4-part onboarding series on getting started with Research Hub. Check out the other guides here: Get Started With Research Hub
Watch this short video demonstrating features for organizing and managing your panel.
Research Hub’s panel management features
- Filters allow you to find participants that fit any criteria (or combination of criteria) for which you have data stored in Research Hub, including participation history, contact information, or data from any custom fields.
- Labels allow you to build flexible lists to group participants based on any criteria that’s important to you. You can apply multiple labels to a single participant, and you can use filters and labels together to discover highly targeted populations.
- Invite rules allow you to set guardrails for your team on who can be contacted for research and how often to contact them. Set your rules up once, and have them work continuously in the background, making it really easy for your team to avoid over-contacting the same participants, and enabling you to maintain a healthy panel.
- Segments allow you to save and retarget custom groups of participants. Segments are based on a set of saved filter criteria. They are dynamic, which means that participants will automatically get added and removed from your segment, so it always reflects the most up to date group.
💡 Note that invite rules and limits are premium features available with Hub premium and enterprise subscriptions.
1. Apply filters to find your ideal participants
You can filter and search your panel by any combination of criteria you’re interested in. Filters are a really powerful way of pinpointing the right set of participants for a given study. You can filter on the default fields in Hub or any custom fields you've created.
- Default fields: Filter by research activity such as project history, last applied date, last invited date, last participated date, or incentives earned over a given period. Or else, filter by participant information such as date added to panel, or name or email fields if you're looking for a specific user.
- Custom fields: Filter on any customer data you have stored in a custom column within Research Hub.
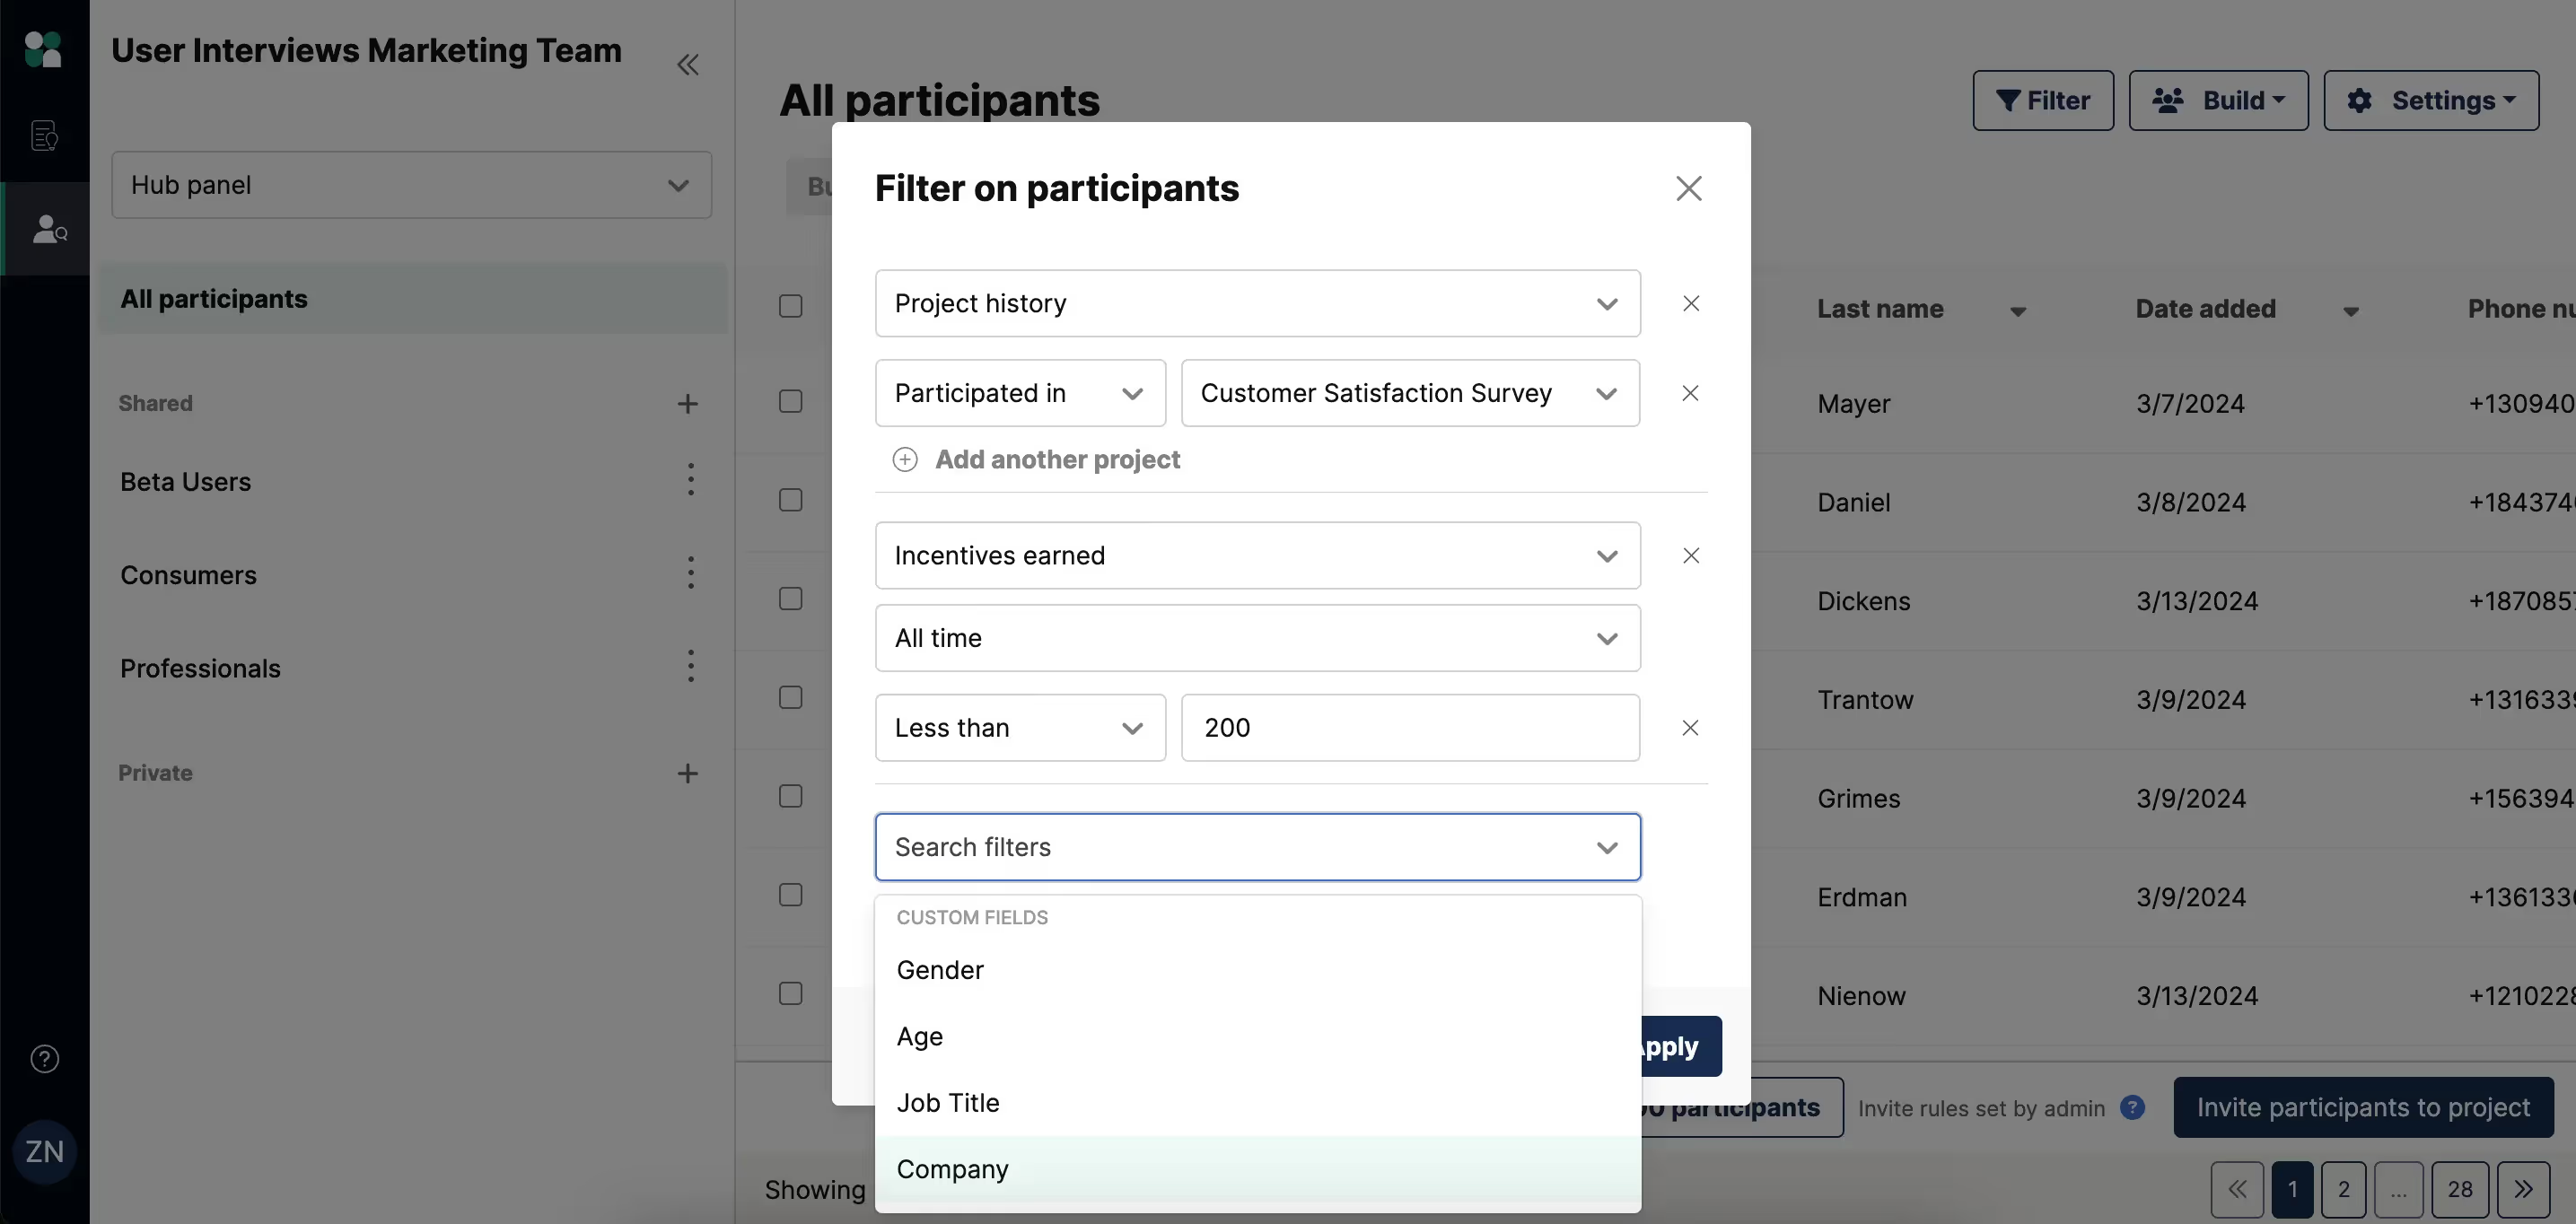
💡 If you have a range of recruiting criteria, try applying multiple filters at once. You can also save your most useful filter settings to reapply in future.
Learn more about filtering Hub participants in your panel.
2. Create labels to group your participants
A second way to manage your panel is with labels. Labels allow you to group together participants based on flexible criteria, and easily access those groups in future.
Say for example you have ten customers participating in a pilot, and you want to create a label in order to group them together. Start by creating a new label by clicking the "Edit labels" option from the Settings dropdown. In this example, we might create a new label called “pilot cohort”. Then, select those ten participants in your database, click the “Add label” option from the Bulk actions menu, and select the label you want to associate with those users.
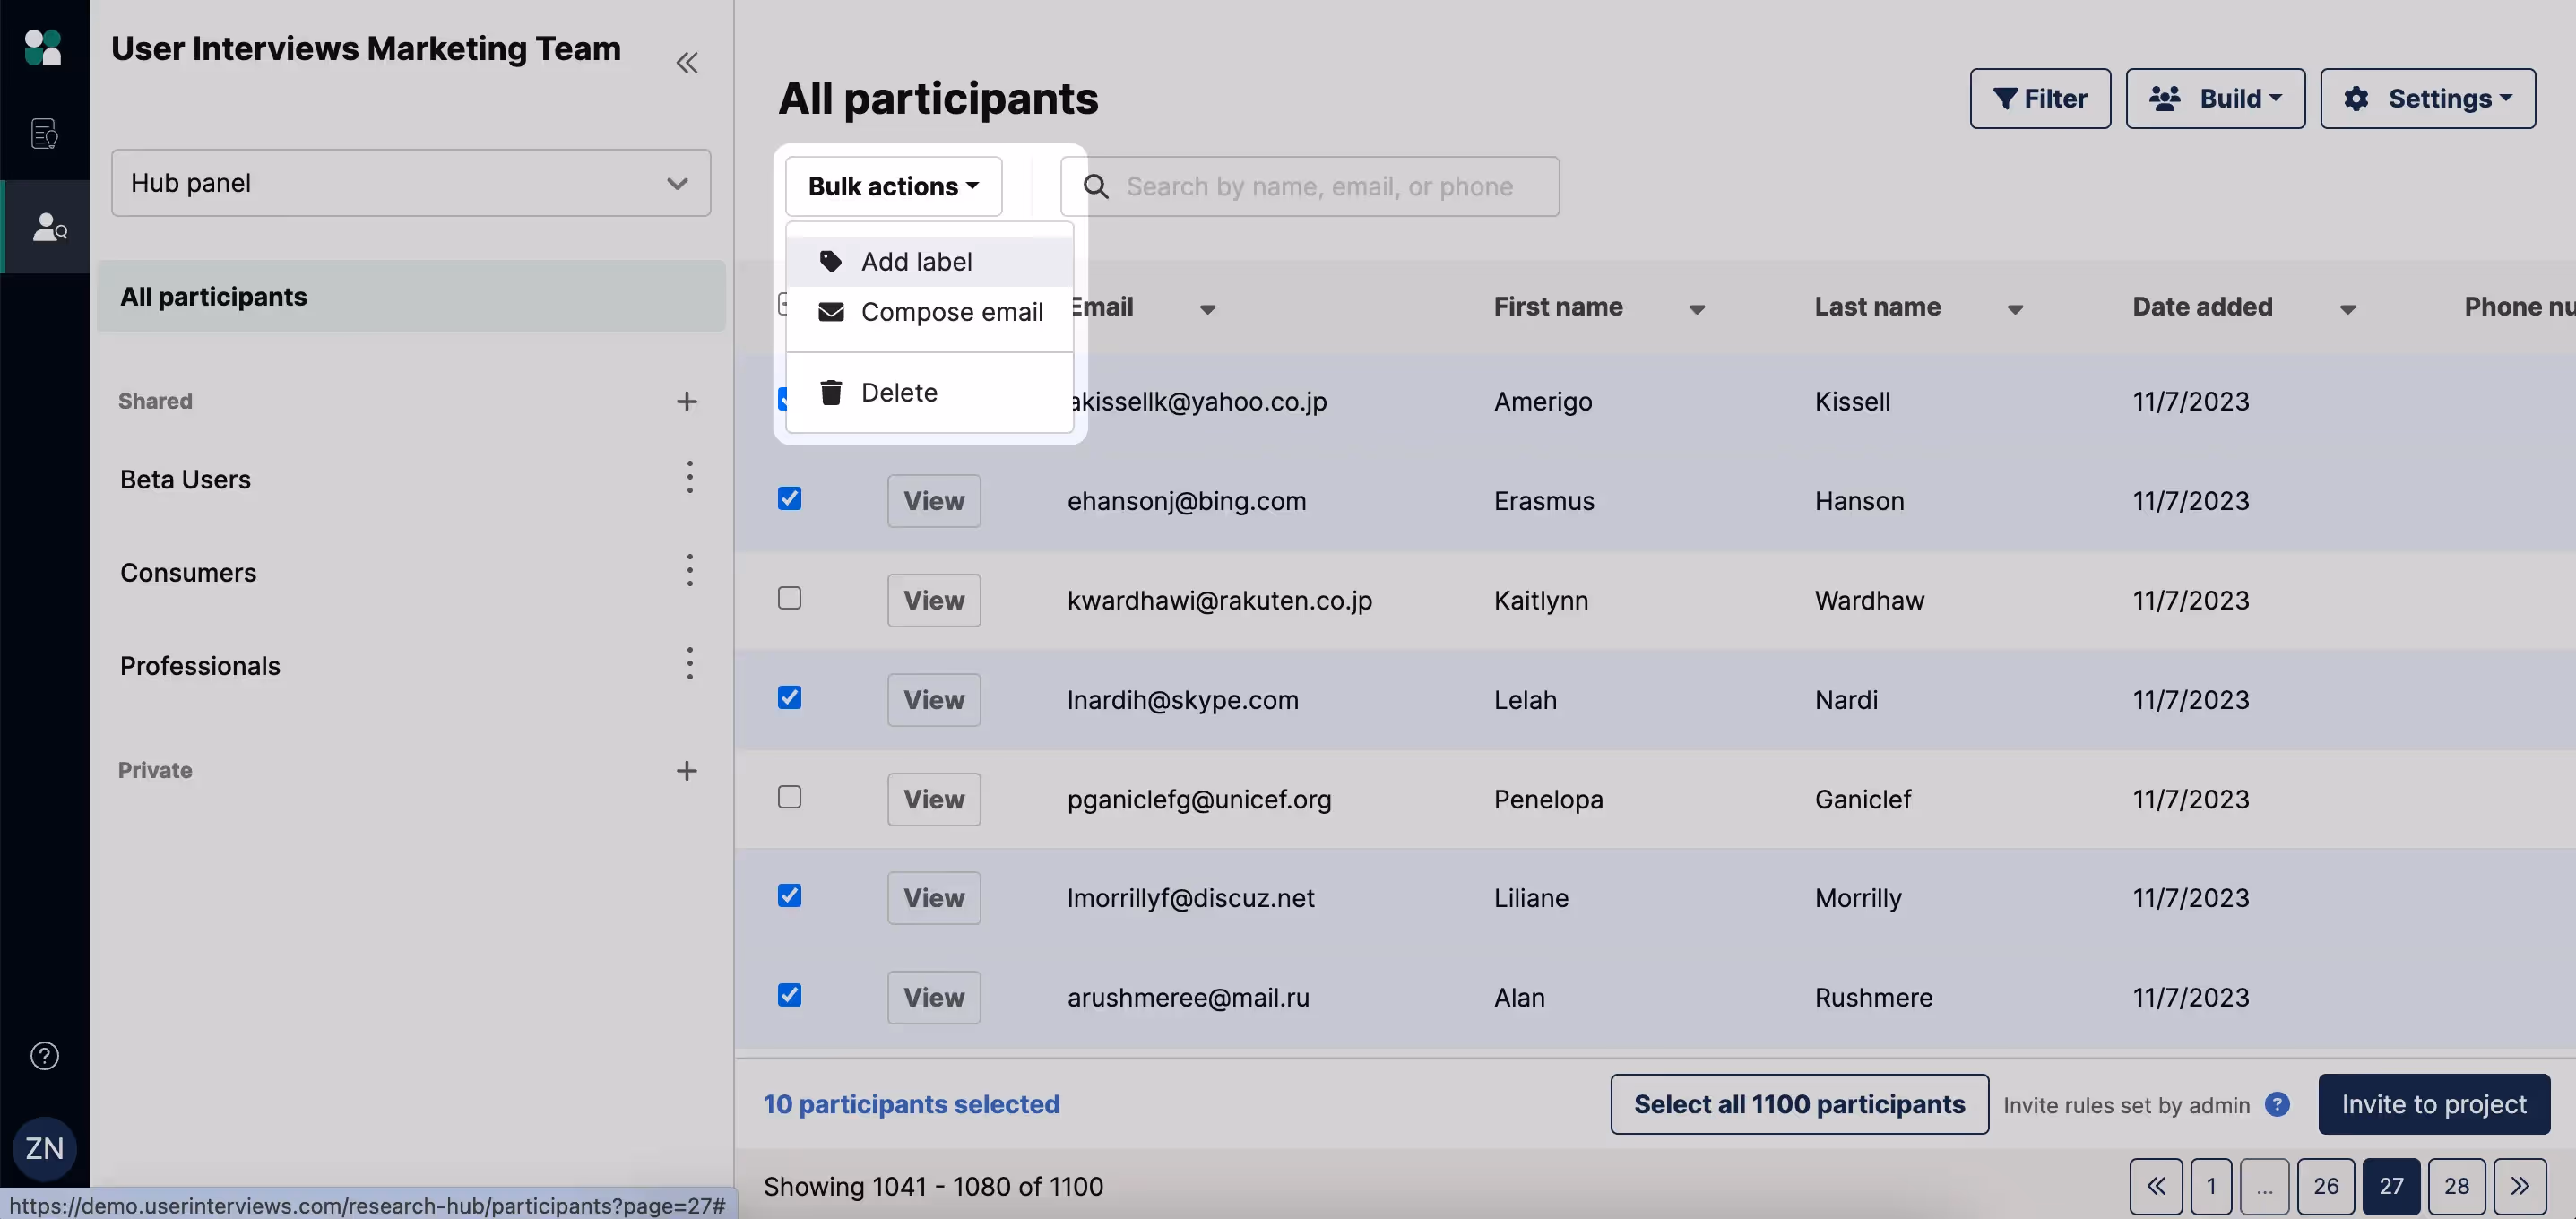
Once you've created labels, they will appear as a column in your Hub panel and you can filter by them. Try using labels and filters together to discover highly targeted populations to invite to niche studies.
Learn more about labeling participants in your panel.
3. Use invite rules to set guardrails on recruitment
When recruiting real customers, it’s important that all researchers in your team are following internal guidelines and best practices. That’s why we’ve created invite rules, which allow you to set guardrails on which customers can be contacted for research, and how often they can participate.
Note that invite rules are a premium feature only available with Hub premium and enterprise subscriptions.
Set your rules up once, and have them work continuously in the background to ensure you can sustain a healthy panel. You can get as granular as you need to with your invite rules, and create combinations based on activity criteria, participant info, or custom fields.
💡 Research Hub tracks participation for you: who’s added to which studies, who participates, how much they’ve earned in incentives, and so on. All this information is available as you filter your panel and set invite rules.
Examples of invite rules you might set
You will know the most appropriate limits to set for your audience. Examples of rules you might set include only inviting participants who:
- Were last invited more than 30 days ago
- Last applied more than 90 days ago
- Did not participate in a specified study
- Have earned less than $200 in incentives this year
- Joined your panel after a specified date
- Fit your ideal participant profile based any custom fields
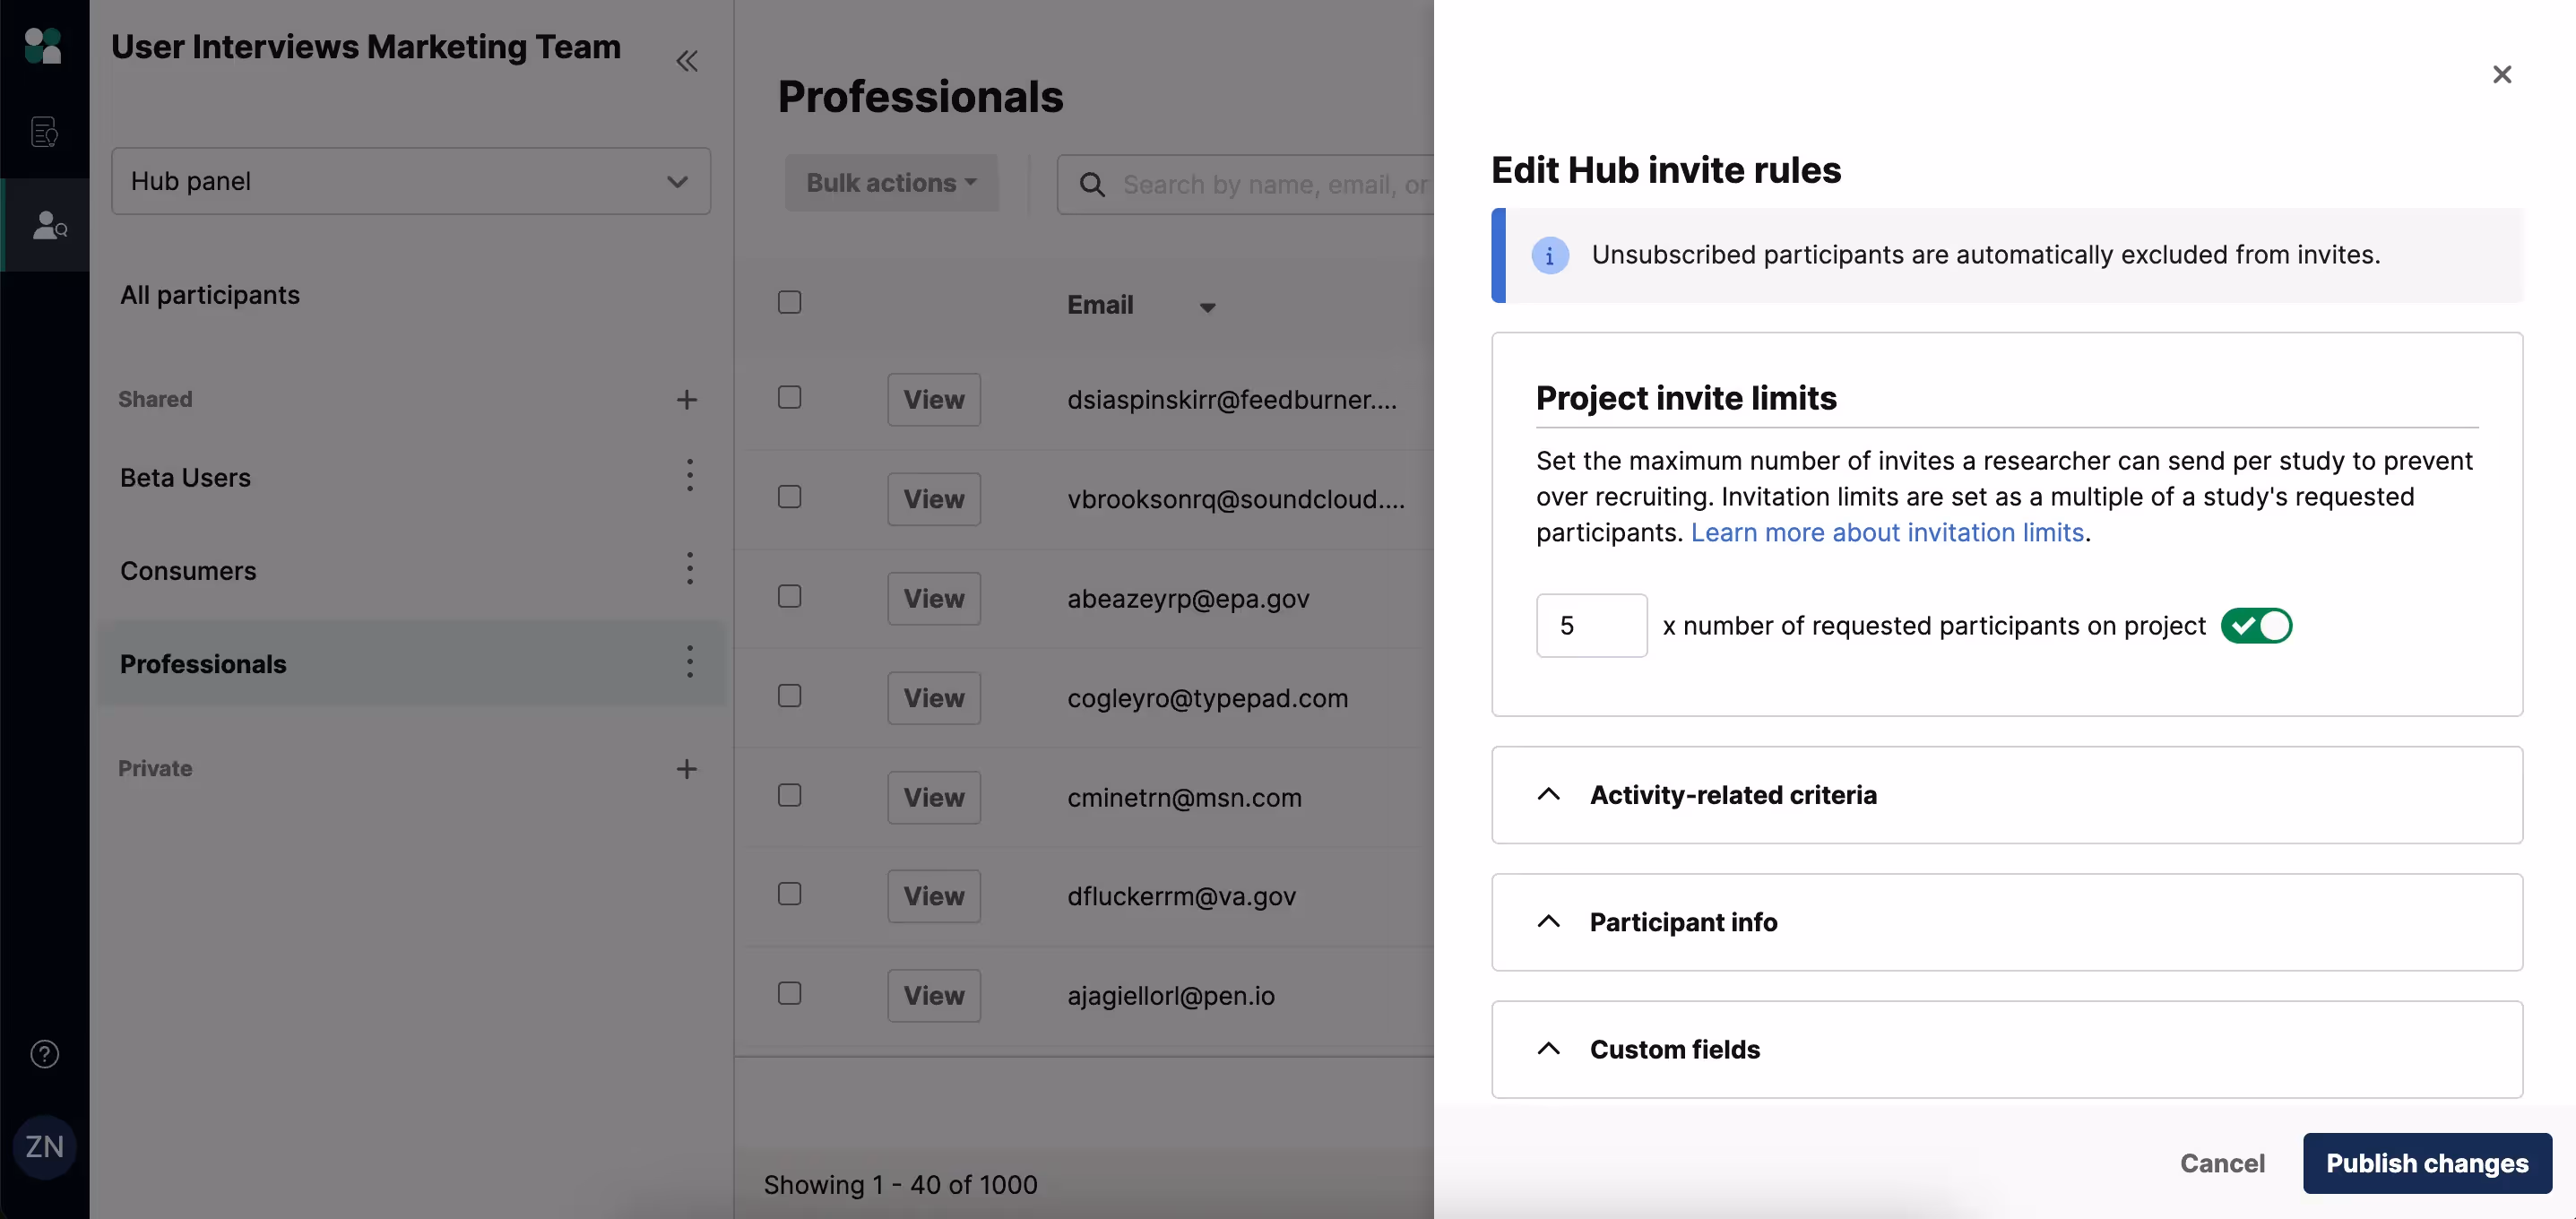
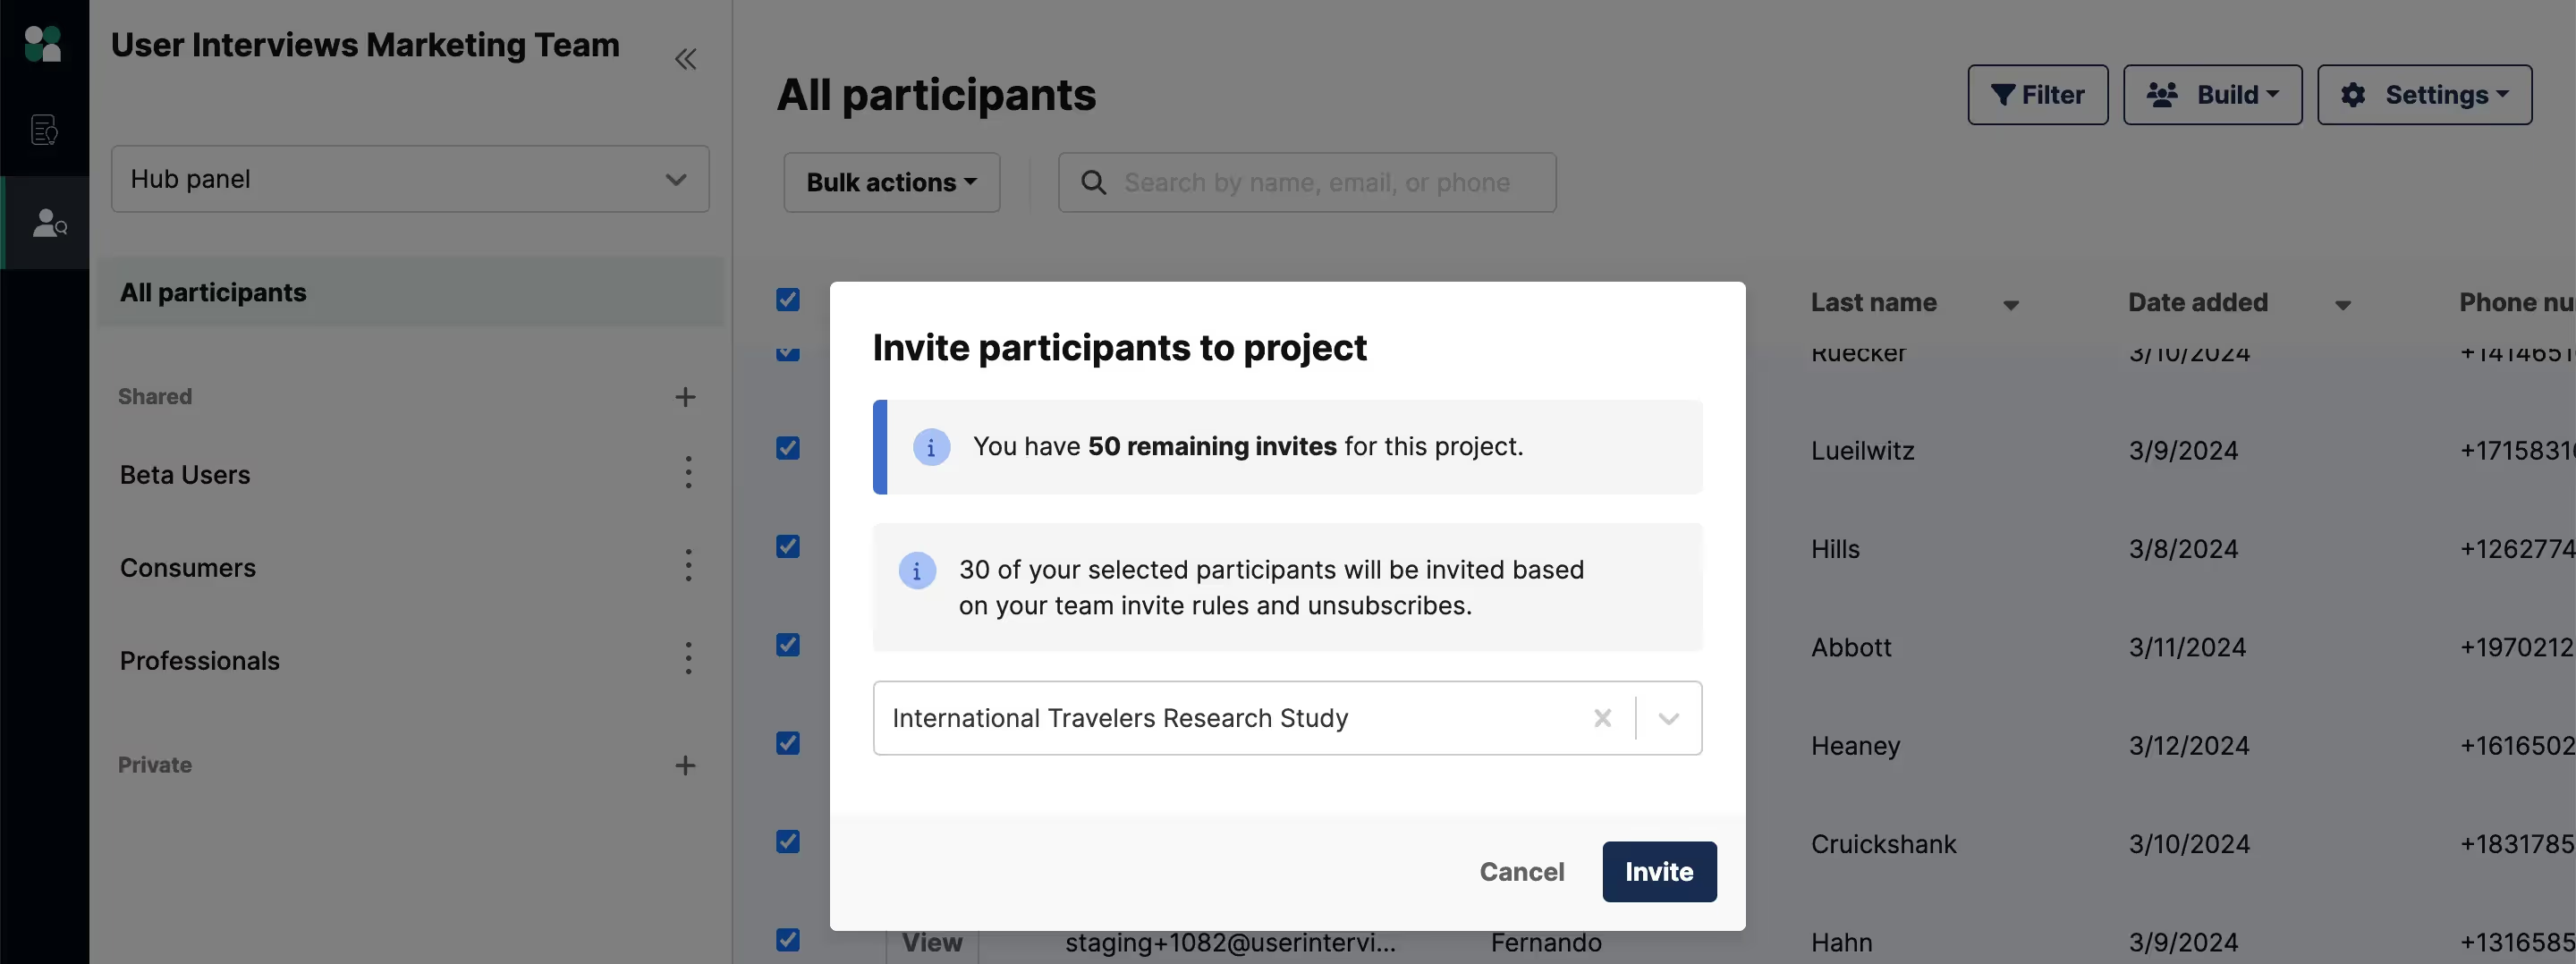
Your rules will be automatically applied when anyone on your team invites participants to a study. We’ll show how many participants are available to invite based on your Hub invite rules, active filters, and unsubscribes in the invite modal.
💡Unsubscribed participants are automatically excluded from invites — you do not need to set subscription status as an invite rule.
Learn more about managing your invite rules.
4. Use segments to retarget groups of participants
You can use segments to easily save and retarget custom groups of participants based on shared criteria. This functionality was previously known as “saved filters”. Segments are dynamic, which means that participants will automatically get added and removed from your segment, so it always reflects the most up to date group.
There are two ways to create segments:
- You can create a segment directly from the left panel by clicking the “+” sign. Give your segment a name, then proceed to define the criteria for that segment.
- Alternatively, start by applying filters to your panel. Once you’ve filtered down to the group you want, click the “Save as new segment” button at the top of your filtered list, and proceed to give your segment a name.
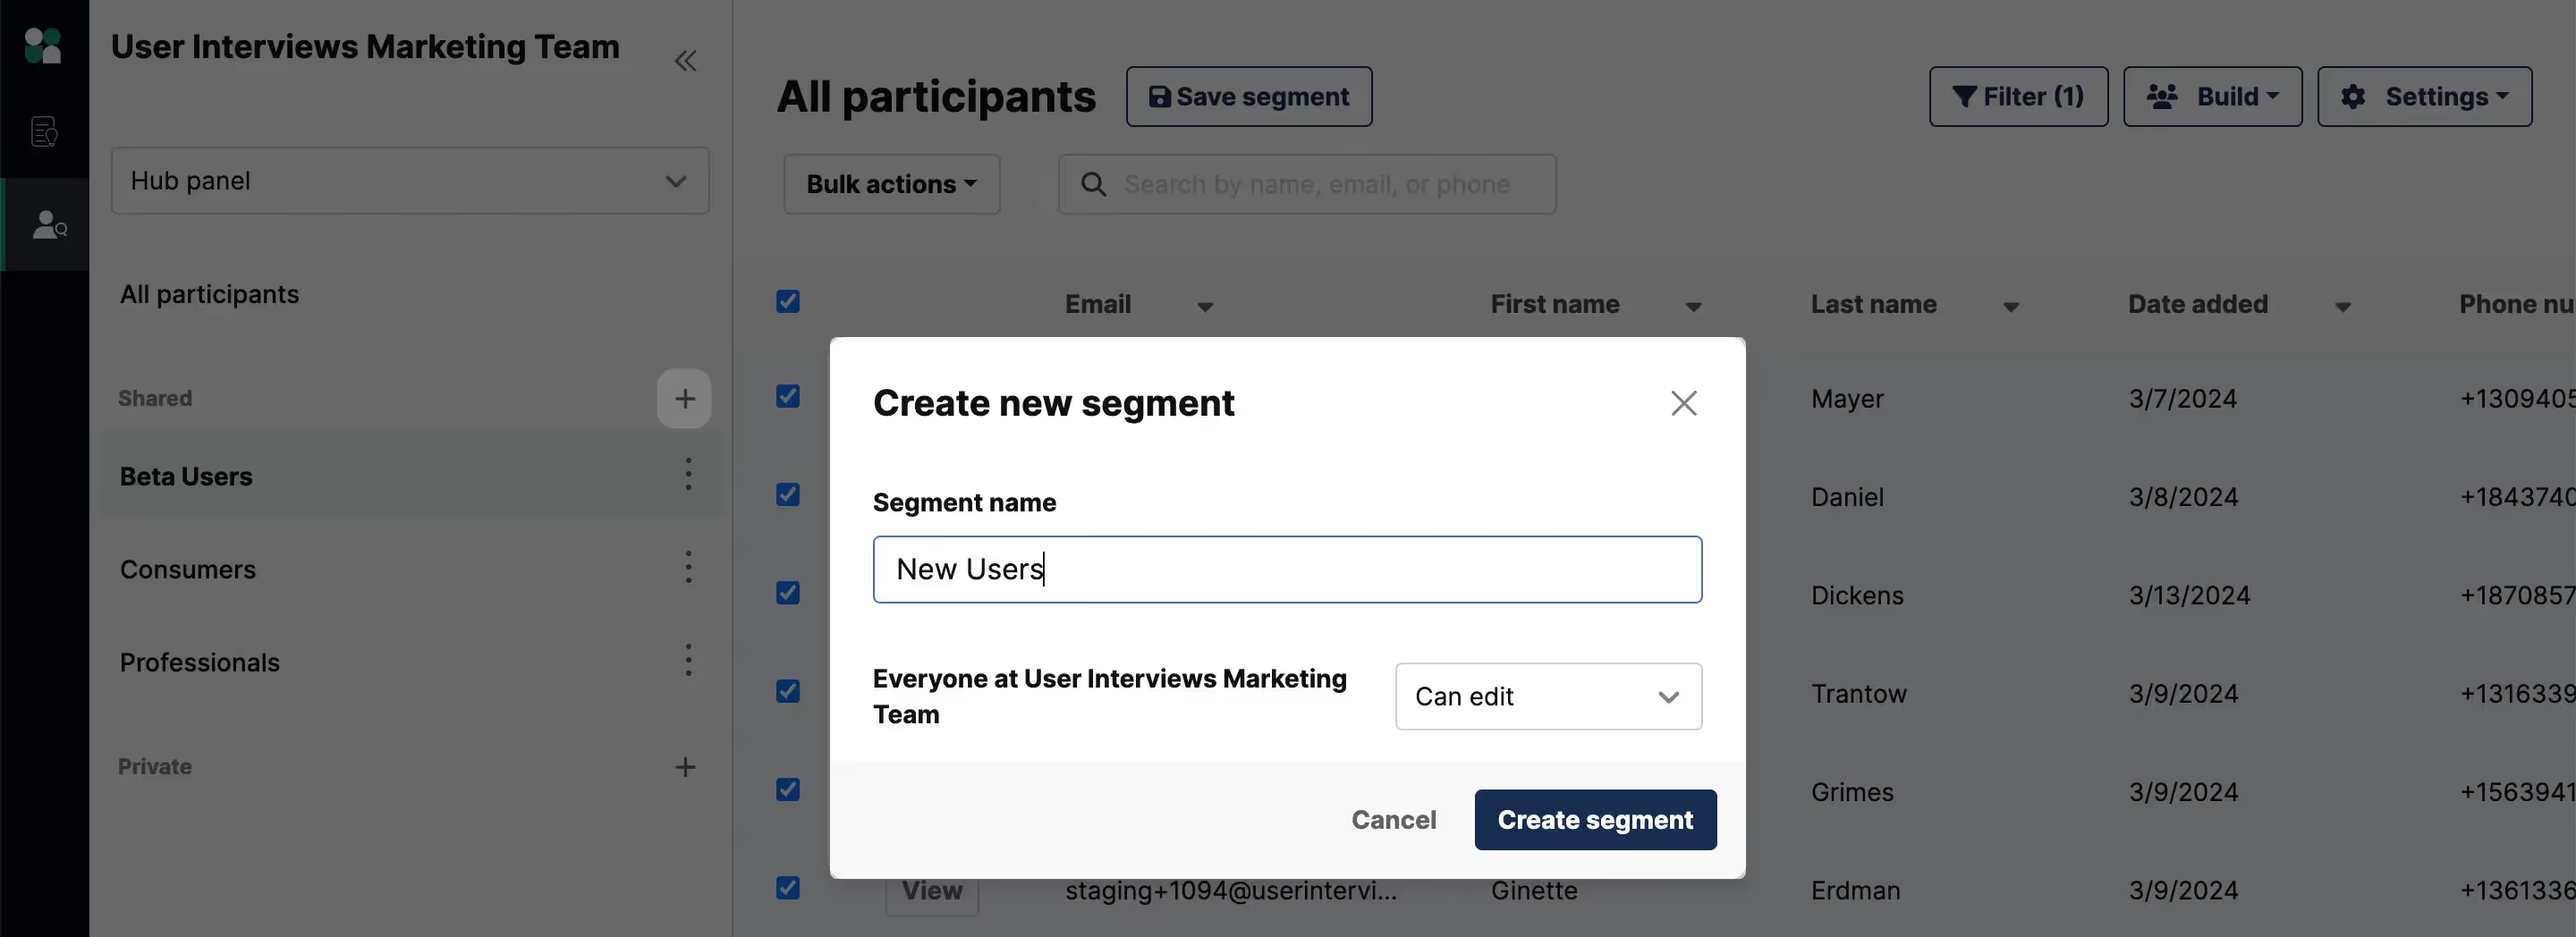
You can also set permissions for your segment to define whether your teammates can view or edit your segment, or if you want to keep it completely private so as not to clutter the workspace.
Learn more about how Hub segments work.
Additional tips for managing your panel
Research Hub’s powerful panel management features rely on maintaining up-to-date customer data. Luckily, we make it easy to do just that. Here are a couple of tips to keep your customer data as fresh and complete as possible.
- Updating participant records via CSV: When you upload a new CSV file of participant data to a project, or to the Hub panel, our system will look for an email address match. If a match is found, that participant’s record in Hub will be refreshed with the latest data from the CSV file. Learn more about how columns are updated.
- Editing a participant record manually: You can edit a participant’s record manually by clicking on the little blue user + pencil icon next to their email address. You can edit any participant info or custom fields, but note that you cannot edit activity records which are automatically tracked.
- Importing screener survey responses: You can gather a lot of useful information about customers through their responses to screener surveys, and some of that information may be valuable to future recruitment efforts. Export participant data from your project, clean it to include only the columns you’re interested in, and re-upload it as a CSV to enrich your Hub data. Learn more about how to export participant data from a project.
Keep learning with our Research Hub onboarding series
Congratulations on organizing and managing your participant community with Research Hub. Next up, let’s look at Part 3: Customizing the Hub Experience for Your Participants.
📖 This guide is part of a 4-part onboarding series on getting started with Research Hub. Check out the other guides here: Get Started With Research Hub


