
Who is this article for?
🗣️ All researchers (both admins and users)
⭐ Recommended for all User Interviews plans
Launching a new project in User Interviews takes just a couple of steps. Start by creating a new project draft, follow our project setup flow to make your selections, and launch when you’re ready.
You can also schedule a demo with our team to learn more, or try launching a project on your own! Start building a project here and learn more about what happens after you launch your project here.
⭐️ New to User Interviews? Get up-and-running fast with our Quick Start Guide on the User Interviews Academy.
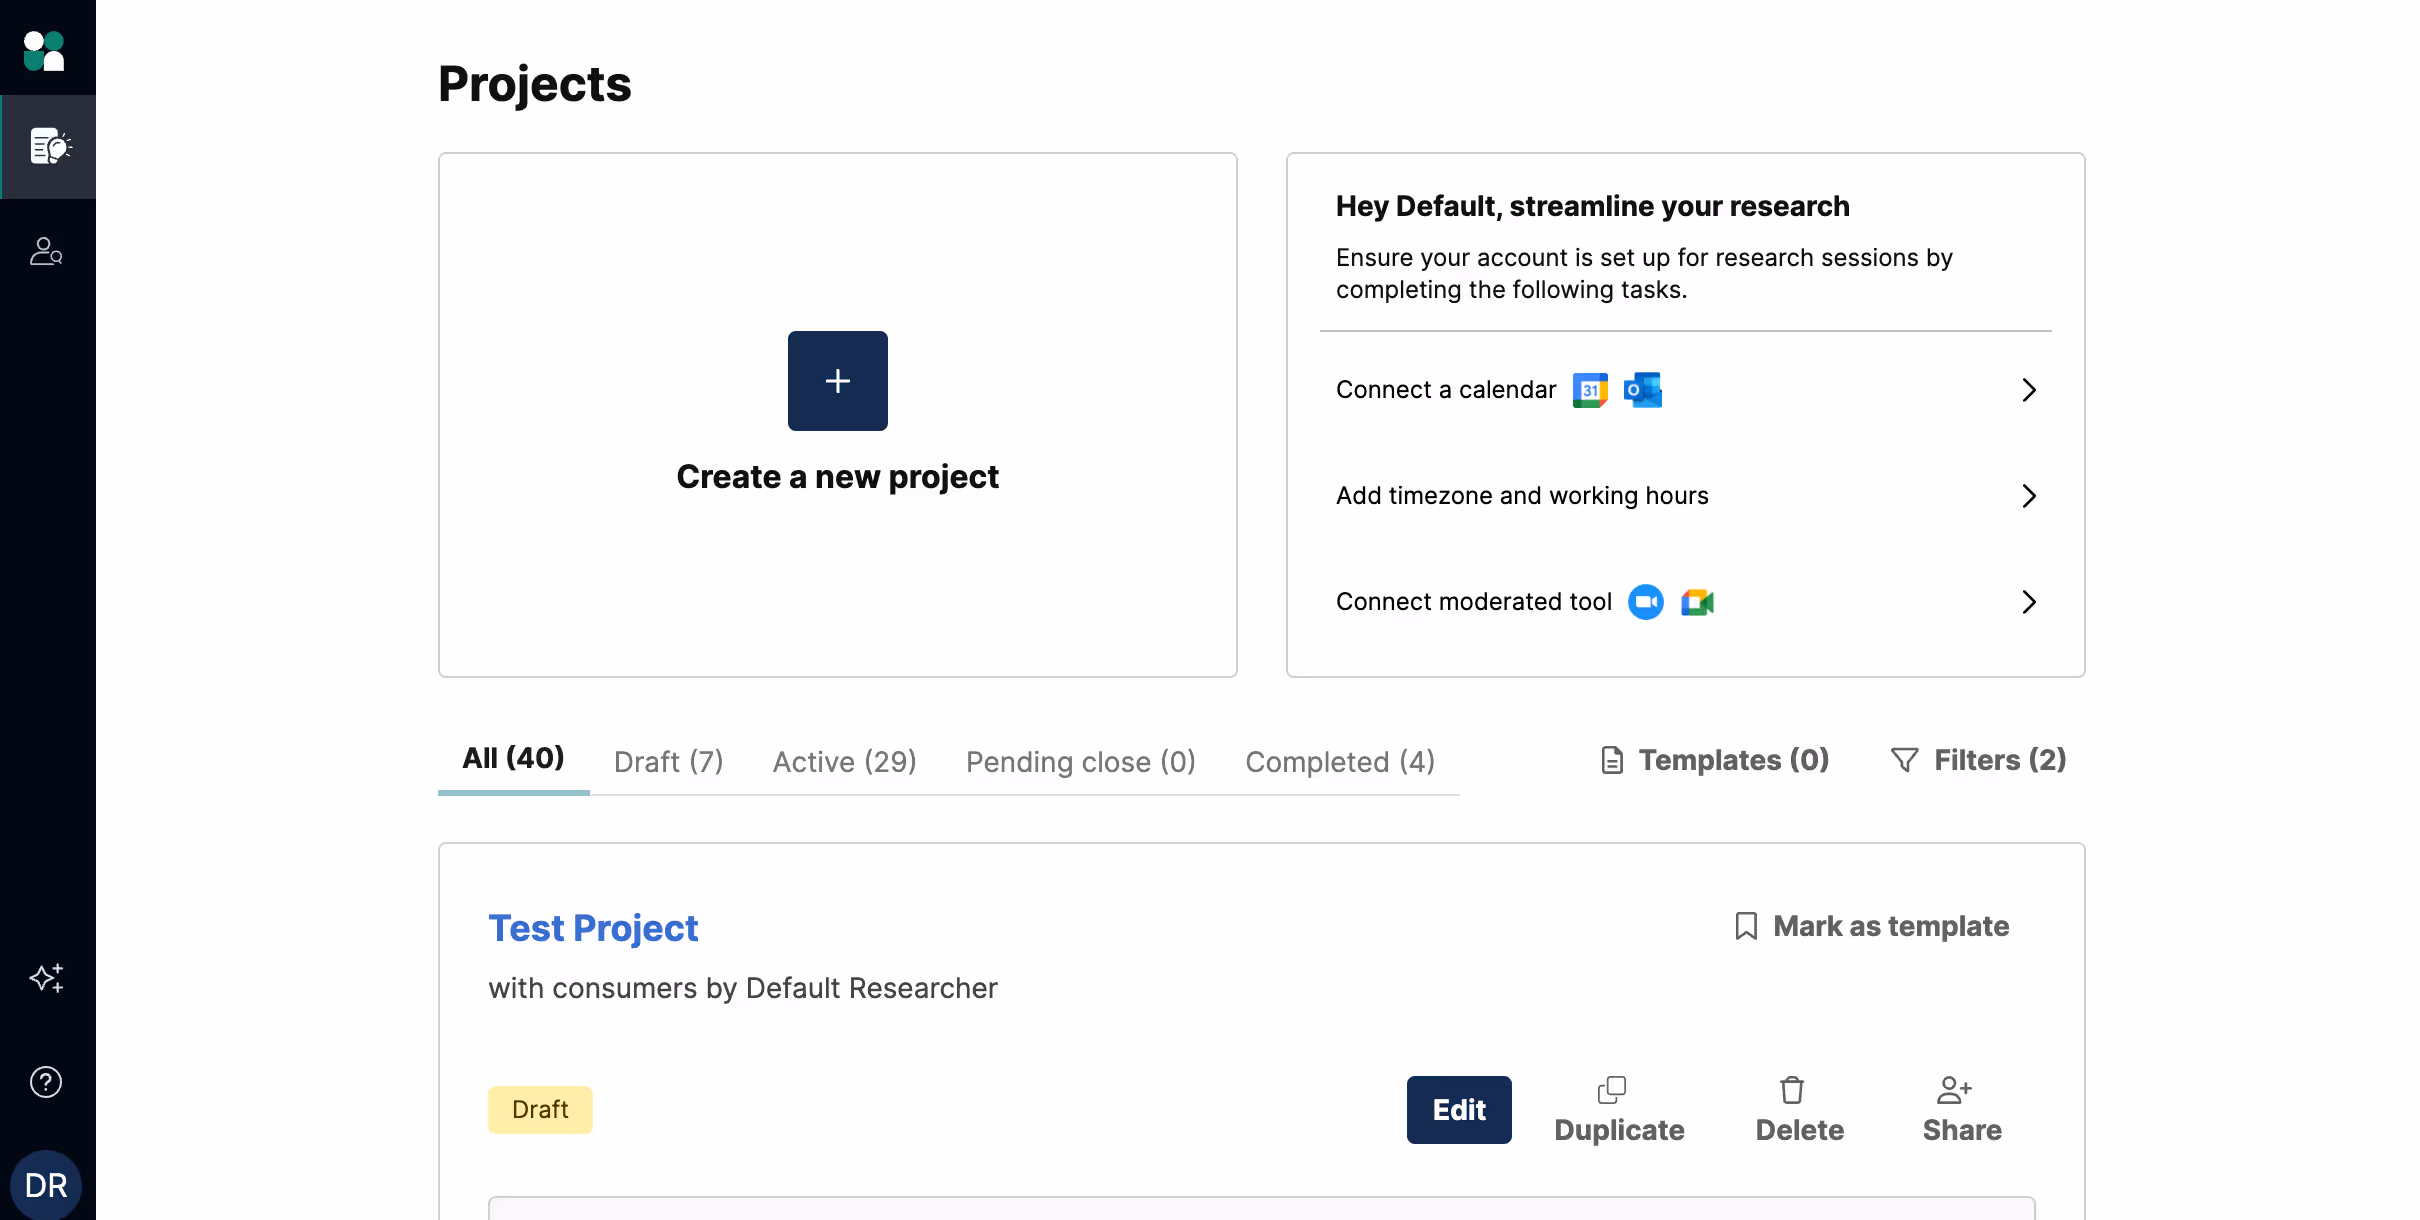
Step 1: Create a new project
First, log into your User Interviews workspace. To create a new project, you can either:
- Click the button with the plus sign to create a new project from scratch
- Click the “Templates” button to create a project from one of your team’s existing templates
In this flow, we’ll click the + button to create a new project from scratch.
Fill out your internal project title and description. This is a great place to add a PO number, quota or persona information, a group number, etc. Only your team and the UI team see this title, so name your study whatever best helps you recognize it. Then click "Create project".
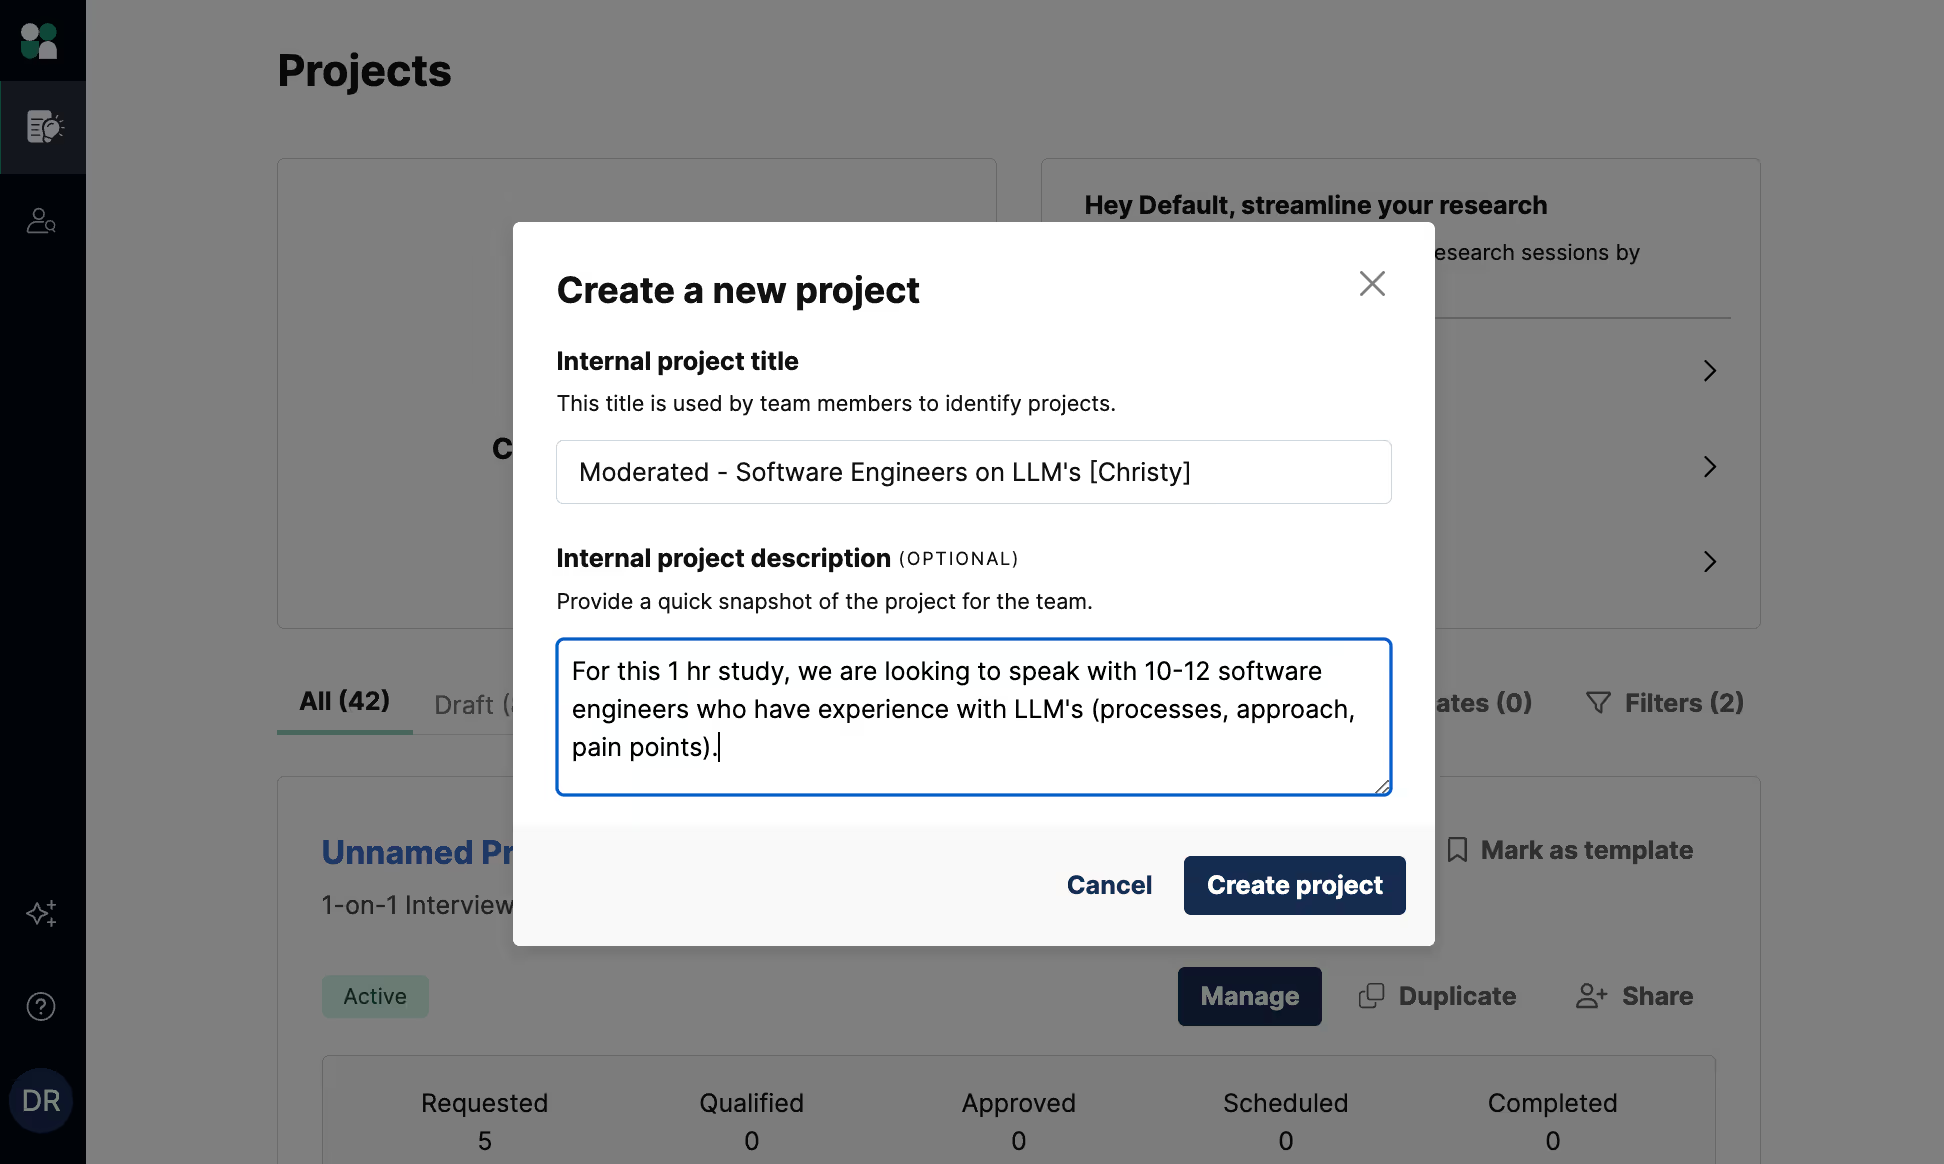
Next, we’ll move through our project set up flow. For instructional purposes, we’ll be showing an example recruiting from UI's panel throughout this guide.
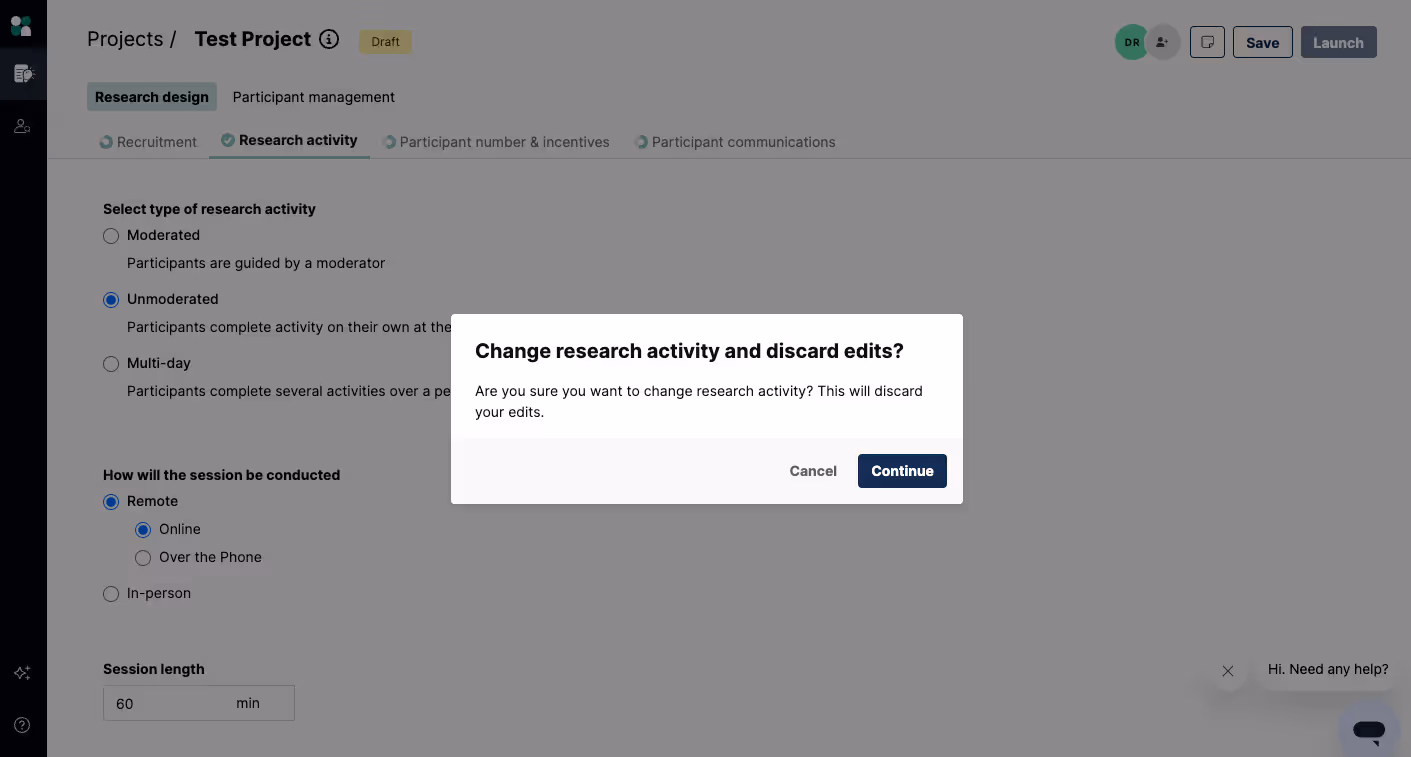
If needed, you can adjust your selections at any time as you move through project setup. Note that choosing a different participant source, study type, or study format requires different fields specific to those selections. Your current selections will be reset, and you’ll be prompted to click “Continue” to confirm.
💡Researcher Tip: You can also use this flexibility to create a base project template and duplicate it to use for multiple types of research. For example, create a template for your recruitment criteria (e.g. software engineers living in Cleveland, OH between 25-50 who work at XYZ Company) and use that template for whatever research project you wish (Unmoderated, Moderated, etc.)
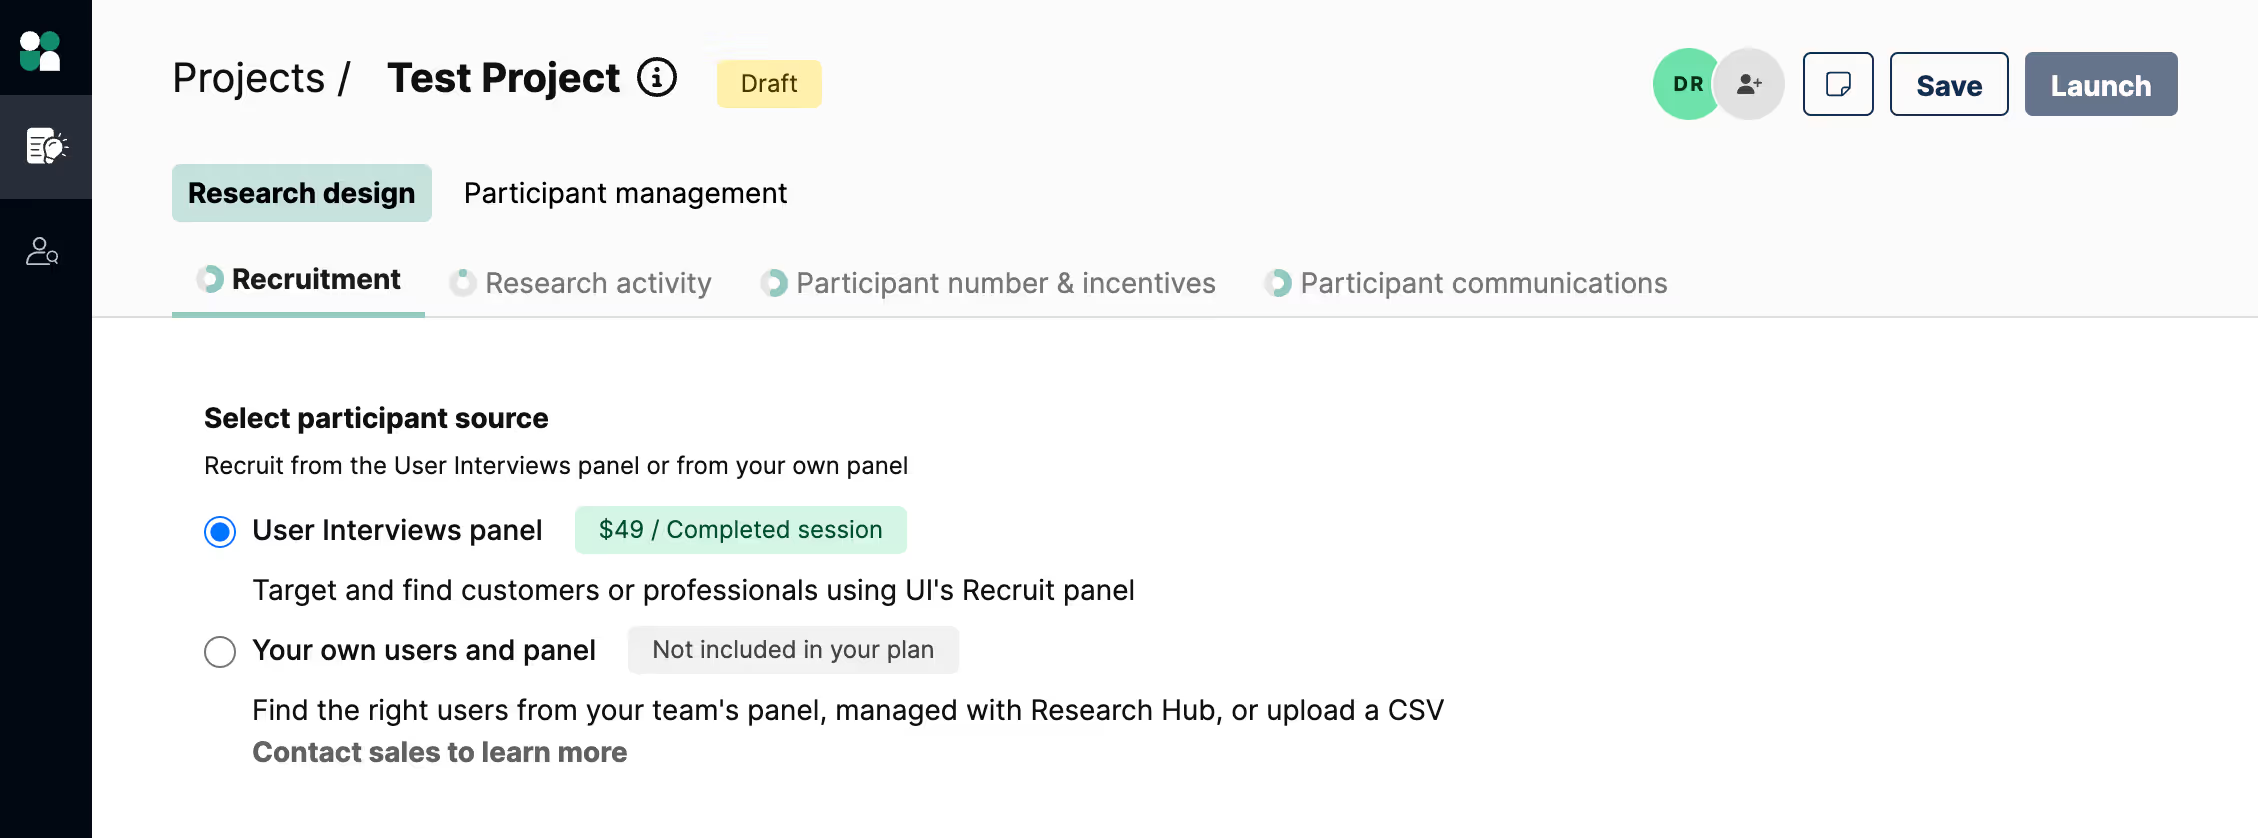
Step 2: Recruitment details
Participant source
Recruit from the User Interviews panel or from your own panel
- User Interviews panel: Target and find consumers or professionals using UI's Recruit panel
- Your own users and panel: Find the right users from your team's panel, managed with Research Hub, or upload a CSV
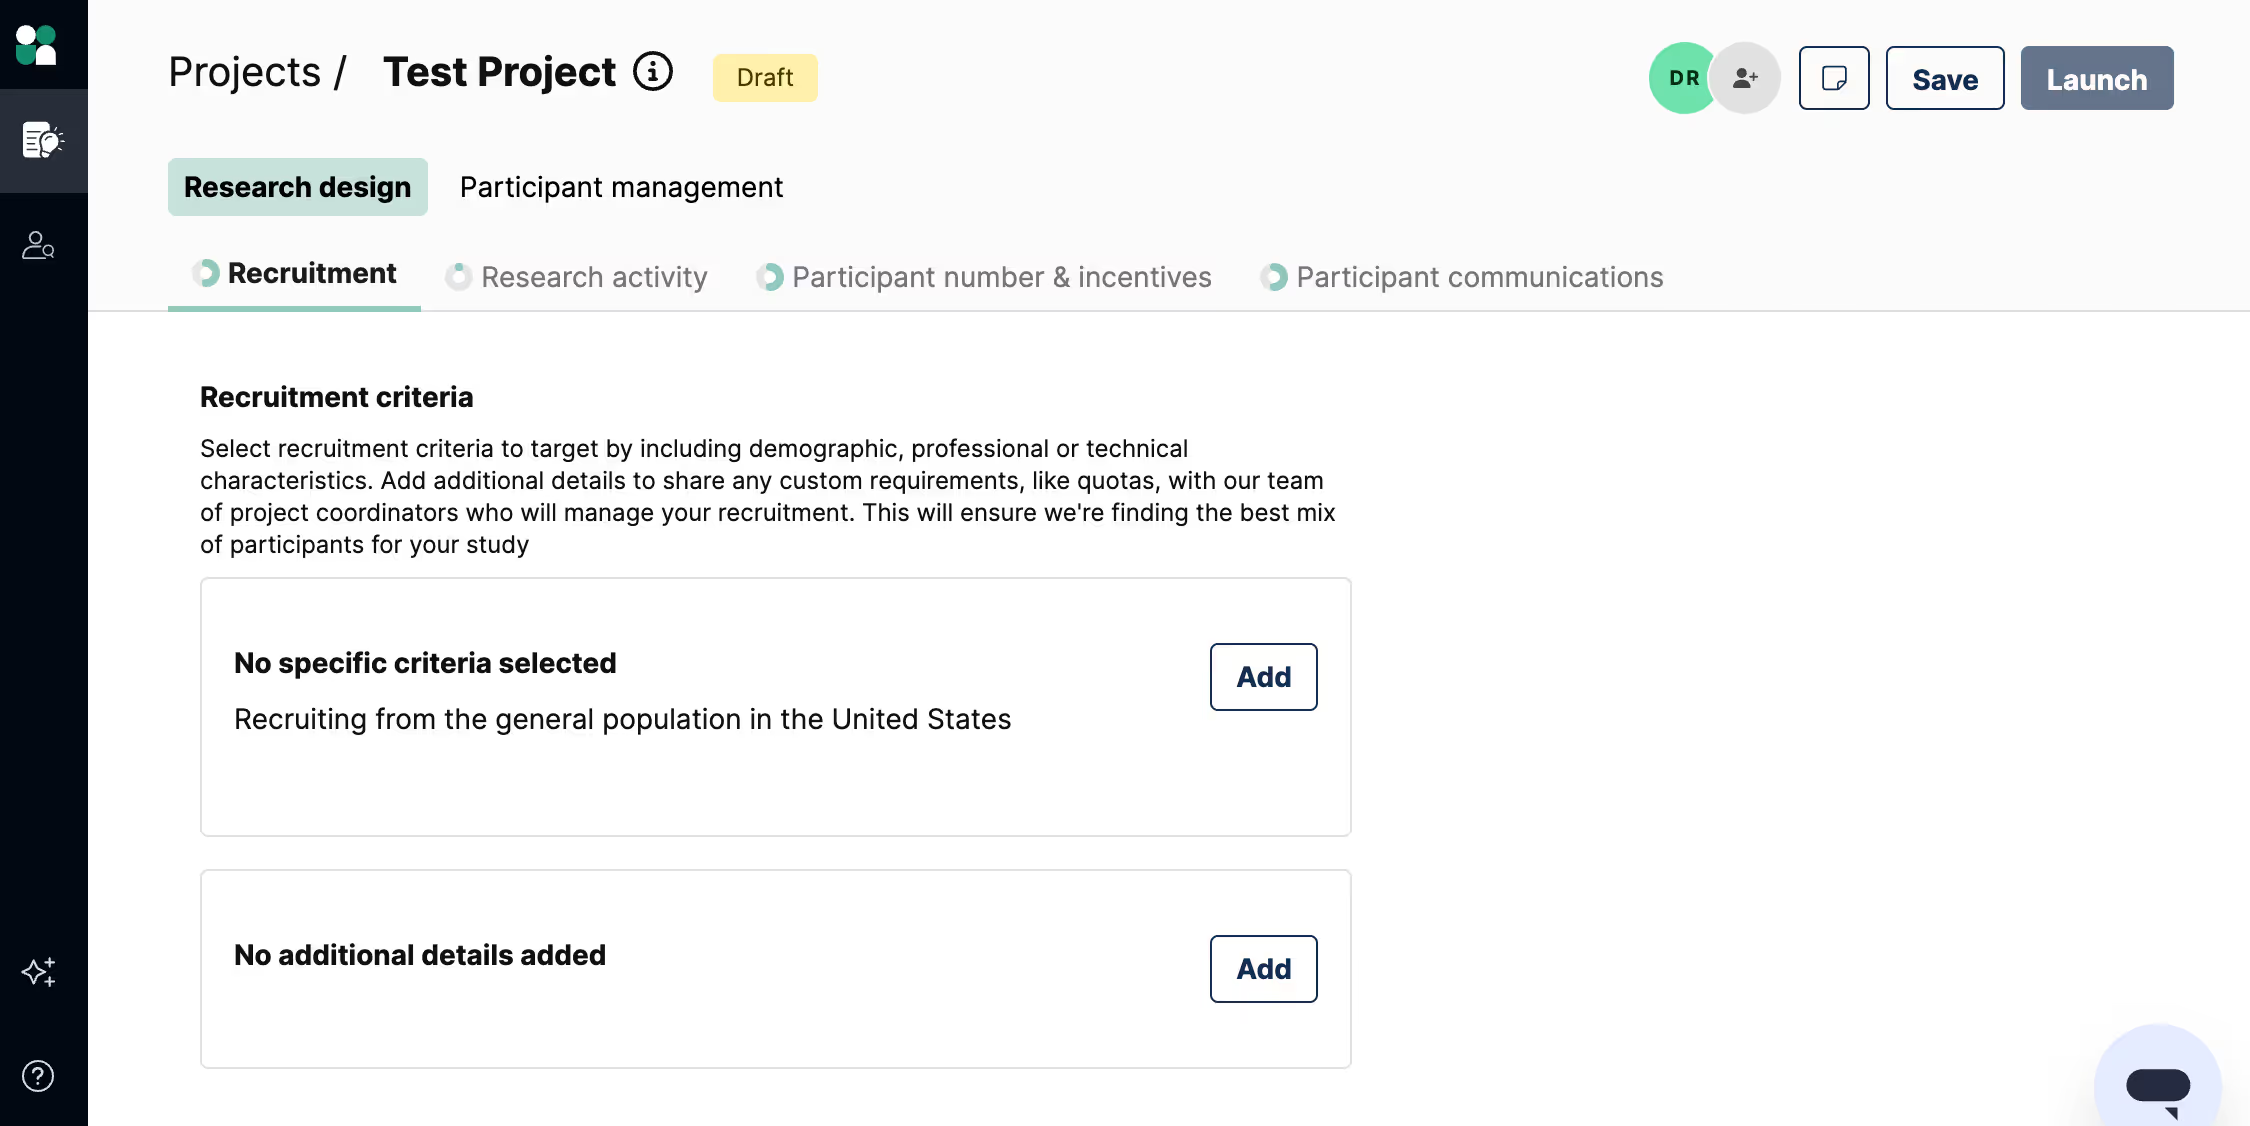
Recruitment criteria
Click on the ‘Recruitment criteria’ card to set location, demographic, professional, and technical targeting criteria. For remote studies, specify which cities, states, or countries we should recruit in. If a specific location doesn't matter, feel free to select all countries.
By default, we'll recruit from the general population. Add criteria from the options below to be more specific about who you want us to recruit. You can target participants based on:
Demographic characteristics
- English language proficiency
- Other language(s) spoken fluently
- Age
- Gender
- Ethnicity
- Level of education
- Employment status
- Type of income
- Household income
- Marital status
- Children
- Living situation
- Homeowner
- Pets owned
- Disabilities

We recommend only choosing necessary characteristics and using the "key characteristic" toggle to flag key criteria. If you have flexibility with demographic criteria, consider either selecting more options for each section or leaving it blank to not narrow on those criteria at all. This helps us cast a wider net when recruiting. Often, participants may be an excellent fit for your study, aside from one demographic criterion, so having some wiggle room from the start with basic characteristics means you'll likely have more participants to choose from.
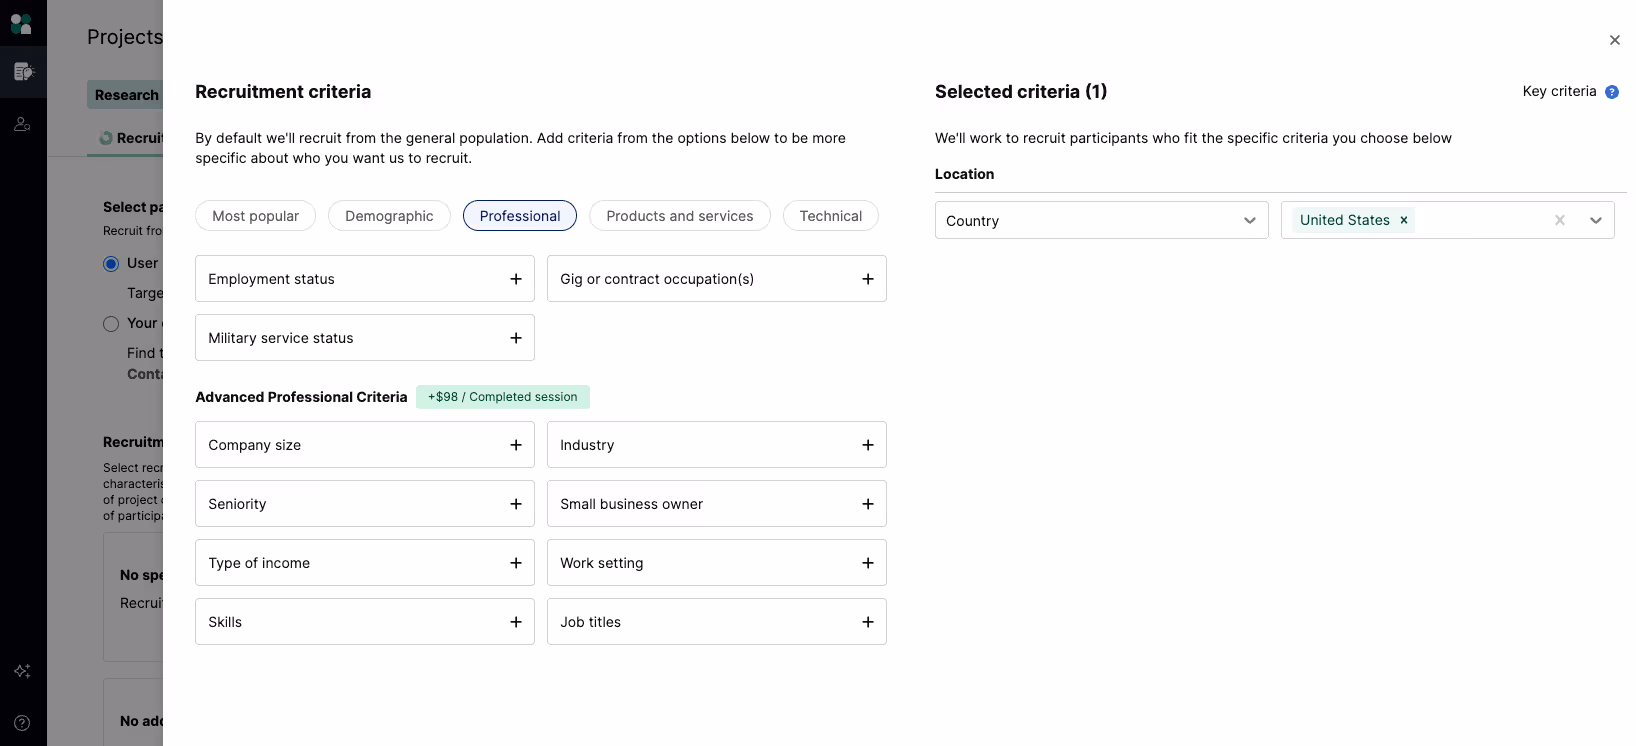
Professional characteristics
- Employment status
- Military service status
- Gig or contract occupation(s)
- Work setting
- Company size
- Industry
- Seniority
- Small business owner
- Type of income
- Skills
- Job titles
⭐ You can choose to target by our standard set of criteria, or we also offer advanced professional criteria such as company size, industry, skills, and job titles (reference screenshot below). Check your subscription for pricing details.
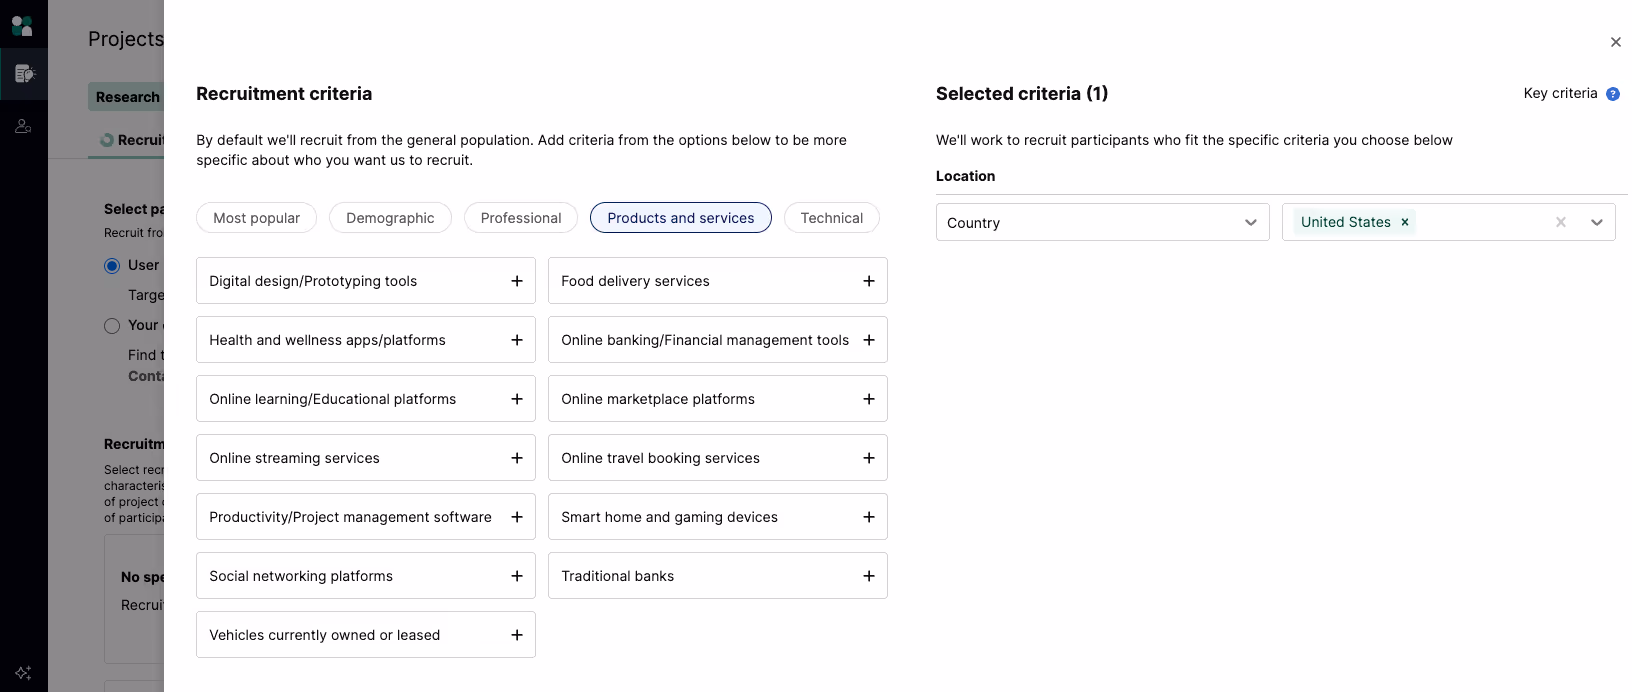
Products and services characteristics
- Digital design/Prototyping tools
- Health and wellness apps/platforms
- Online learning/Educational platforms
- Online streaming services
- Productivity/Project management software
- Social networking platforms
- Vehicles currently owned or leased
- Food delivery services
- Online banking/Financial management tools
- Online marketplace platforms
- Online travel booking services
- Smart home and gaming devices
- Traditional banks
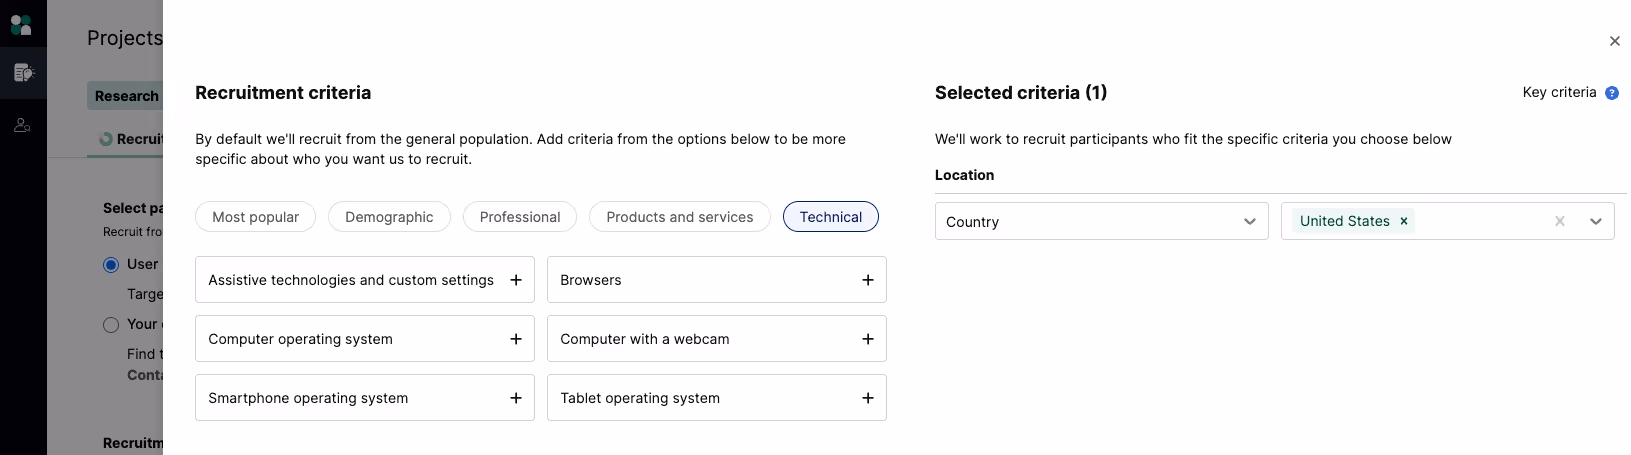
Technical characteristics
- Assistive technologies and custom settings
- Browsers
- Computer operating system
- Smartphone operating system
- Tablet operating system
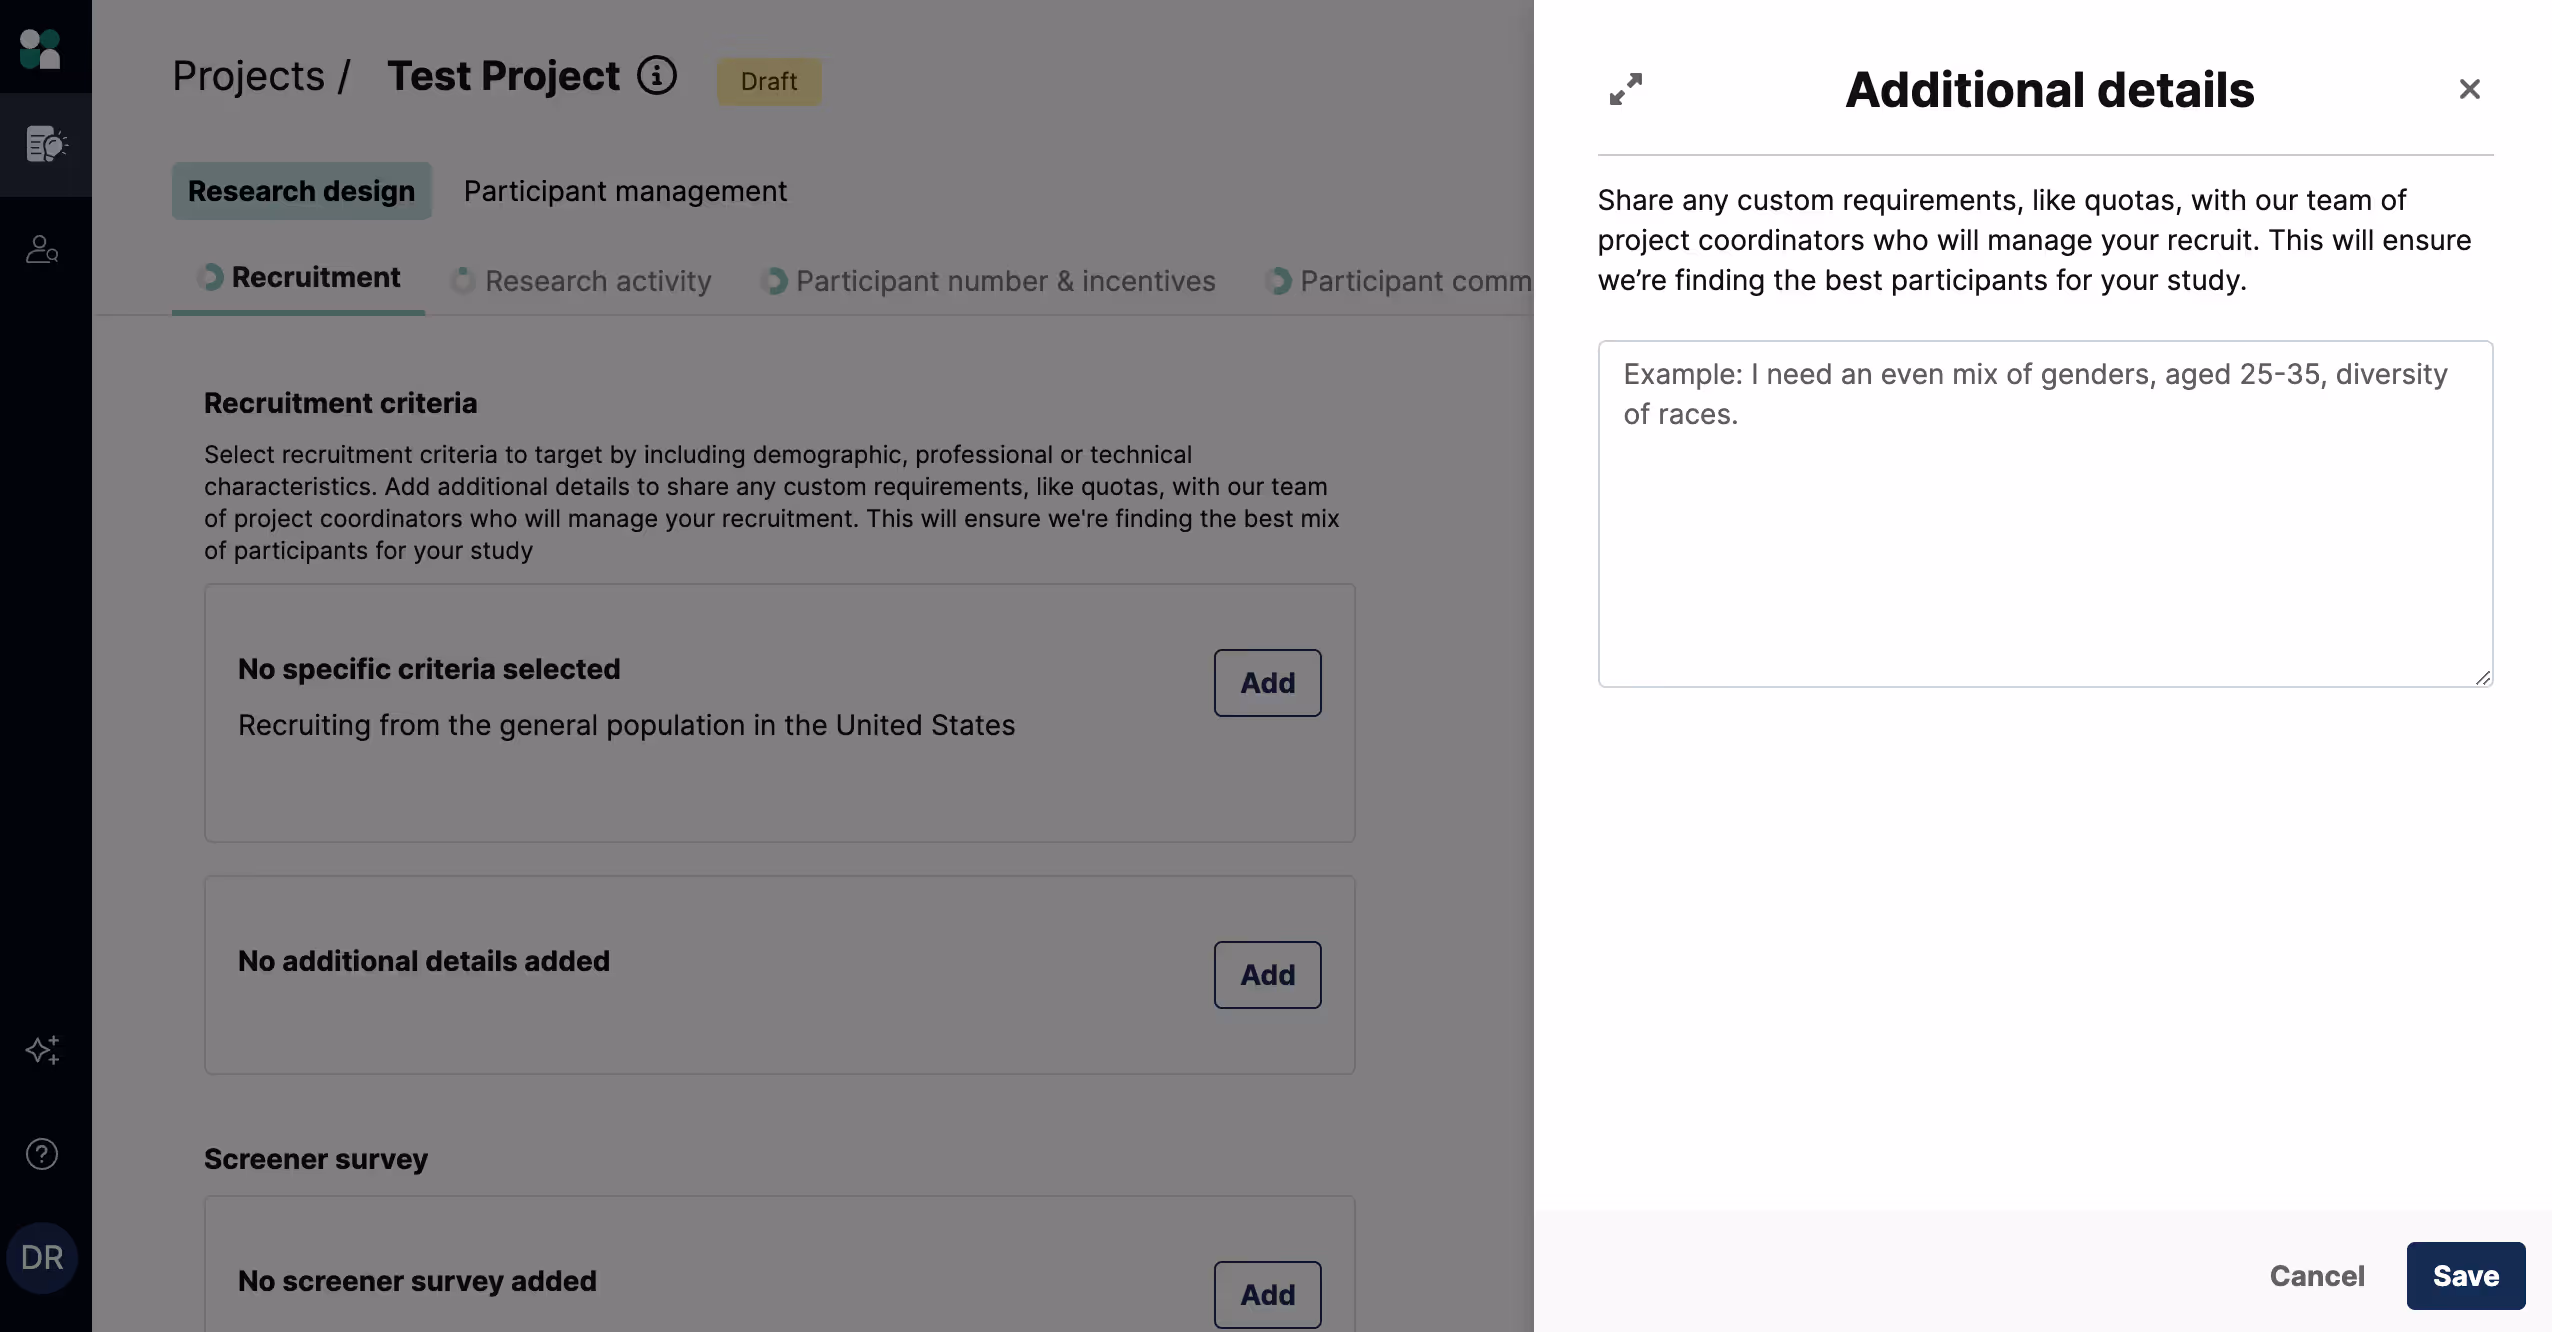
In addition to selecting recruitment criteria, you can also add additional details to share any custom requirements (such as quotas) with our team of project coordinators who will manage your recruitment. This will ensure we’re finding the best mix of participants for your study.
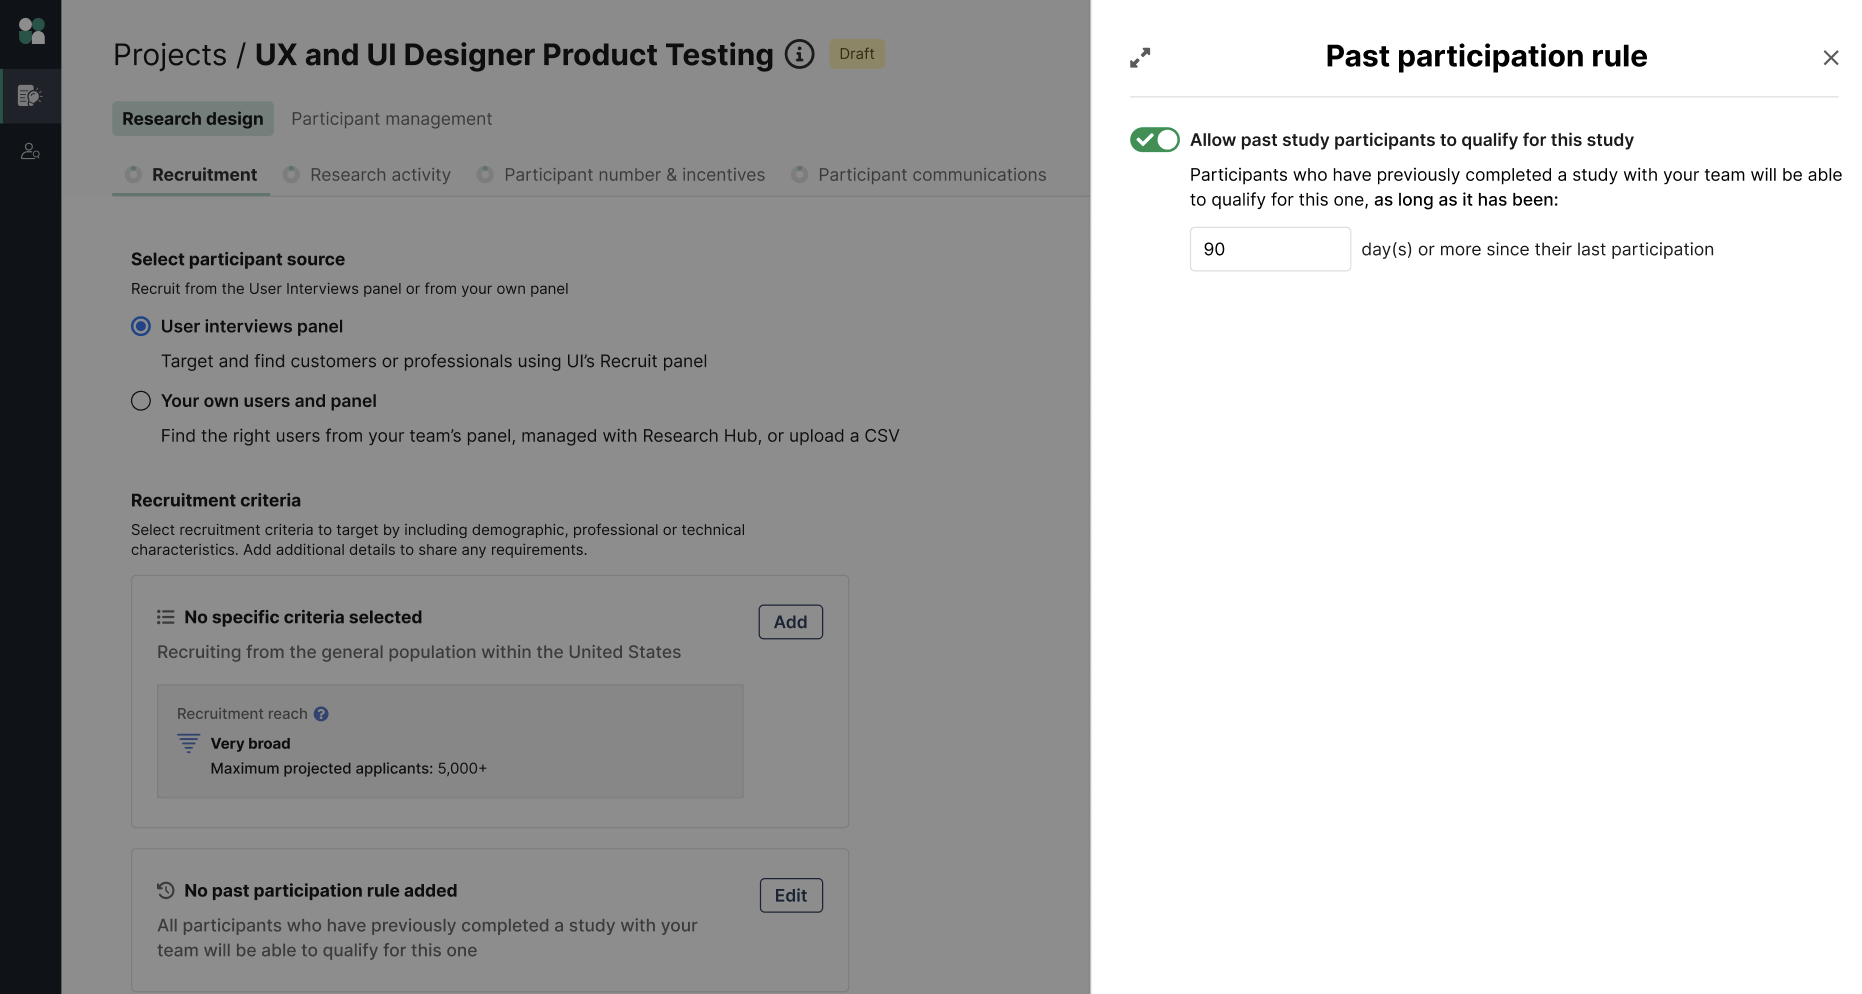
Past participation rules
Customize the project's past participation rule to allow past participants to qualify for your study. You can set a participation exclusion window anywhere from 0 to 365 days, or toggle off the rule to exclude all repeat participants. The default exclusion window is 90 days or more since their last participation.
Keep stricter rules for exploratory studies, or reopen your pool for niche audiences and hard-to-recruit professionals where repeat participation may be appropriate.
Screener Survey
All Recruit projects require a screener. If you're utilizing your Hub panel for this project, you can skip this step if additional screening isn't necessary.

Take advantage of screening features like:
- Reuse an existing screening, so you don't have to start from scratch! If you or a teammate already used a screener that would work for your new project, you can select it from the dropdown, then edit or add to it if needed.
- Pick from different question formats. Select pick one, pick any, short answer, or long answer. Simply use the drop-down to choose a question format, or use the duplicate symbol to copy a question, then make edits as needed.
- Add skip logic to branch participants to related pages or questions. This is especially helpful if you're recruiting multiple personas within one project! You can also use skip logic to end the study for participants who selected rejecting answers.
- Mark questions as required or not required. This is useful if you don't want to make a question required if it doesn't apply to all participants, or if the question just gathers additional information. For example, I may want to add a short answer question under the example question above that says "If you answered Other, what type of pet do you have", and not make it required since that may not apply to many participants. OR, I could use skip logic to branch participants who answered Other to a new set of questions.
- Set questions as key criteria. You can specify which information is key to making recruiting decisions with a simple toggle in the project builder
- Move questions between pages. Sometimes reordering the flow of questions makes for a better experience for the participant, or is necessary for skip logic. Move questions around as you please! If moving the question breaks your skip logic, we'll alert you.
As a general rule of thumb, try to keep screeners as short as possible. Long, complicated screeners tend to wear out participants, and may deter them from completing your application. We also recommend spelling out acronyms, using plain/common language, making screener questions as inclusive as possible, and being conscious to include "None of the above" and "Other" answer options so participants aren't forced to choose an option that doesn't suit them.
If you're unsure if your screener is clear, launch your project and send the application link to a friend. Often a second set of eyes, especially those of someone not affiliated with the project, can help you identify if something could be clarified.
Document Signing

The Document Signing add-on automates getting signatures from participants on any type of document before a participant confirms their session, helping make sure all confirmed participants have signed your document.
If your team does not have the Document Signing add-on, the green upload button will not be available. If you're interested in adding Document Signing to your subscription, email development@userinterviews.com. They'll be able to best assist!
Review Participants

Choose whether you'd like to manually review participants or if you'd like to choose automatic review. Automatic will automatically approve any participant who 100% matches your set criteria and passes the screener survey.
If your subscription has Double Screening, check that field to gain access to participant phone numbers and email addresses, as well as be able to message participants, prior to approving them.
Step 3: Research activity details
In this section you can set the study type, study format, session length, and add details around scheduling, attendance and location. You'll also be able to add information for confirmed participants to help them be prepared by providing instructions for what they need to do or have on hand for the session.
Research activity type

- Moderated sessions are guided by a moderator
- 1-on-1 interviews are sessions where the participant will meet with your team. Most commonly, these are moderated online sessions. These studies may be conducted online, over the phone, or in person.
- Focus groups are sessions where a group of participants will meet at the same time, and are typically moderated by someone on your team. These studies may be conducted online, over the phone, or in person.
- Unmoderated tasks are usually surveys or user tests where the participant completes an activity on their own at their own time.
- Multi day studies are sessions where participants complete multiple interviews, focus groups, diary entries, tasks, surveys, user tests, etc. over the course of a stretch of days. These studies may be conducted online, over the phone, and/or in person.
Session format
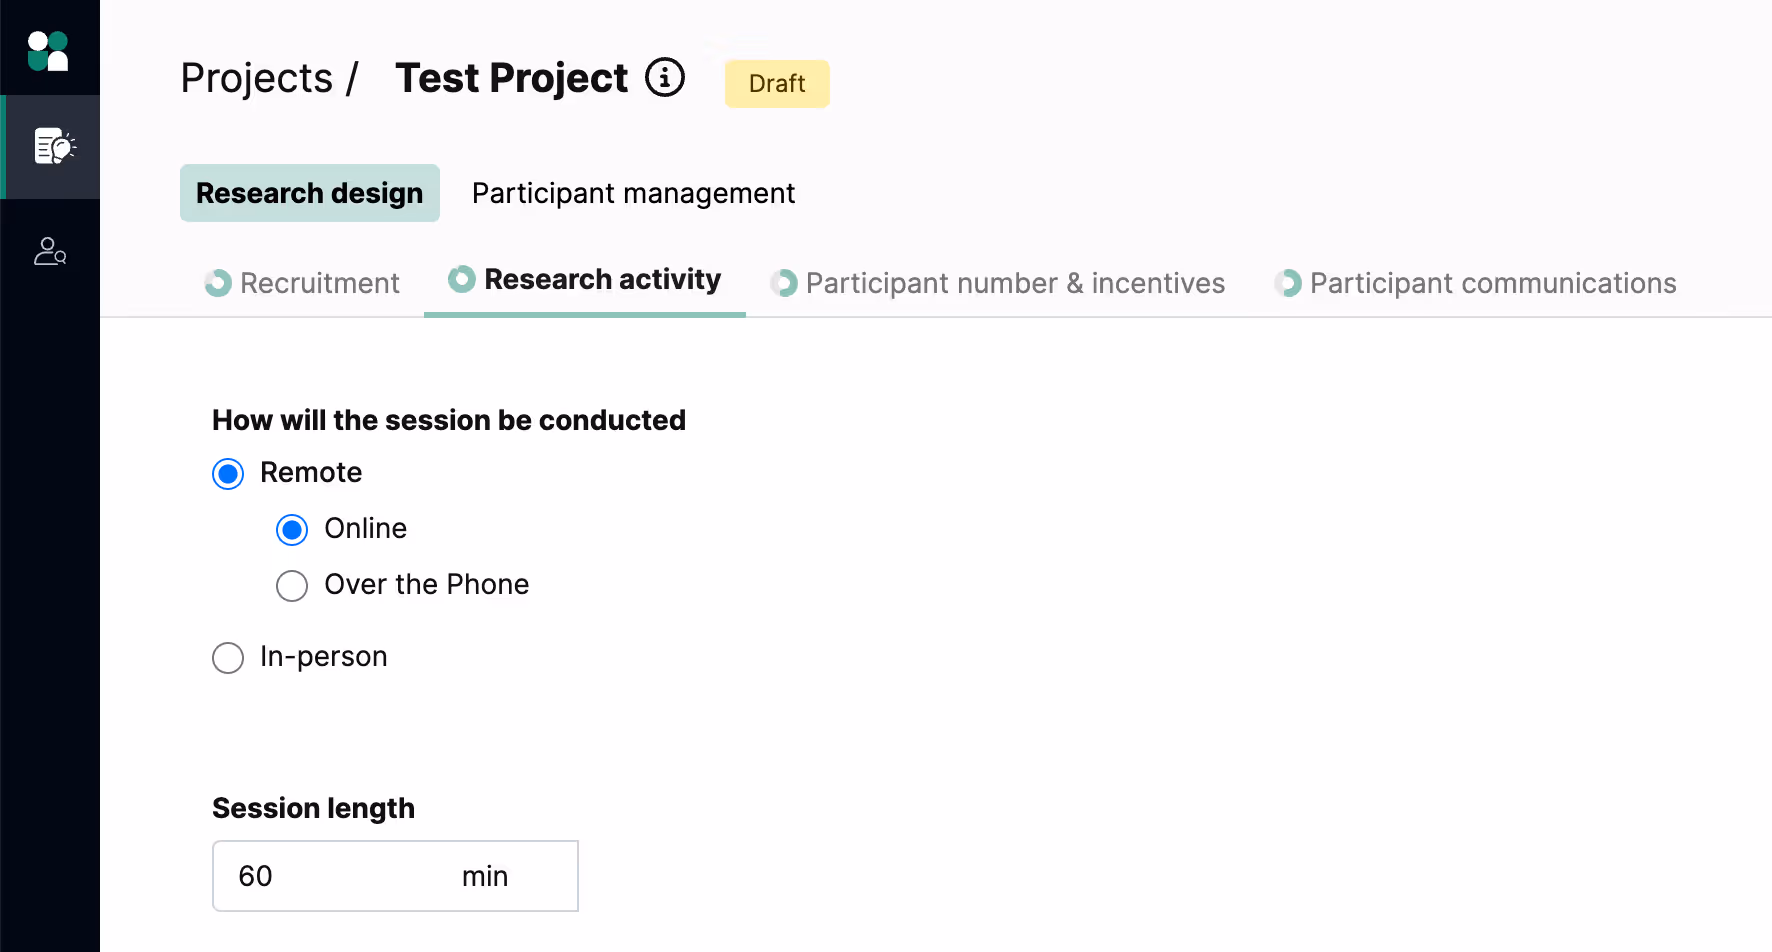
- Online studies will give the option later in the builder to add a default session link or utilize our Zoom integration to automatically generate unique meeting links for confirmed participants.
- Over the phone studies will give the option later in the builder to tell participants whether you'll be calling them or if they should dial-in to a number at the time of their session.
- In person studies will give the option later in the builder you'll be able to specify a location, or choose if you want to meet at the participant's home, office, or a mutually agreed upon location like a coffee shop.
Time limit for participant responses
For unmoderated studies, you can set a response time limit—participants have 24 hours (or whatever time you chose) to complete the task. Once that time limit expires, they will automatically be marked incomplete and be replaced with a new participant. Note: This is only available for projects that use an integration or tracked custom link.
Researcher experience
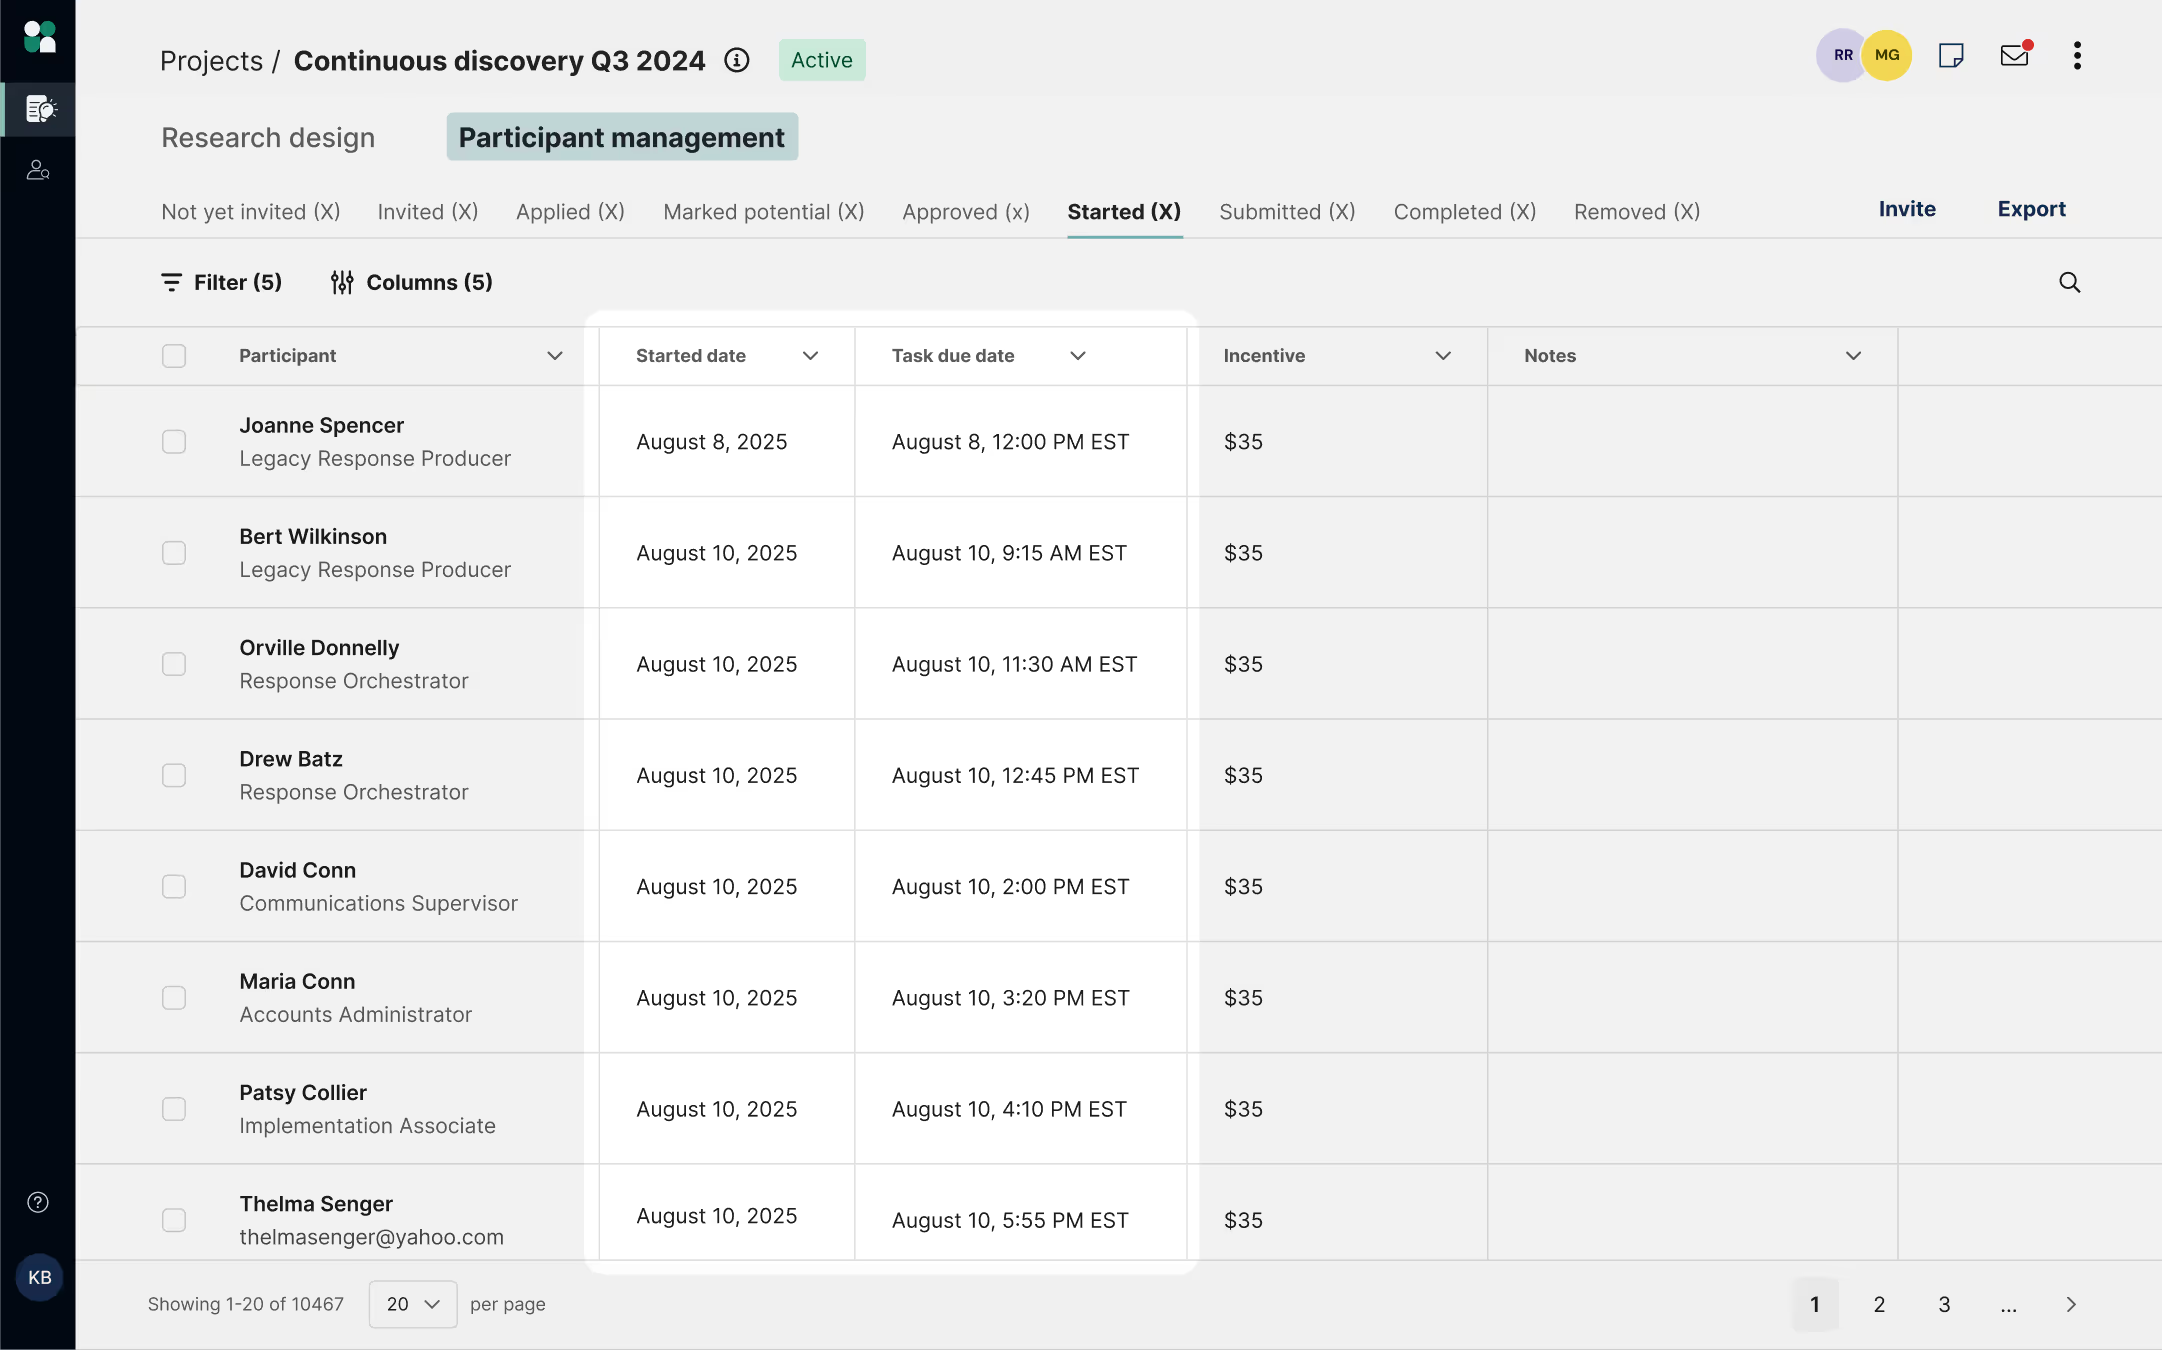
To set the time limit, select either Integration or Tracked custom link as your task platform. Toggle on the “Set time limit for participant response” option and choose your desired time limit. By default, we set the time limit to be 24 hours.
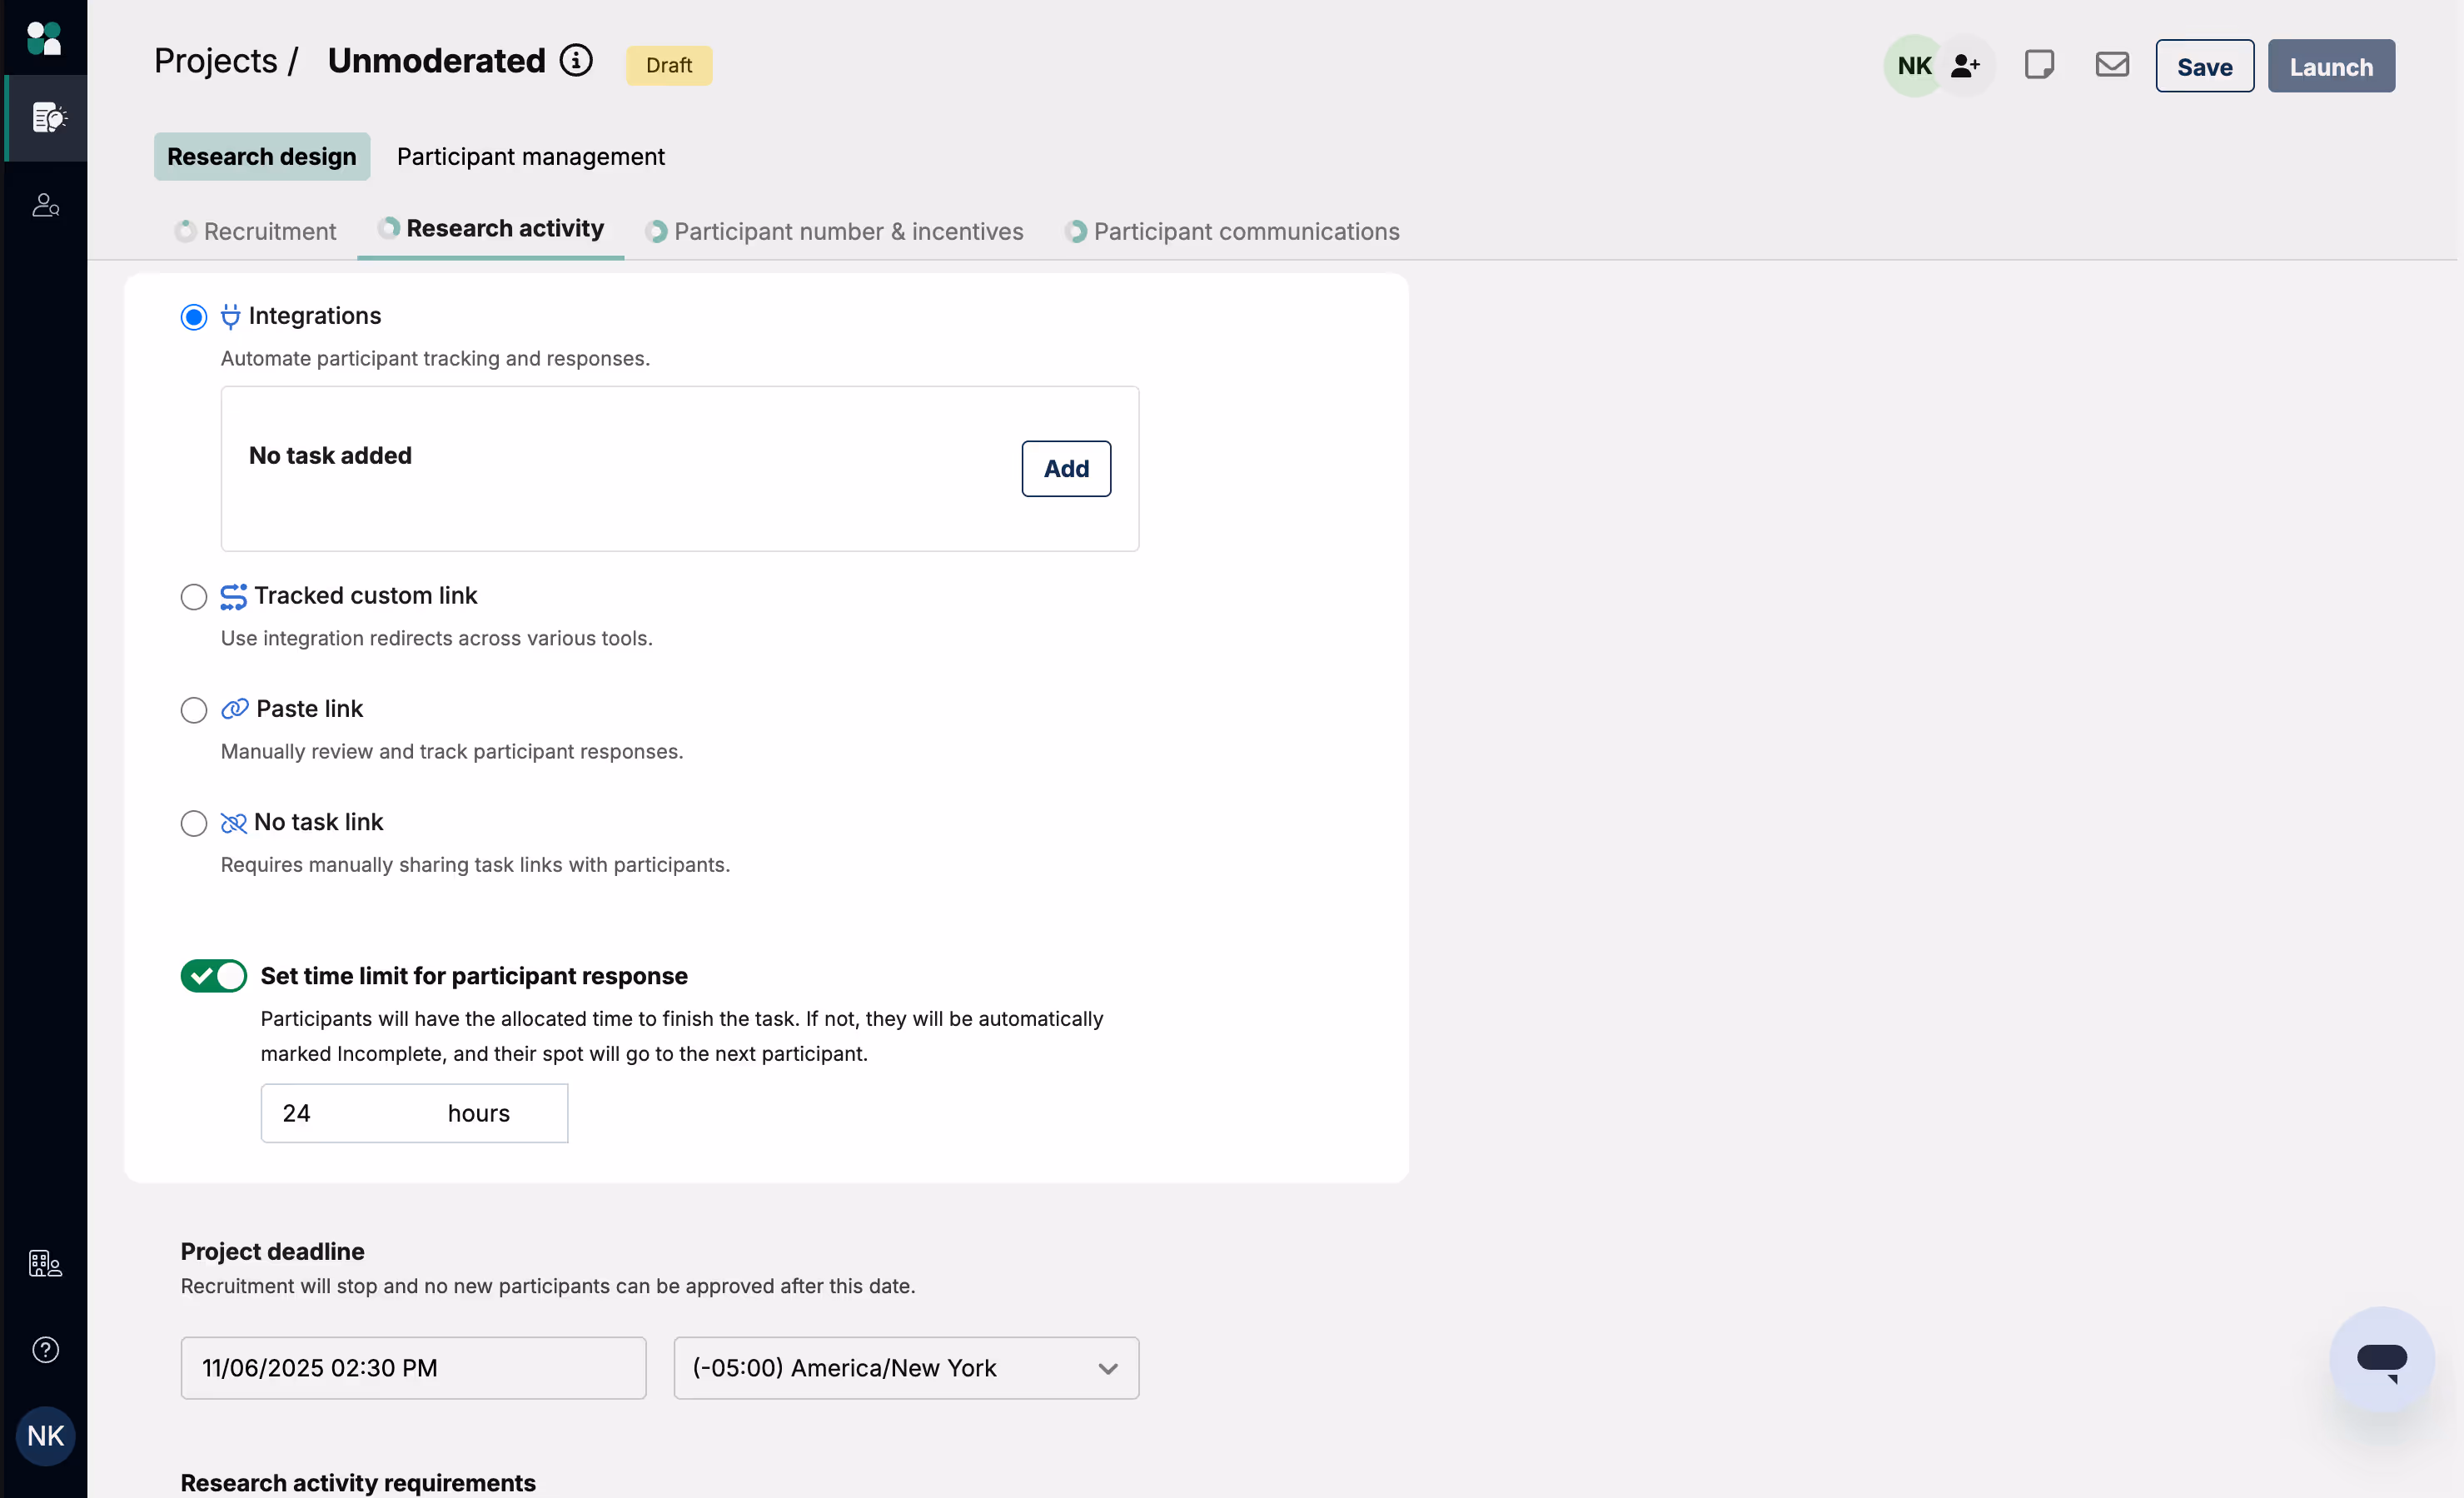
Now, you’ll be able to track participants who have started the task and see how much time they have remaining to complete it. Participants enter Started status when they click a task link, or are redirected to the task automatically.
- Once a participant starts, they have until the time window expires or the project deadline (whichever is sooner) to submit the task. Once they’ve completed the task, they’ll enter Submitted status. You can then mark the participant Completed.
- A participant is marked Incomplete if they started the task and did not finish before the task window expired, or they finished the task after the project deadline.
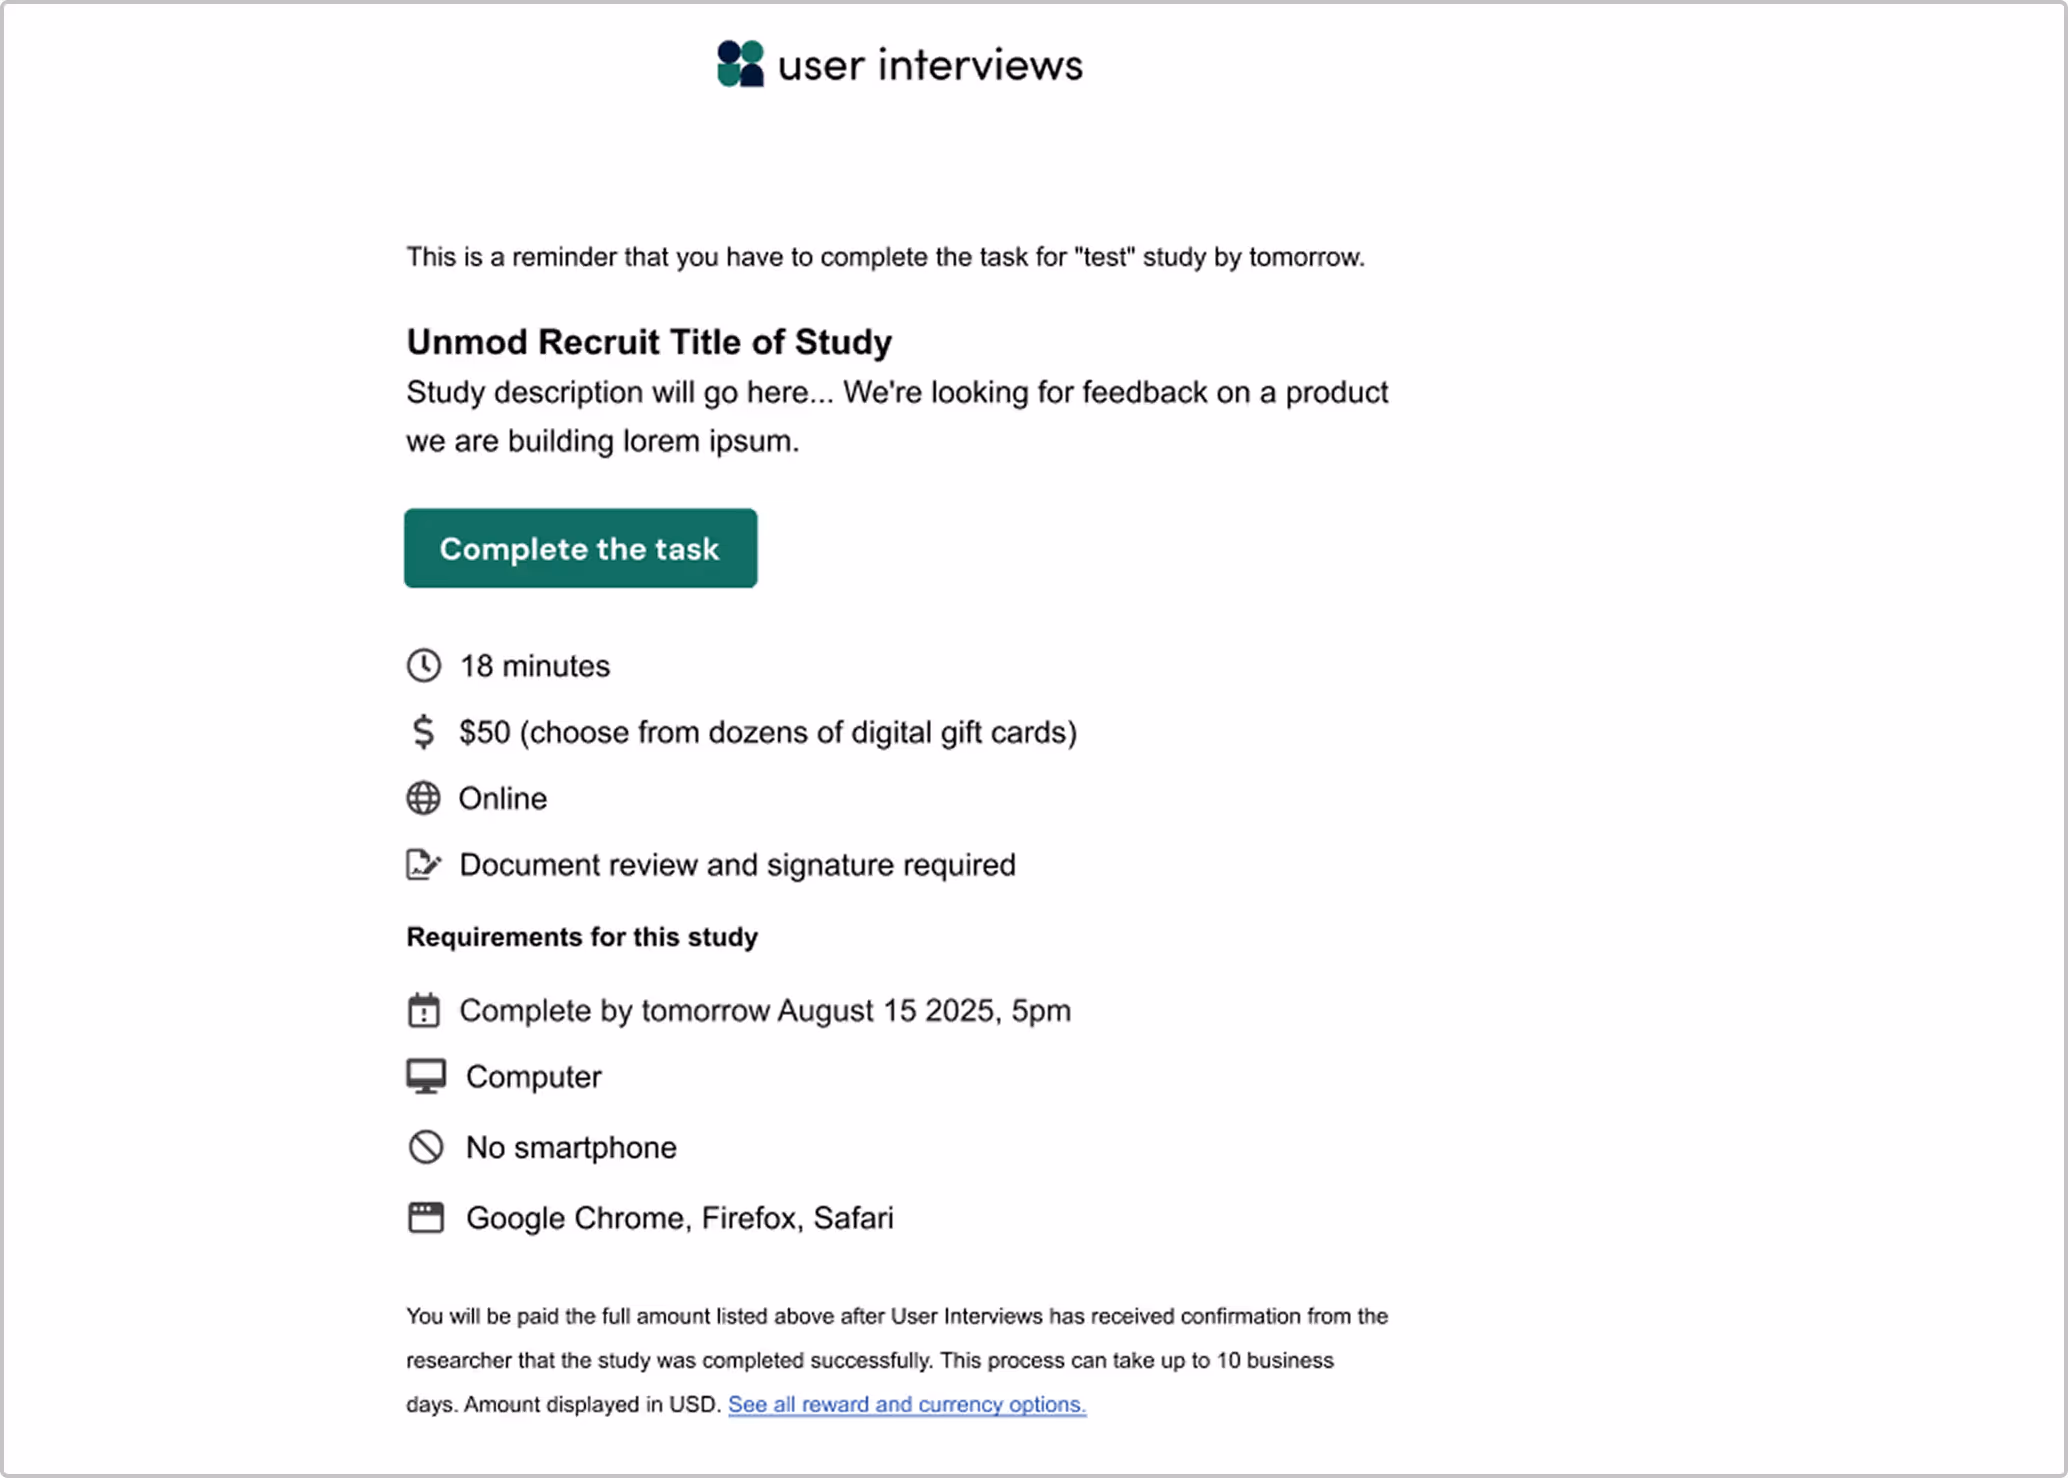
Participant experience
Participants will be notified of how long they have to complete tasks as part of the application and approval process. They will also receive email reminders to complete the task before the deadline.
Once a time window expires, the participant will no longer be able to access the task. Their spot will be released to a new participant.
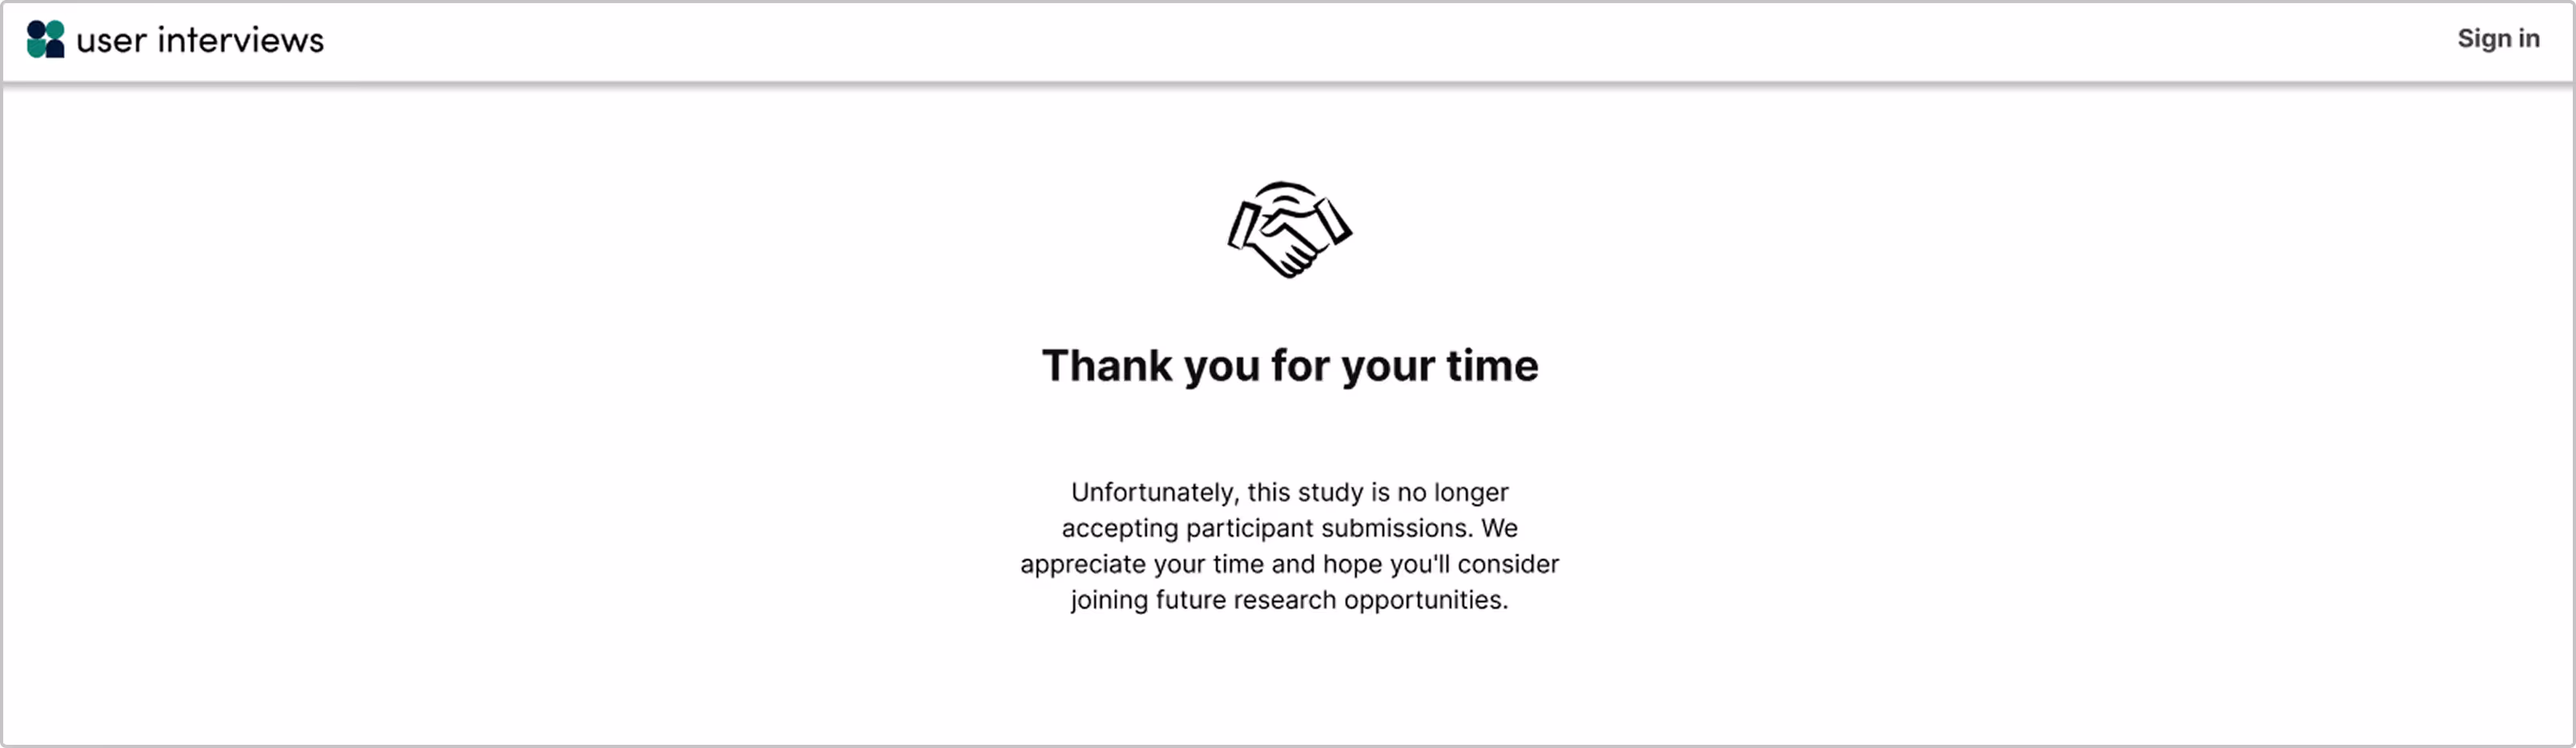
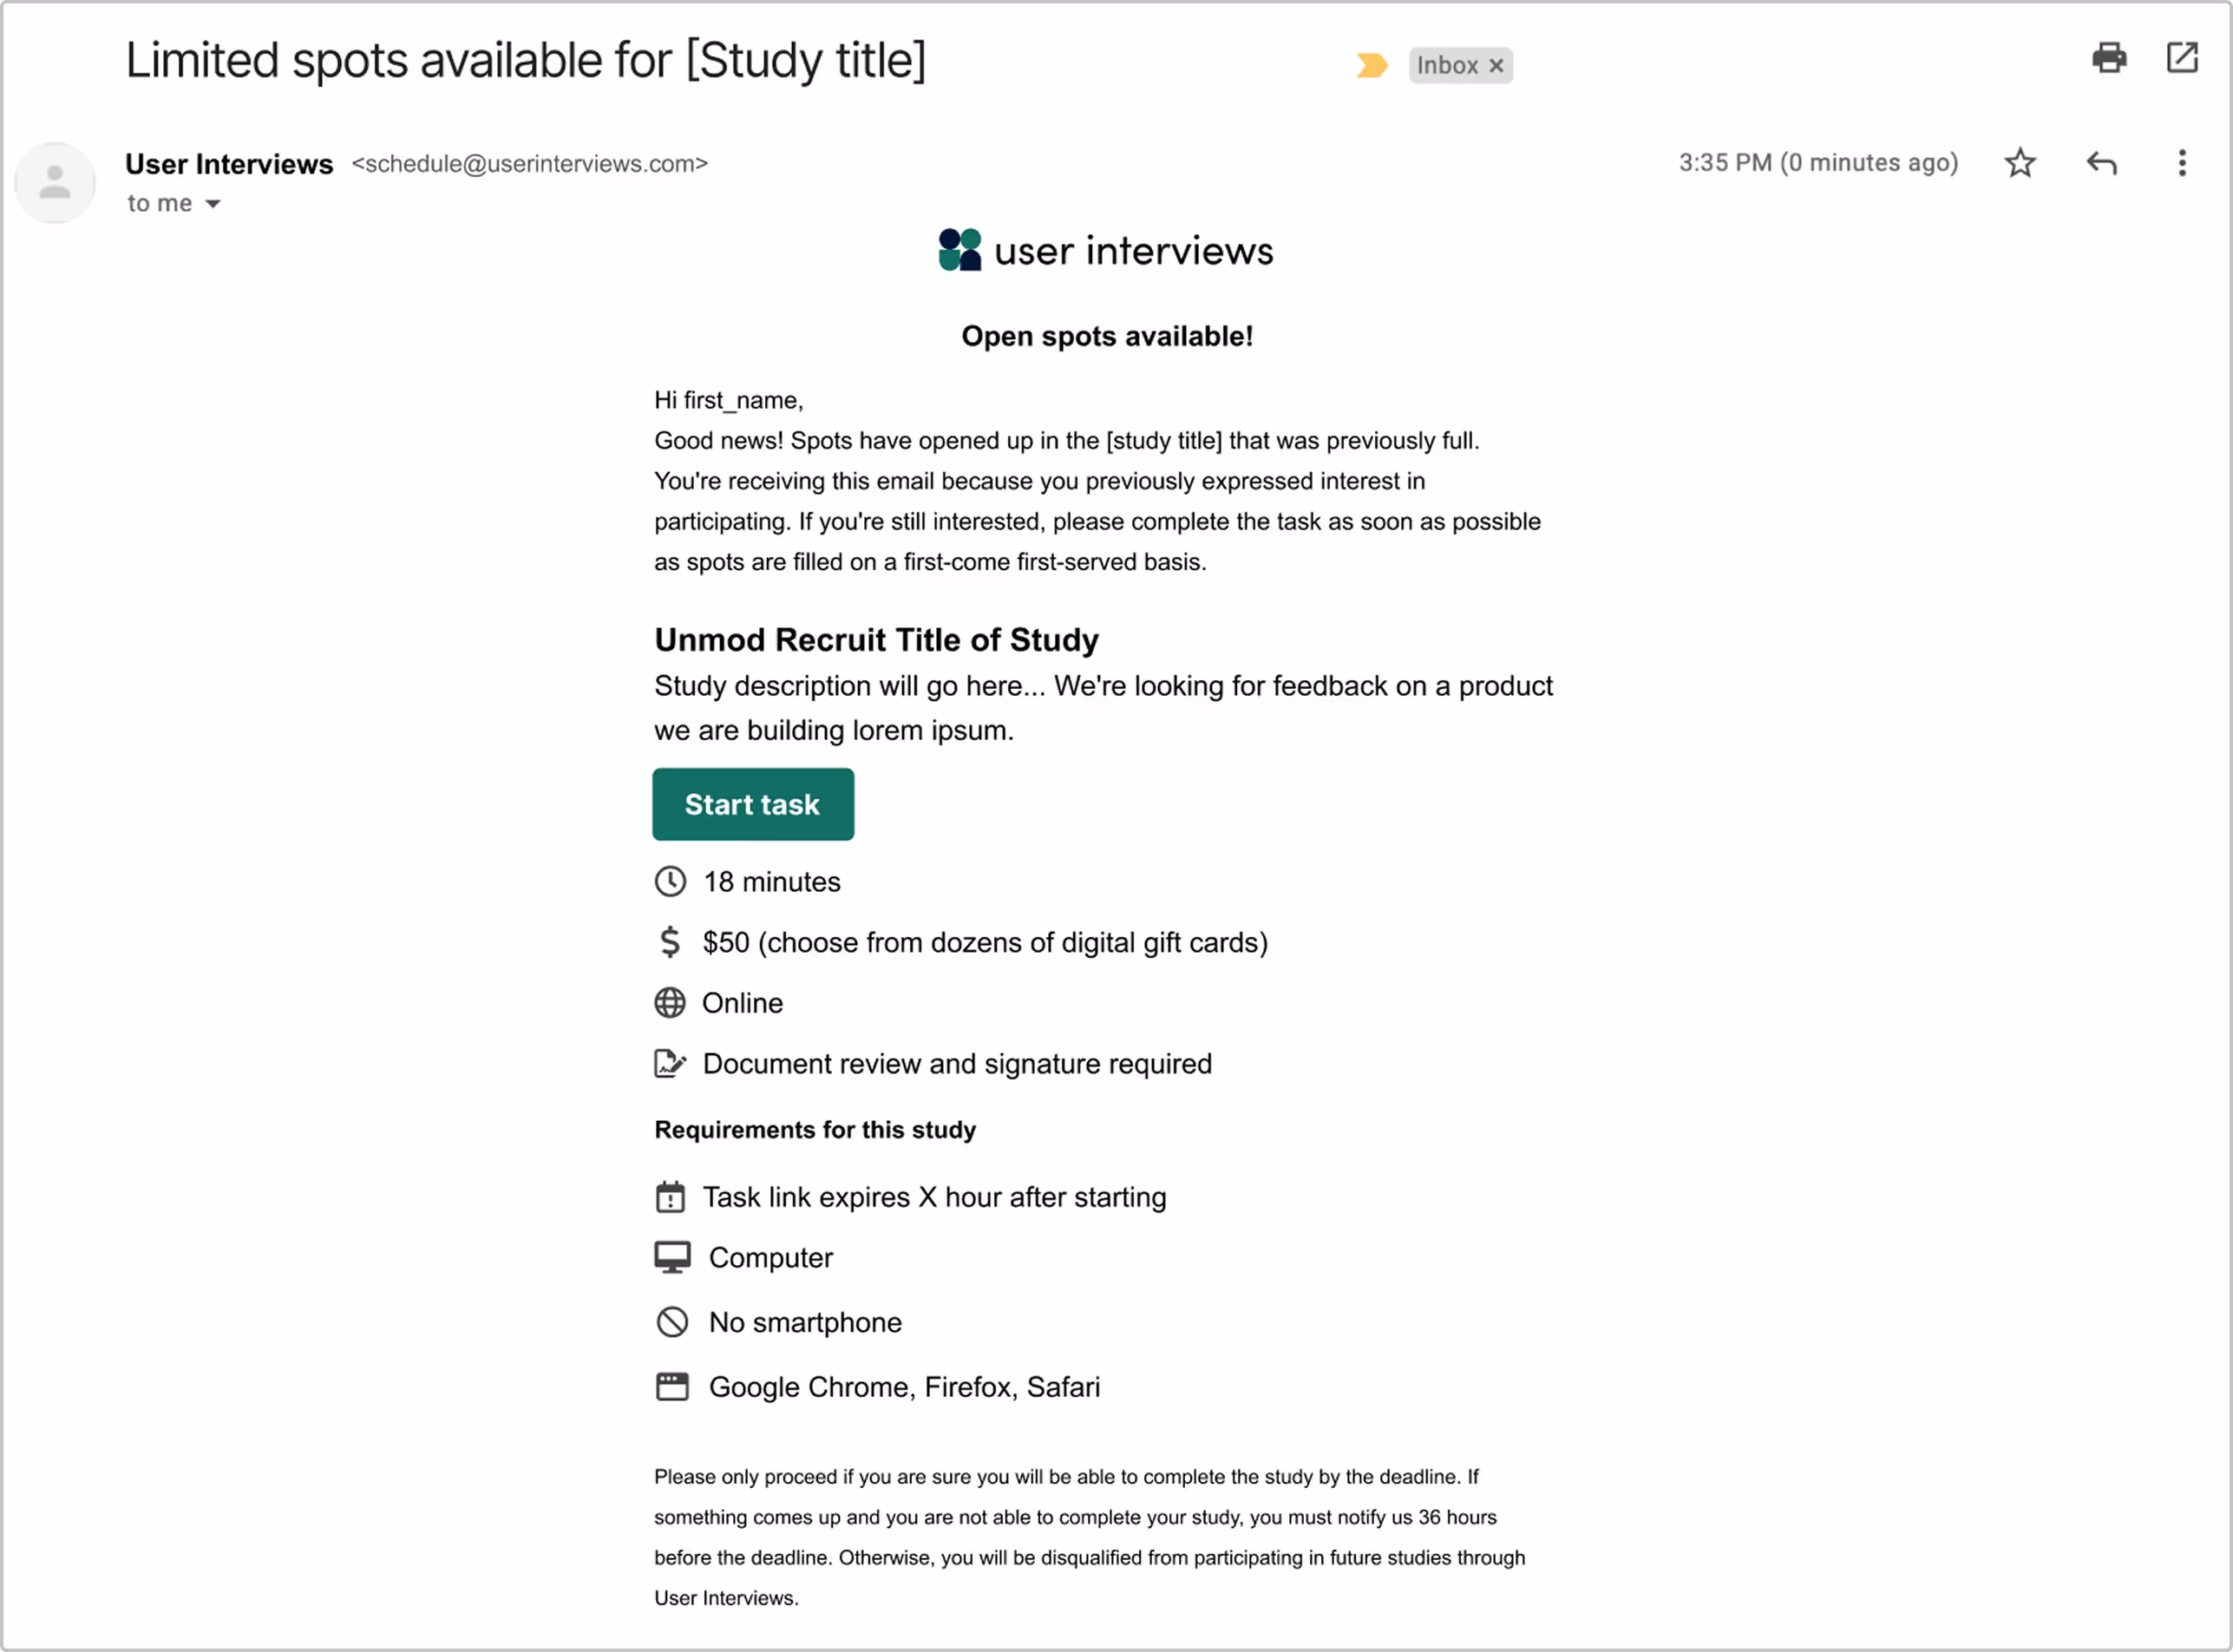
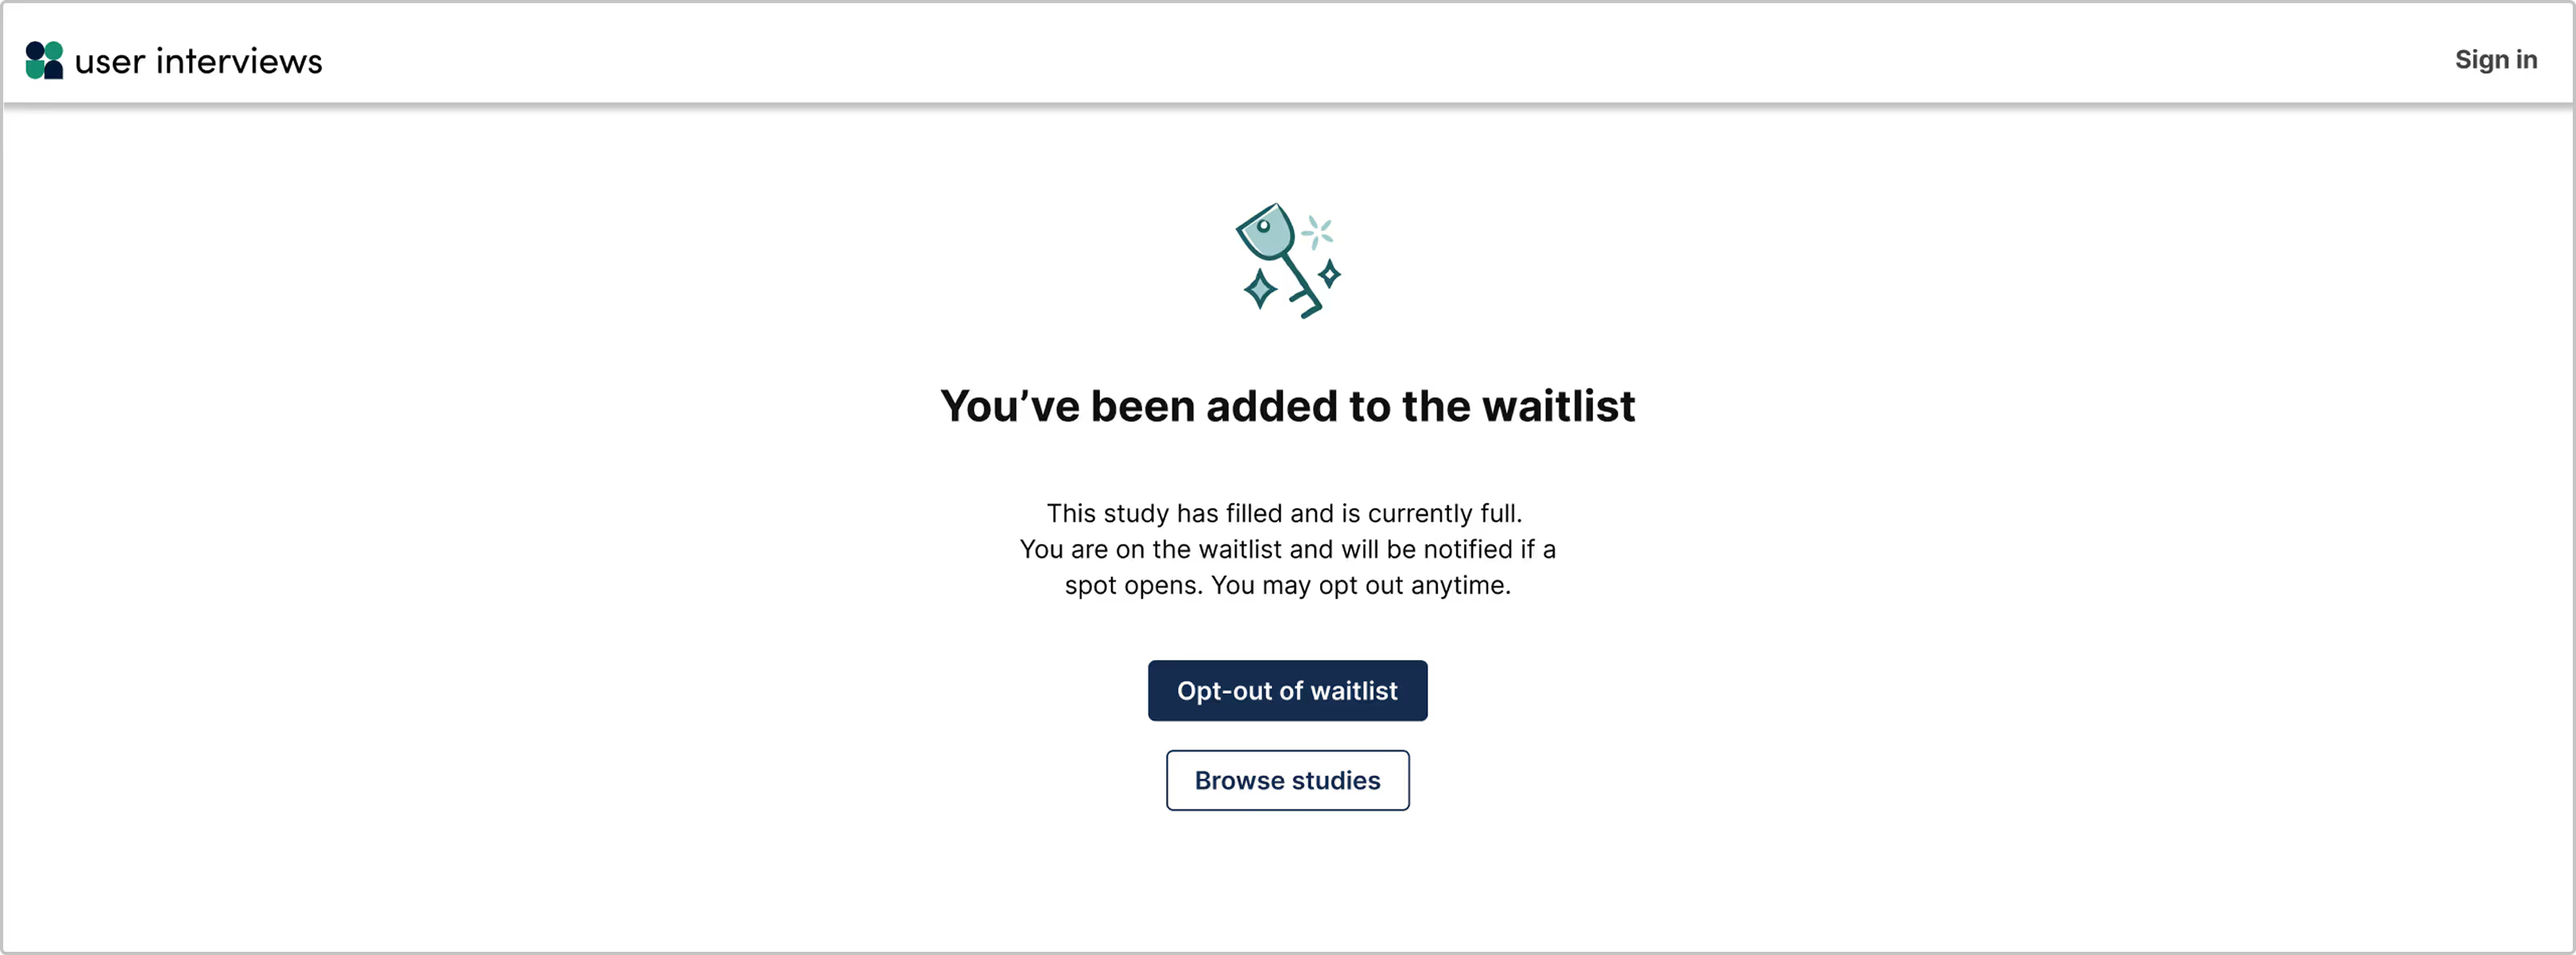
Participants on the waitlist who have been approved will be notified when spots open. They have the option to opt-out of the waitlist at any time if they would like.
Session attendance and location
We recommend setting your availability before launching so you can easily start scheduling participants as soon as they start qualifying through your project. When you connect your calendar, it's even easier to add sessions since you see your availability within the project builder. You can also edit the schedule after you launch your project!

For an online study, choose the default moderator, session length, and the meeting location. The default moderator automatically populates the name of the person building the project but can be updated to be any teammate.
If the default moderator has the Zoom integration, the Zoom meeting location will be clickable. Otherwise, input a default session link under "other location link". Confirmed participants will be automatically sent a unique Zoom link if Zoom is selected, and will be sent the default session link pasted in the other link field if it is selected.
Scheduling rules
Scheduling rules will allow you to control how many sessions can be scheduled per day, the buffer time between meetings, frequency of available time slots, and more.

Research activity requirements
Add preparation instructions to ensure participants are fully prepared for their session. In this space, you can add clear instructions for what they need to do or have on hand before the session starts. List if specific devices are necessary, otherwise participants are free to use their preferred devices.
Participants who confirm their session automatically receive information in this field as part of their confirmation email, reminder email, and can always access this information via their profile.
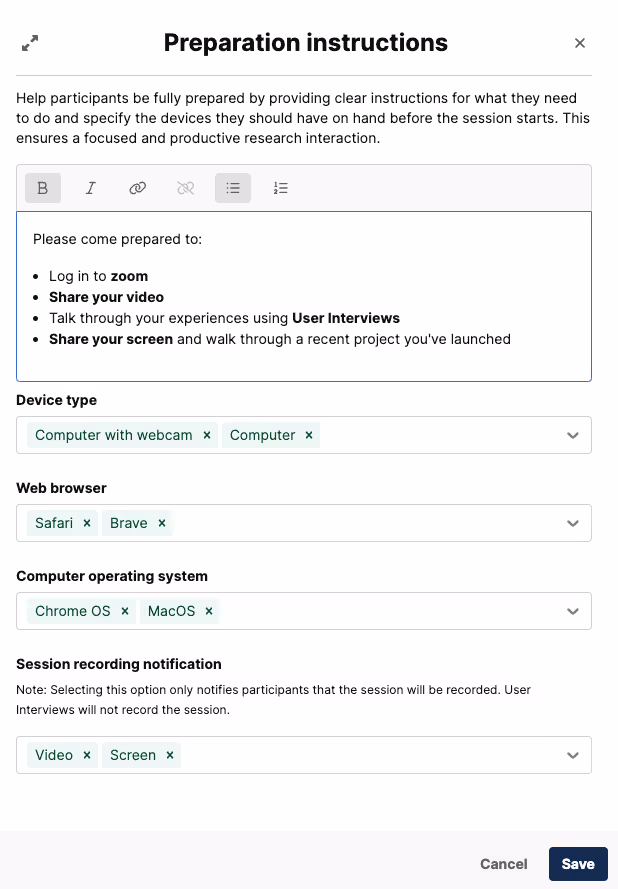
We encourage you to include instructions in this field before approving participants, and utilizing this field vs. emailing participants off platform with information. Participants know to look here as their source of truth for session details, so take advantage of this field!
Step 4: Participant number and incentives
In the 'Participant number and incentives' section you'll be able to choose how many participants you'd like to collect data from, establish the incentive and the distribution method.

Number of participants
Select the number of participants you'd like to have sessions with. The requested participants number helps us know how many participants to invite to apply to your study, so try to make it an accurate representation of your study needs. You can increase or decrease this number after launch.
Incentives
We encourage researchers to offer a strong, fair incentive. Higher incentives tend to garner more applications, while lower than average paying studies may have fewer applications. If you're unsure how much to offer, check out our data-backed incentive calculator.
You have 2 options: UI can distribute incentives for your project so your team doesn't have to worry about it, or your team can manually distribute incentives. If UI distributes incentives, participants who complete a session will have a choice between select reward and currency options. If your team distributes incentives, a field will appear to write in the form of payment being issued.
Step 5: Participant communications
In the Participant communications section you can add a project listing name and description and test any of the project flow notifications.

- Your project listing name is what participants see as the name of your study. We recommend NOT using the default "User Research Study"—studies without unique titles tend to get less applies since they're not very alluring. Title your study something fun, eye-catching, or detailed to get more applies!
- Your project listing description is what participants see as a high-level overview of your study. Participants rely on the description to get a feel for your study and determine if your study is worth applying to, so add as many (non-biasing) details here as you can. Again, the more standout your description, typically the more successful the recruit!
Step 6: Launch!
Once all sections of the project builder have been successfully completed (denoted by the green check marks), the "Launch" button will be clickable in the upper-right corner. If you have any incomplete areas for a section, go back to that section and find the fix the error, then either move to the next section so the fix autosaves, or click 'Save' in the upper-right corner.
The 'Payment details' drawer will open to display the cost estimate based on current factors (number of participants, professional criteria). If you run sessions with more participants, less participants, researcher canceled participants, have credits added after launch, etc. this cost may update. Take a glance through that overview, and launch!
A dedicated project coordinator will review your project and will notify you of any errors or suggestions prior to starting recruitment. If you need anything updated that you're unable to update yourself on your launched project, email projects@userinterviews.com and your PC will assist you.
⭐️ To learn best practices for managing live projects in UI, check out our Academy course on Managing Live Projects —>
Happy researching!


