
Who is this article for?
🗣️ All researchers (both admins and users)
⭐ Available on Research Hub plans
When recruiting real customers for research, it’s important to provide an on-brand experience that builds trust with your customer base. Research Hub includes lots of customization options so every touchpoint appears as a true reflection of your company’s brand and values.
📖 This guide is part of a 4-part onboarding series on getting started with Research Hub. Check out the other guides here: Get Started With Research Hub
Watch this short video demonstrating how to customize the Hub experience for your users.
There are four key customizations we recommend teams take advantage of:
- Branding: Upload your company’s logo and style your emails. This feature is available on any of our paid subscription plans.
- Email templates: Create email template sets so it’s easy to manage end-to-end communication for your studies. Any of our paid subscription plans offer custom email template sets.
- Data consent notice: Ask your customers for explicit consent before collecting their data. All Hub subscriptions include this feature.
- Domain settings: Authenticate your domain and set up sender profiles to ensure maximum deliverability of your automated emails. Note that this feature is only available on Hub premium and enterprise subscriptions.
How to customize Research Hub
To see which customizations are available to your team, click on your username at the bottom left of the screen and select "Team settings". You can find your customization options on the Branding, Templates, and Advanced options tabs.
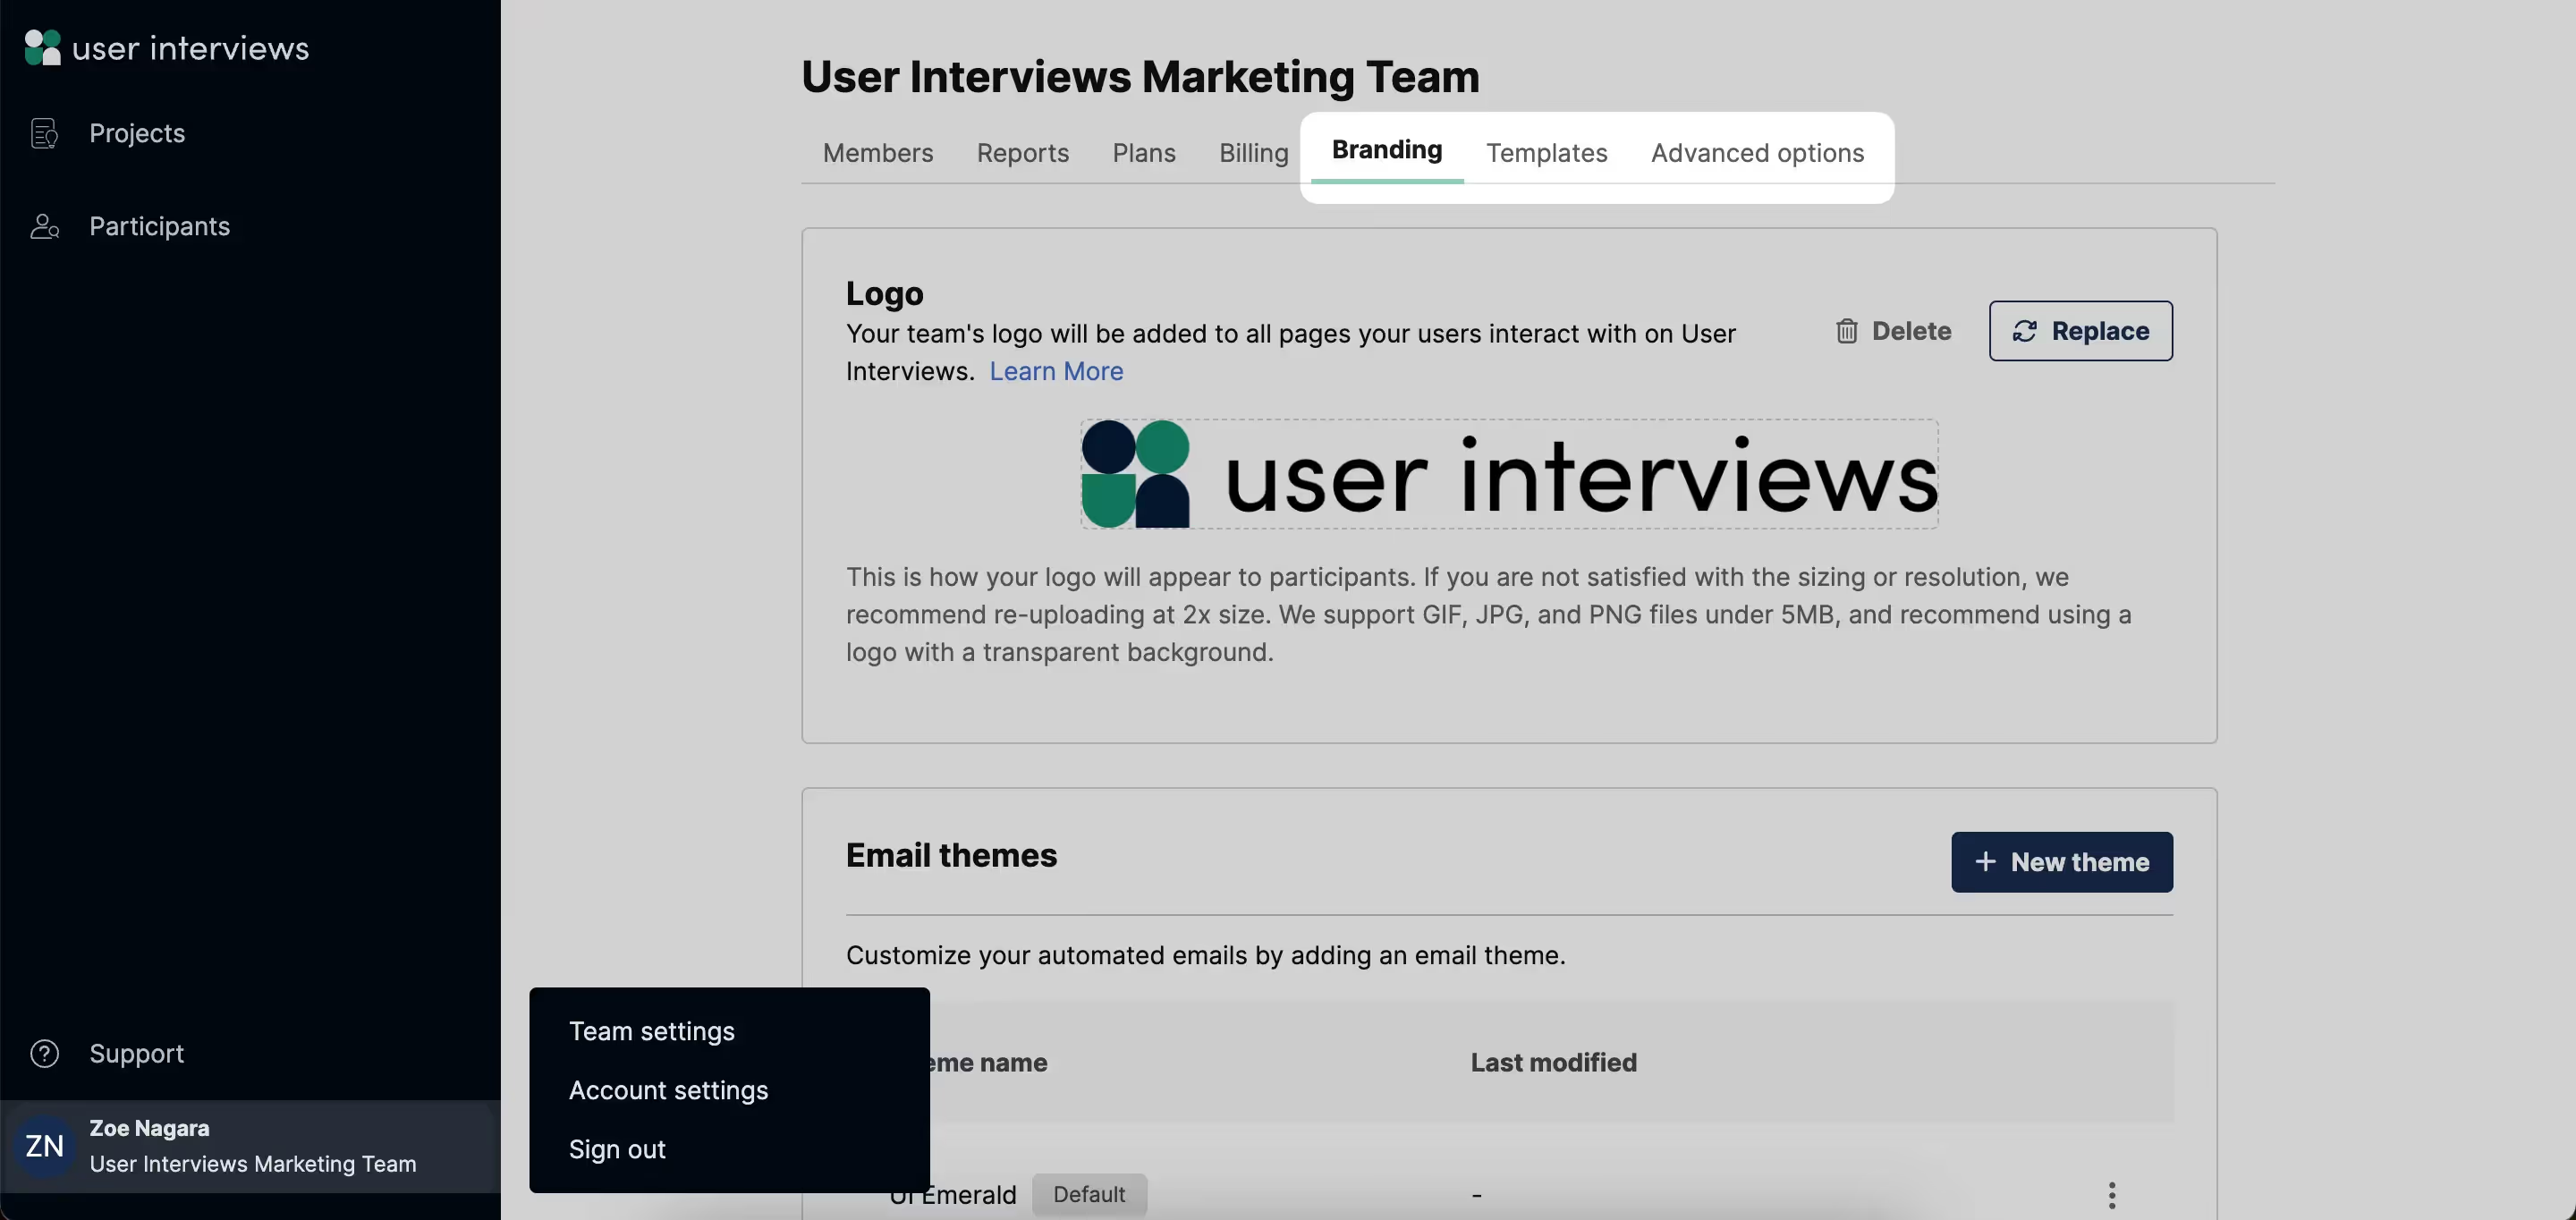
1. Apply company branding and style emails
On the Branding page, upload your company logo and it will be automatically applied across every piece of customer-facing communication including opt-in forms, screener surveys, and email notifications.
💡 We support GIF, JPG, PNG, and SVG files under 5MB, and recommend using a logo with a transparent background. The recommended dimensions are 240px by 240px for square logos and 240px by 400px for rectangular logos.
Learn more about adding or updating your logo.
You can also set up email themes from the Branding page. Email themes help you to keep branding consistent across all of your email communications. Style the header, footer, and body of your emails with HTML and CSS, preview real-time changes in the builder, and send a test to confirm your styles on various email clients and devices.
💡 Some of the common stylings we see are header image, footer message, font size, font color, button color, margins and spacing — but really, the sky’s the limit!
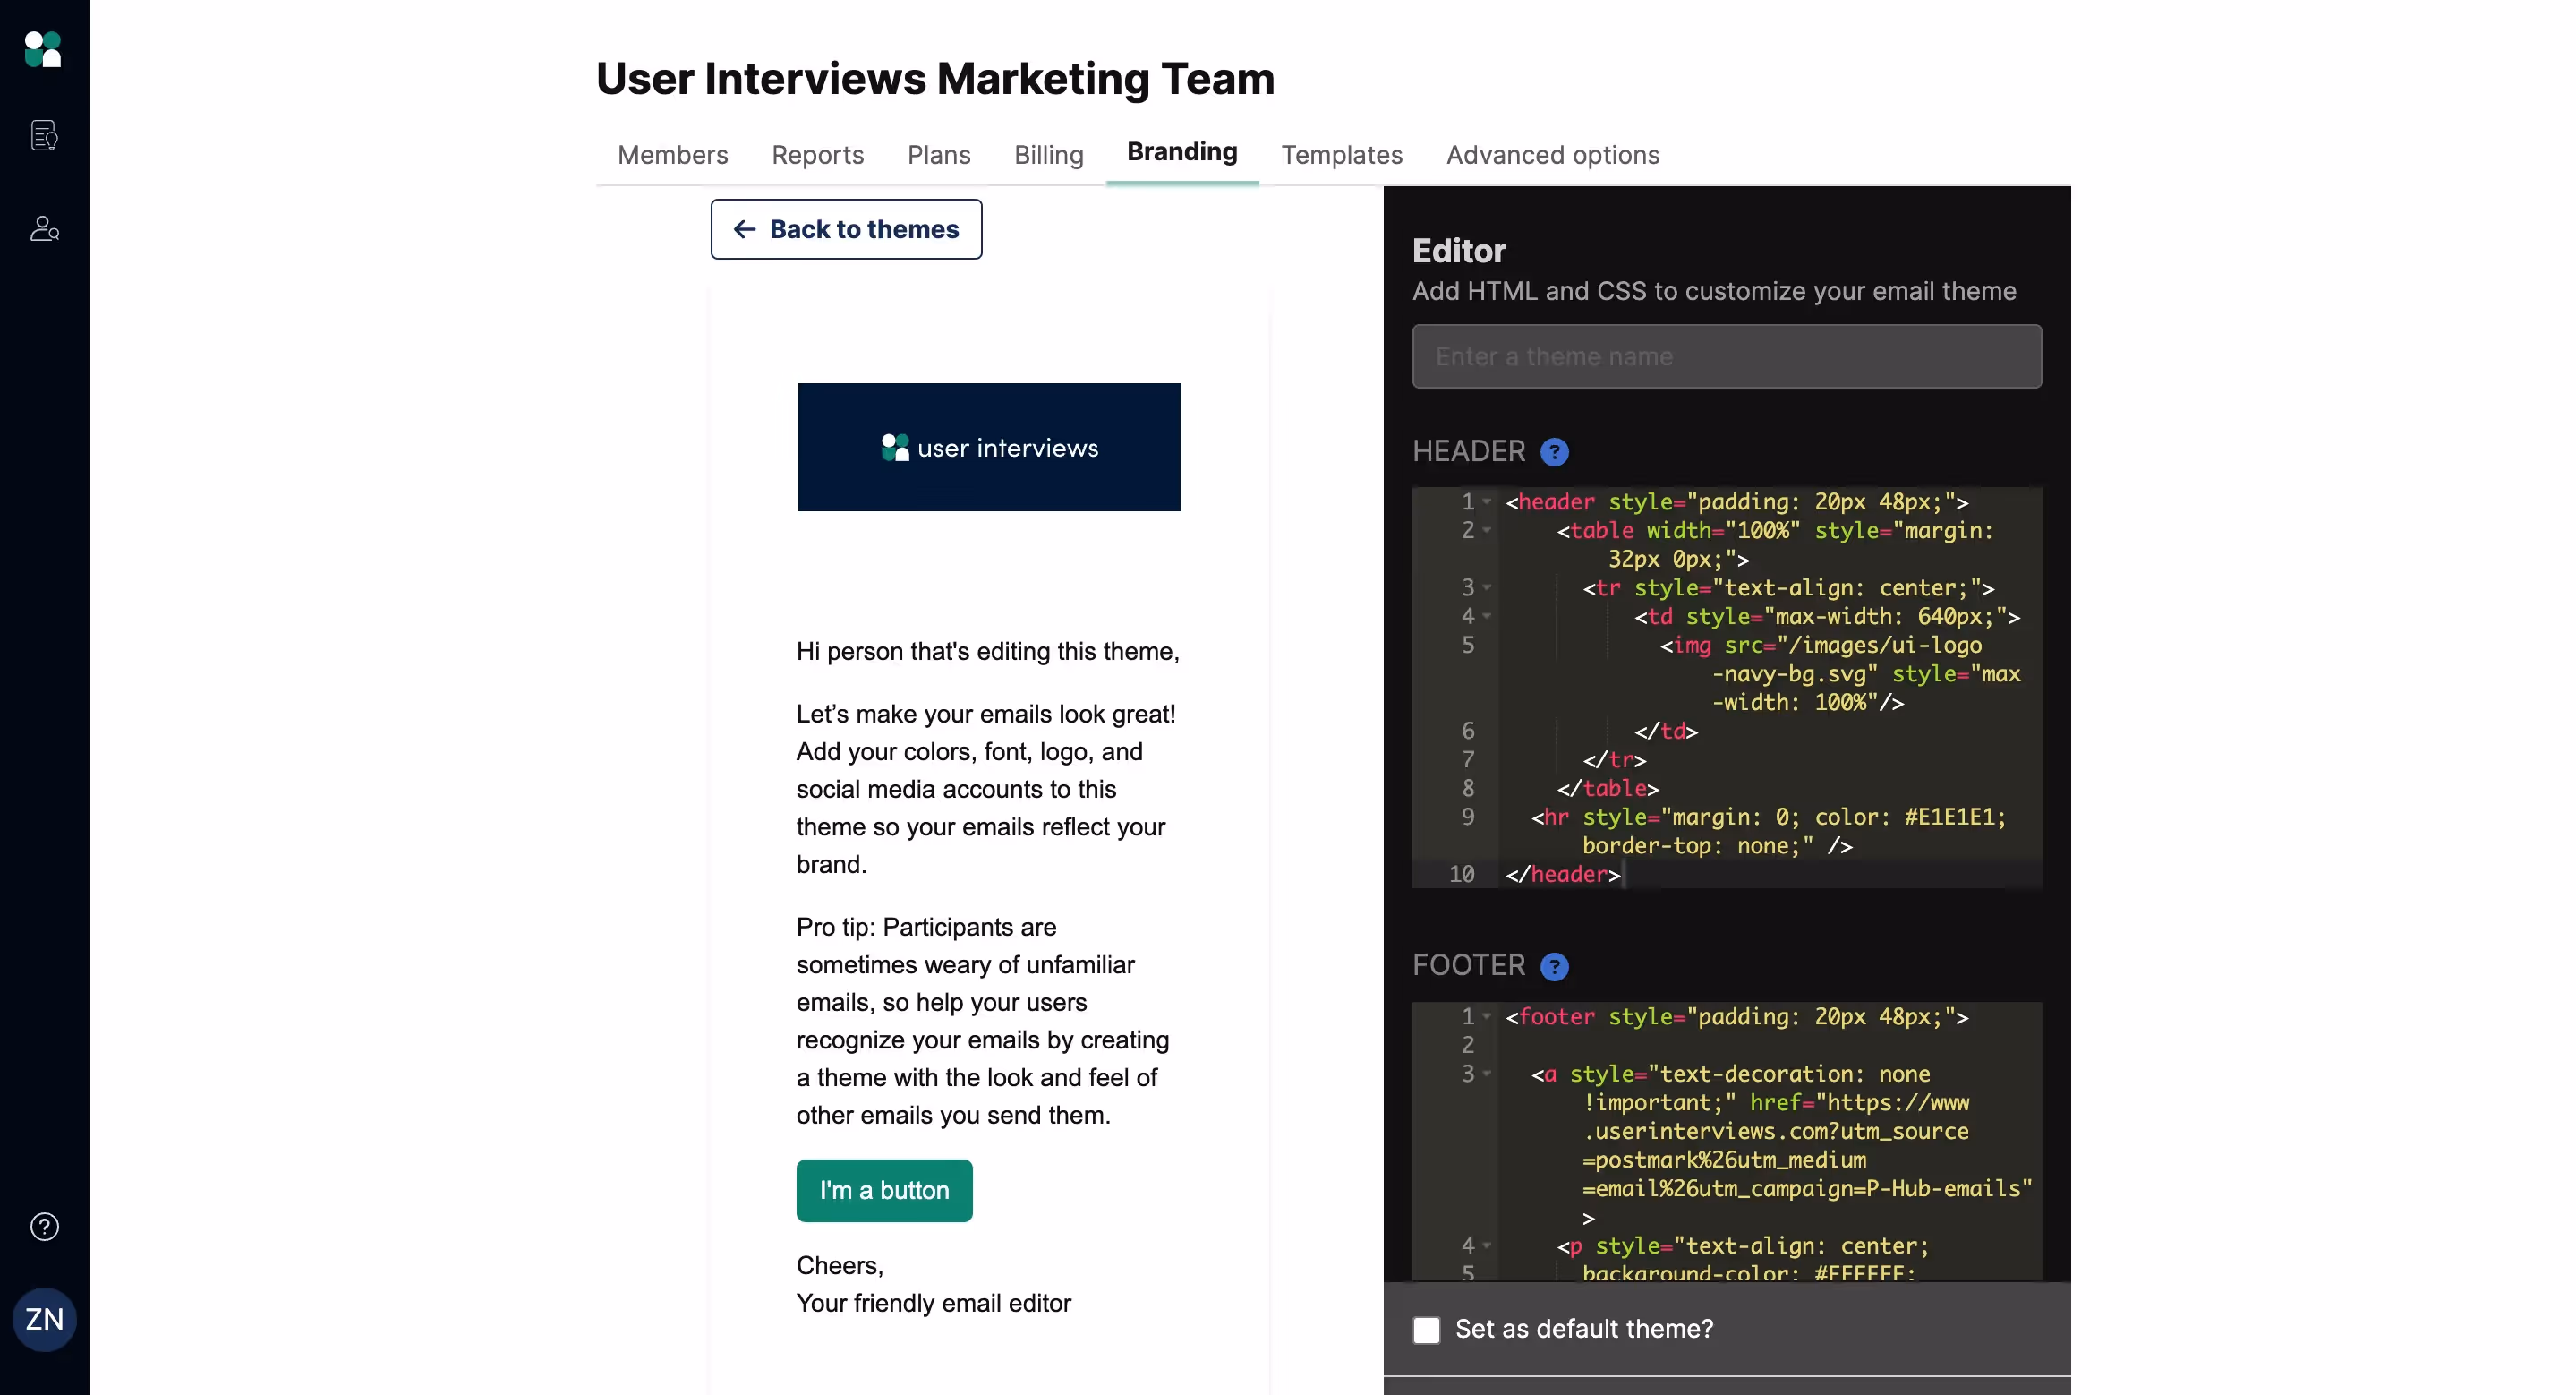
Email themes are created at the team level, then activated at the project level. Your team can create multiple email themes for different uses. Once you’ve set up your themes, it’s easy to apply your chosen theme to any research project.
Learn more about creating email themes.
2. Create email template sets
If email themes control the style of your automated emails, email templates set the substance.
When you think about it, there are a lot of automated emails that get sent to participants in the course of a single study — invitations, approvals, session confirmations, reminders, cancellations or reschedules, incentive redemption… so many emails! Creating an email template set helps you to manage it all, and maintain a consistent tone of voice across all participant-facing communication.
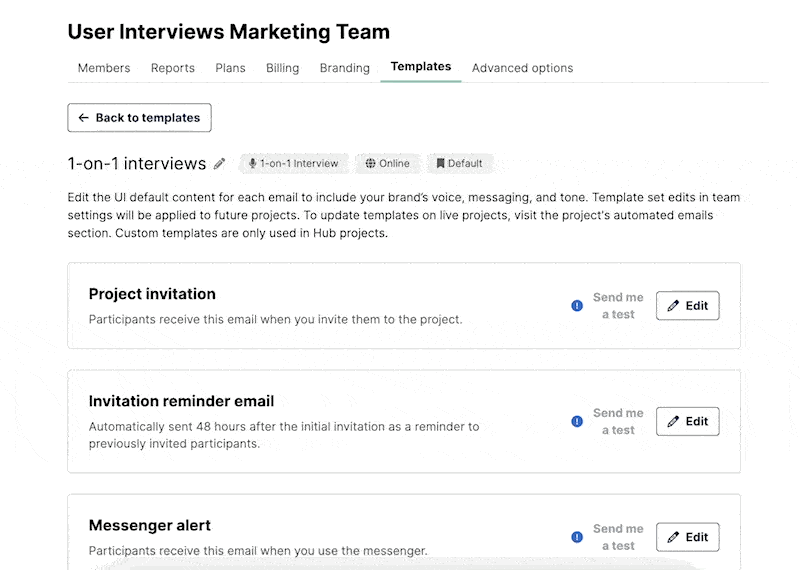
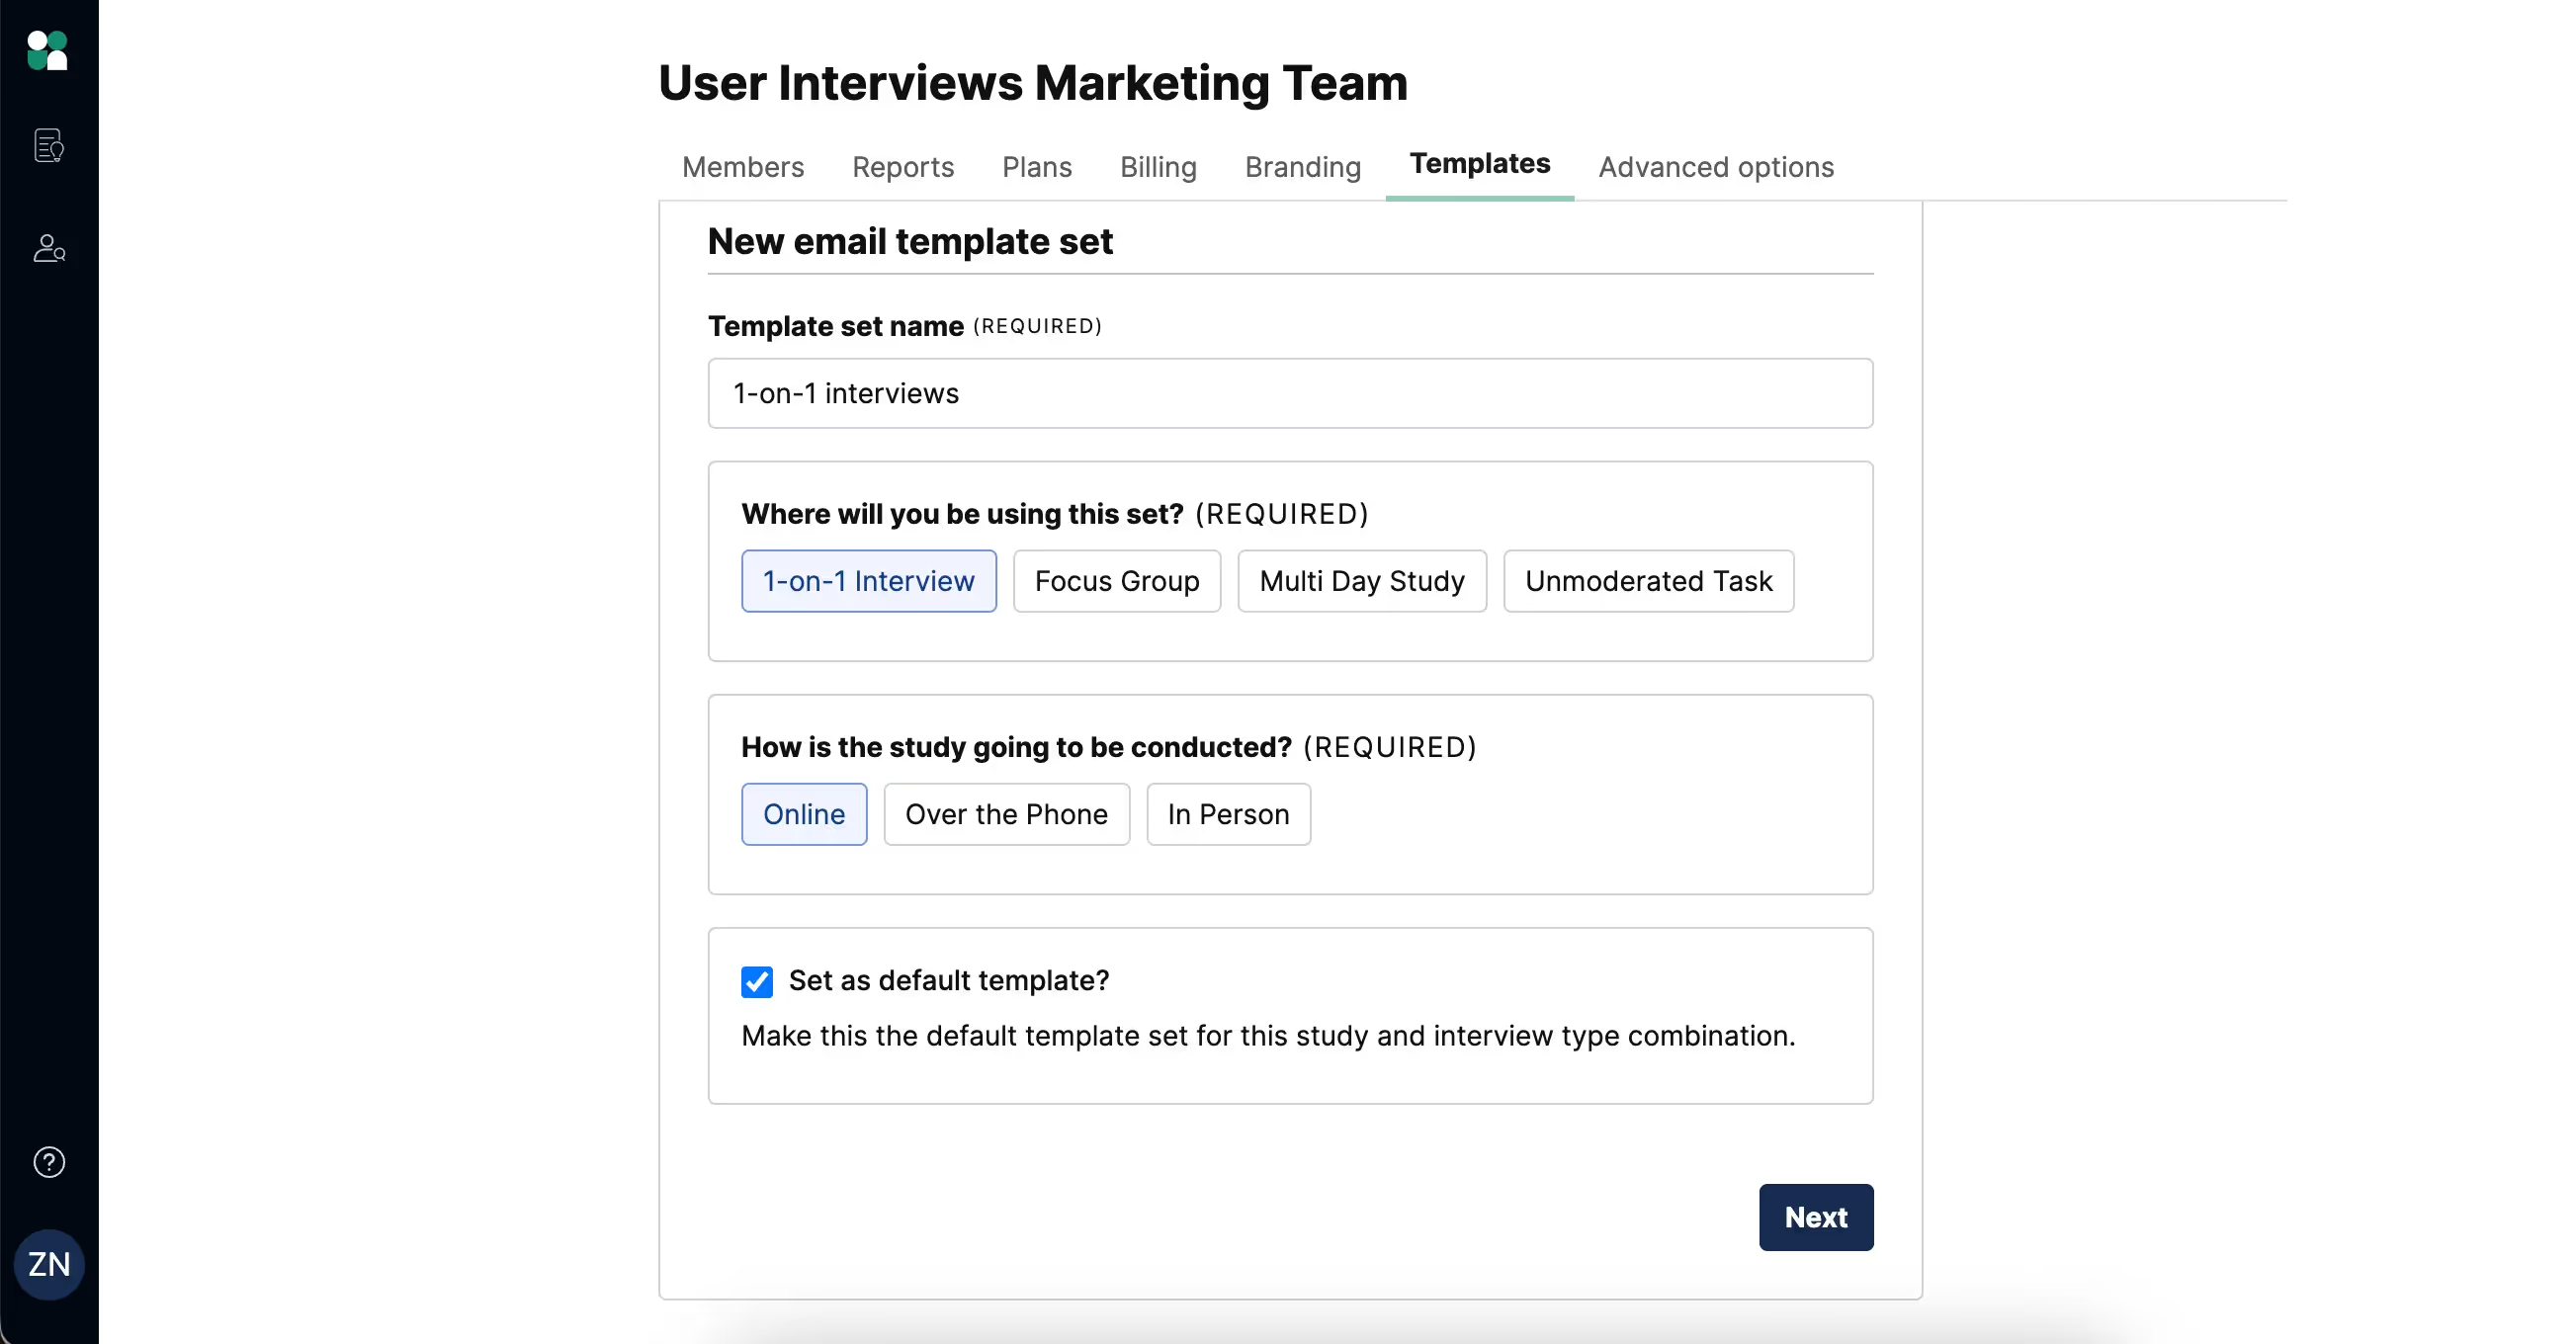
We make it really easy to build your first set. Simply hit the “Create” button, give your set a name, and tell us what kind of study it’s for (e.g. 1-1 interview, or focus group) and where the study will take place (e.g. online, or over the phone). If you’ll be running various types of studies, you can create multiple template sets.
Instantly, your templates will be populated with some base language that you can start from, and apply any customizations to. Email templates will dynamically pull in information about your project, so participants will get all the information they need without you having to type up new communication every time you run a project. Email templates are a huge timesaver!
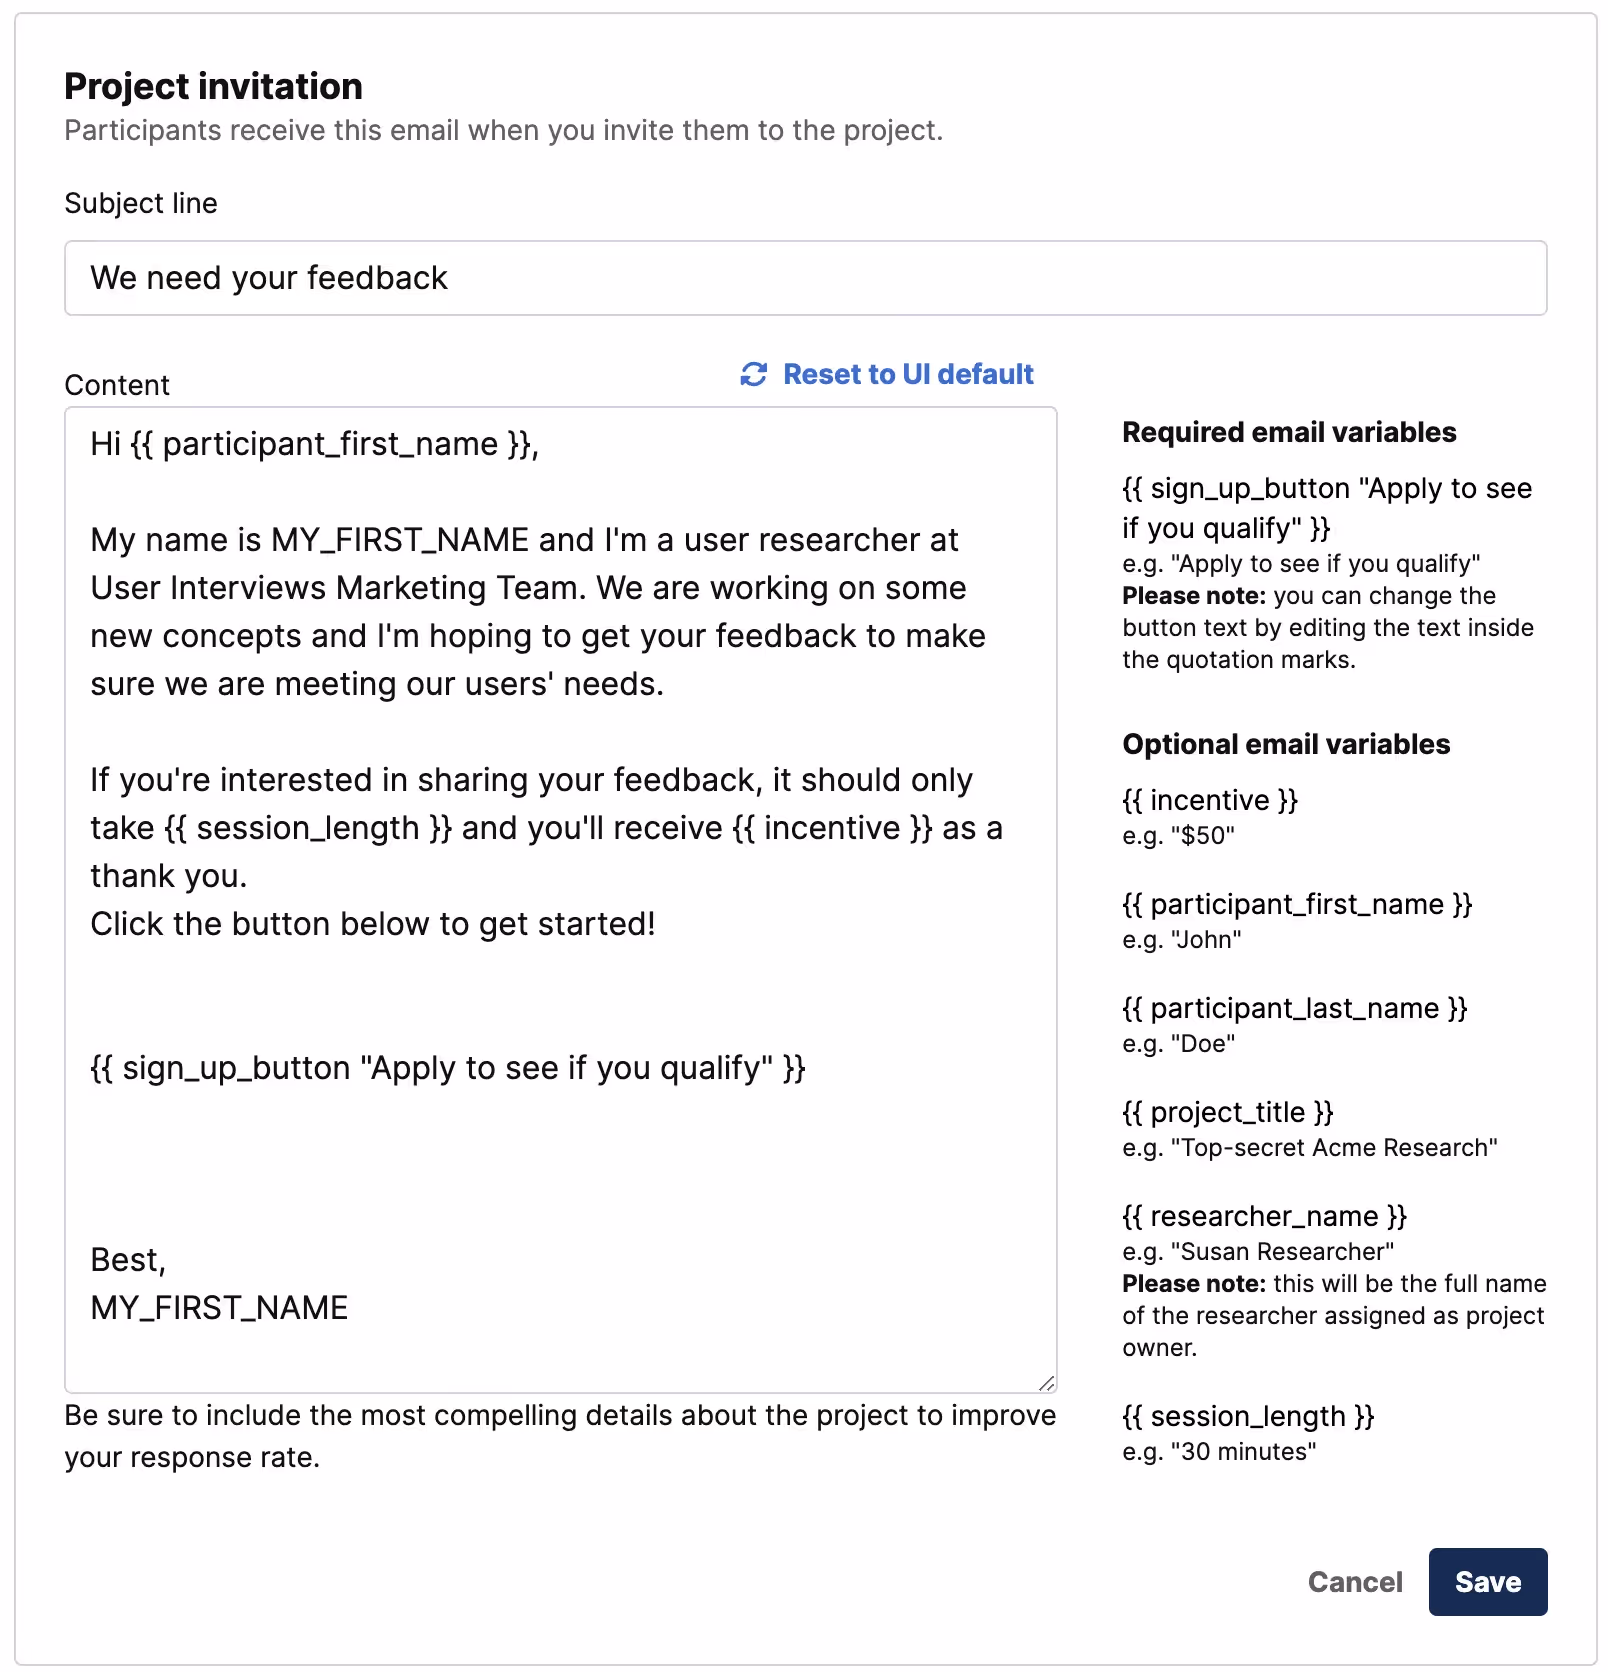
Learn more about creating email template sets.
3. Set up a data consent notice
Create a data consent notice if you need to ask for explicit consent from customers before collecting their data. When your team has an active consent notice turned on, participants will be asked to provide consent before opting in to hear about research studies or submitting a project application. This feature helps researchers to handle their users’ data in compliant ways.
Using the editor on the Consent Settings page, you can customize your consent notice, apply formatting, and link out to a more detailed privacy policy.
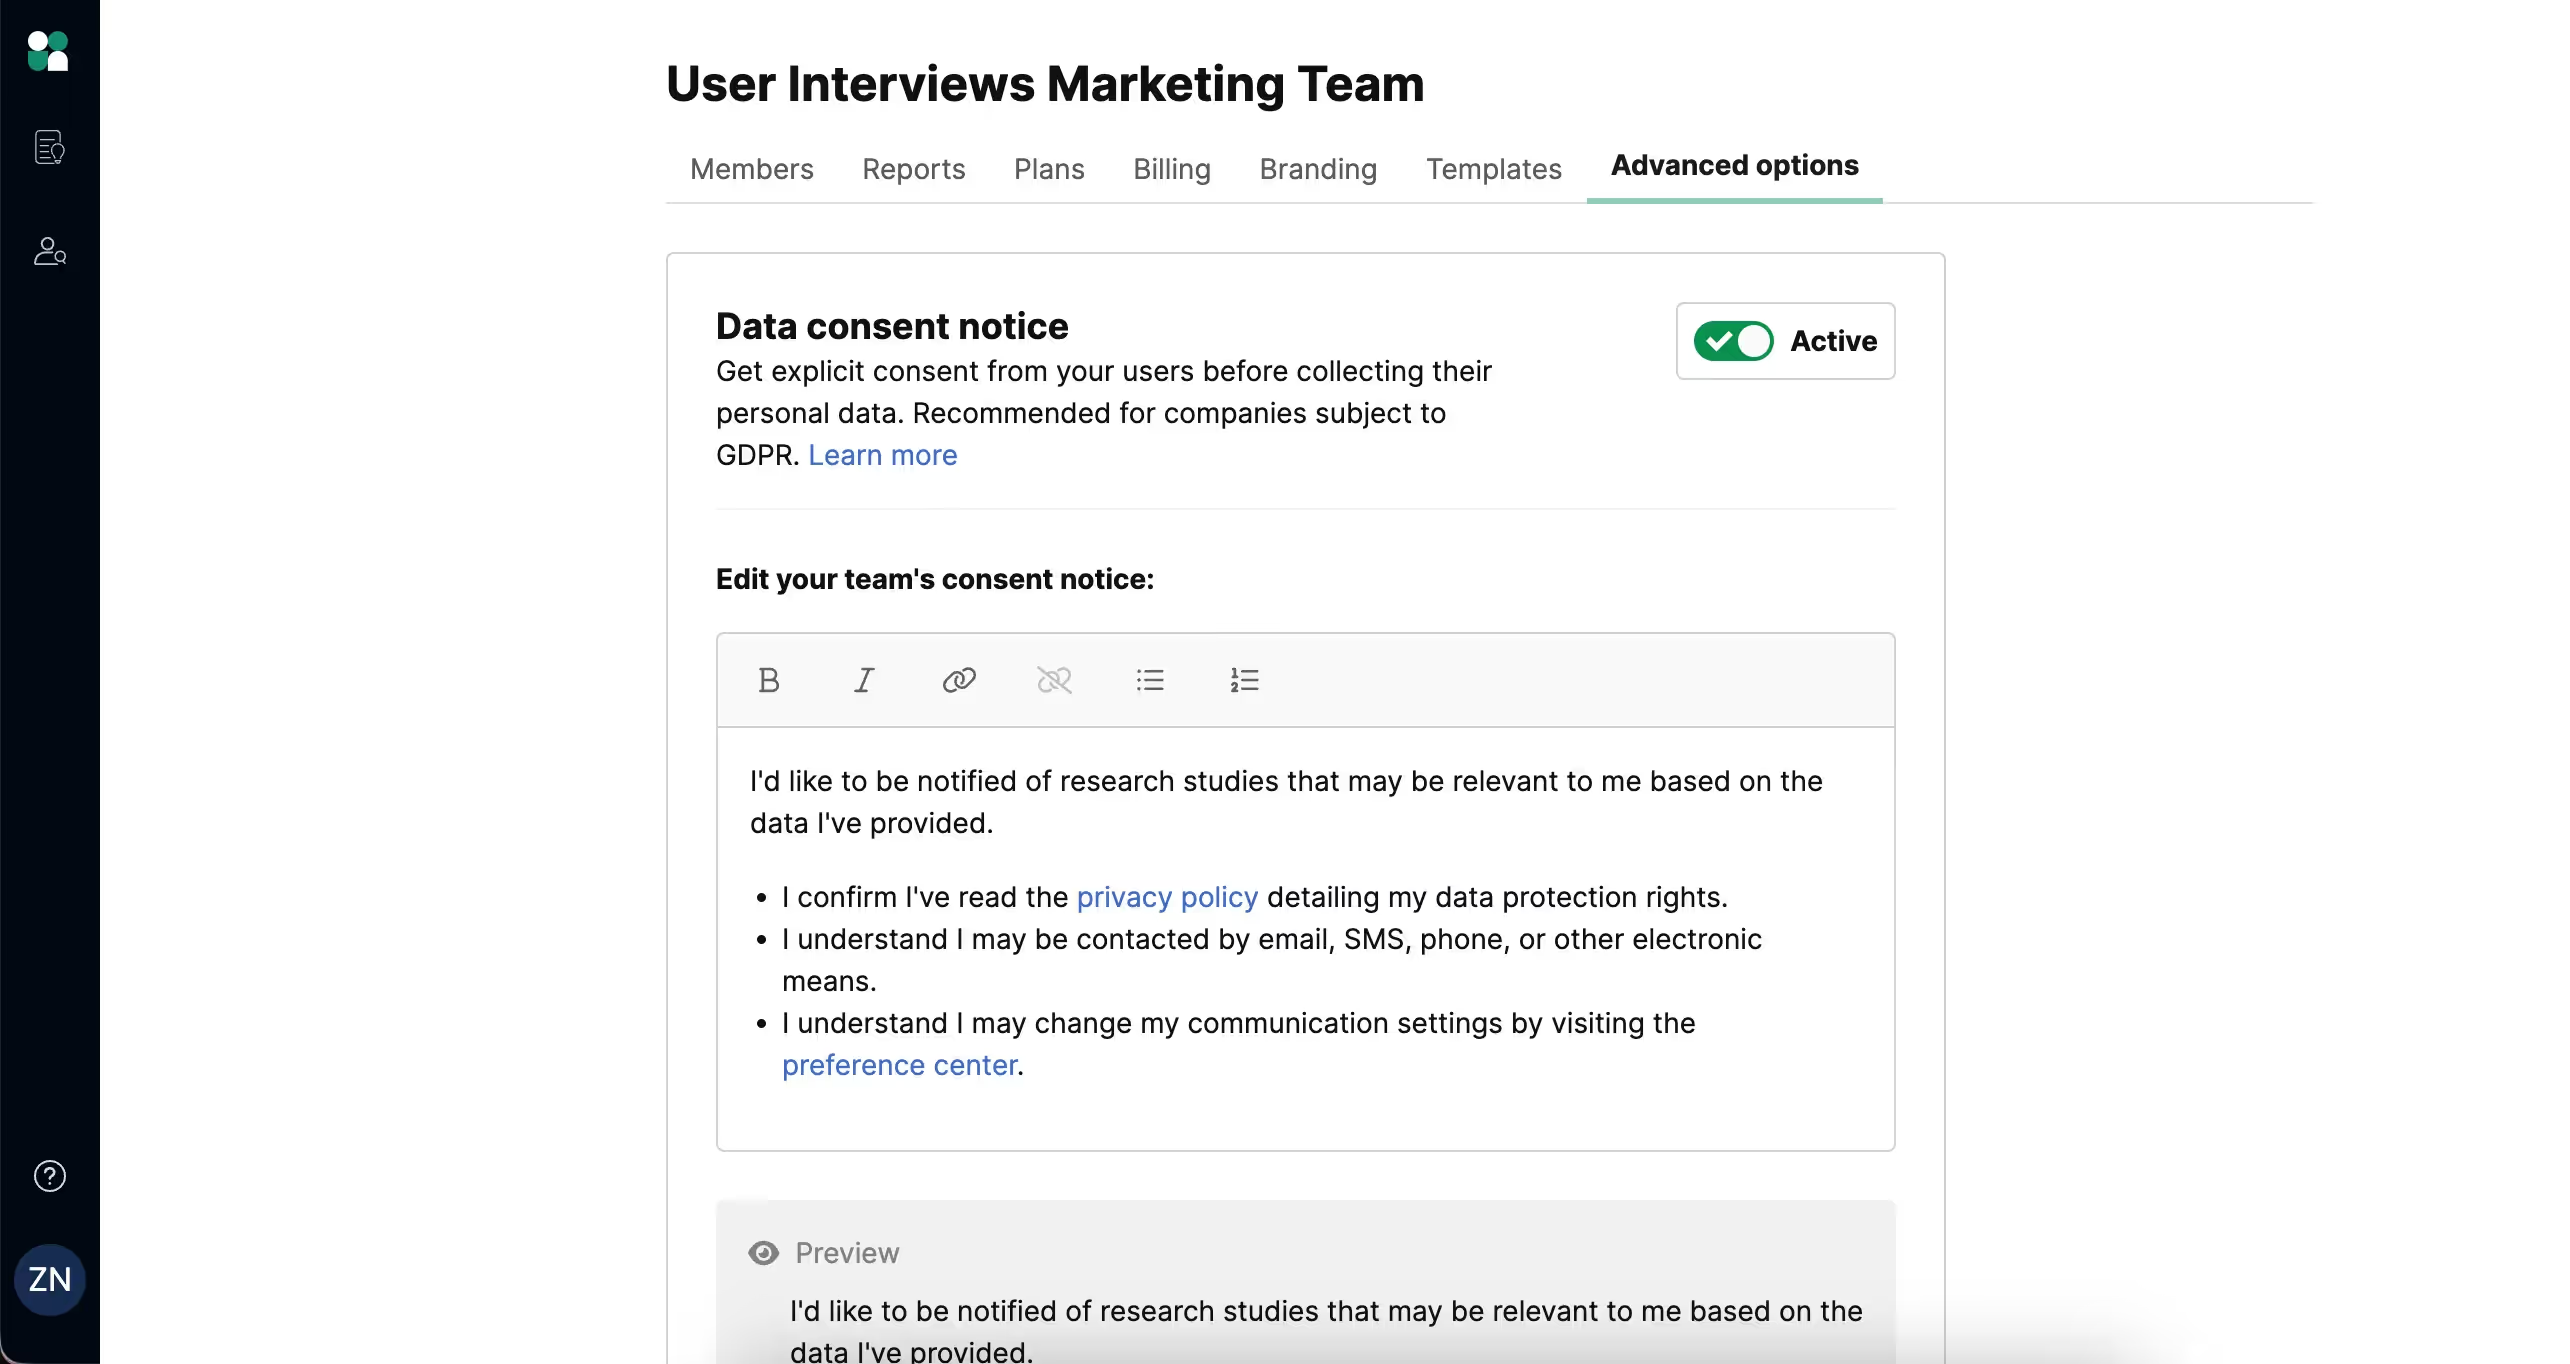
💡 Data consent notices are a great feature for companies subject to GDPR and other compliance policies to ensure they have a current record of consent every time a user joins their panel or applies to a project.
Learn more about creating a data consent notice.
If you have additional privacy information and links to share, you can create a custom footer to be displayed on all participant-facing pages. This ensures that important information is easily accessible to your participants as they navigate through any part of the Hub experience, such as filling out your opt-in form, or redeeming an incentive.
4. Authenticate your domain and set up sender profiles
Lastly, we recommend you authenticate your domain and set up sender profiles, so emails appear to come from specific team members. This step will ensure maximum deliverability of your automated emails and the best response rate from your customers.
To authenticate your domain, you may need a tiny bit of help from your IT team. We’ve laid out simple instructions for them to follow in this domain authentication guide.
Once your domain has been authenticated, you can proceed to set up sender profiles for you and your teammates. Sender profiles allow you to customize the sender email address and name that automated emails are sent from. Users appreciate getting emails from contacts they're familiar with. Setting up sender profiles for any teammates who will be running research through your User Interviews account is a great way to build trust with your panel.
Learn more about authenticating your domain and setting up sender profiles.
Help! I’m not seeing these customizations in my account
If these customizations do not appear to be active in your Research Hub account, you may not have the subscription tier required to activate them.
- Data consent notices are included with all subscription tiers.
- Branding, email themes, and email template sets are available on our essential, premium, and enterprise subscriptions.
- Custom email domains and sender profiles are included with Hub premium and enterprise subscriptions.
Keep learning with our Research Hub onboarding series
Congratulations on customizing the Hub experience for your participants! Next up, let’s look at Part 4: Launching Your First Project With Research Hub.
📖 This guide is part of a 4-part onboarding series on getting started with Research Hub. Check out the other guides here: Get Started With Research Hub


