
For any Recruit or Hub project, you can now apply one or more filters to the participant queue to quickly and precisely seek out the participants you most want to talk to. Combine any number of characteristics and screener questions to meet your participant recruitment and research goals — as specific as they may be.
Why use filters
Filters can help you to:
- Speed up the process of finding the participants you want to talk to, once they’ve applied.
- Control the criteria that’s most important to your study.
- Build a balanced and representative panel.
- Manage quotas more easily.
- Simplify your workflow — get the precision you need without exporting data to analyze off-platform.
How to use filters
1. Navigate to your project’s “Participants” page to view your participant queue. Click on the “Filter” button at the top right of the participant table to bring up the filter modal.

2. Using the first drop-down, select whether you want to filter by a participant characteristic or by a screener survey response.
3. Next, select which characteristic or screener survey question you’re interested in.
4. Finally, select the responses you’re targeting. Note that multiple selections within a single filter are treated as or statements.
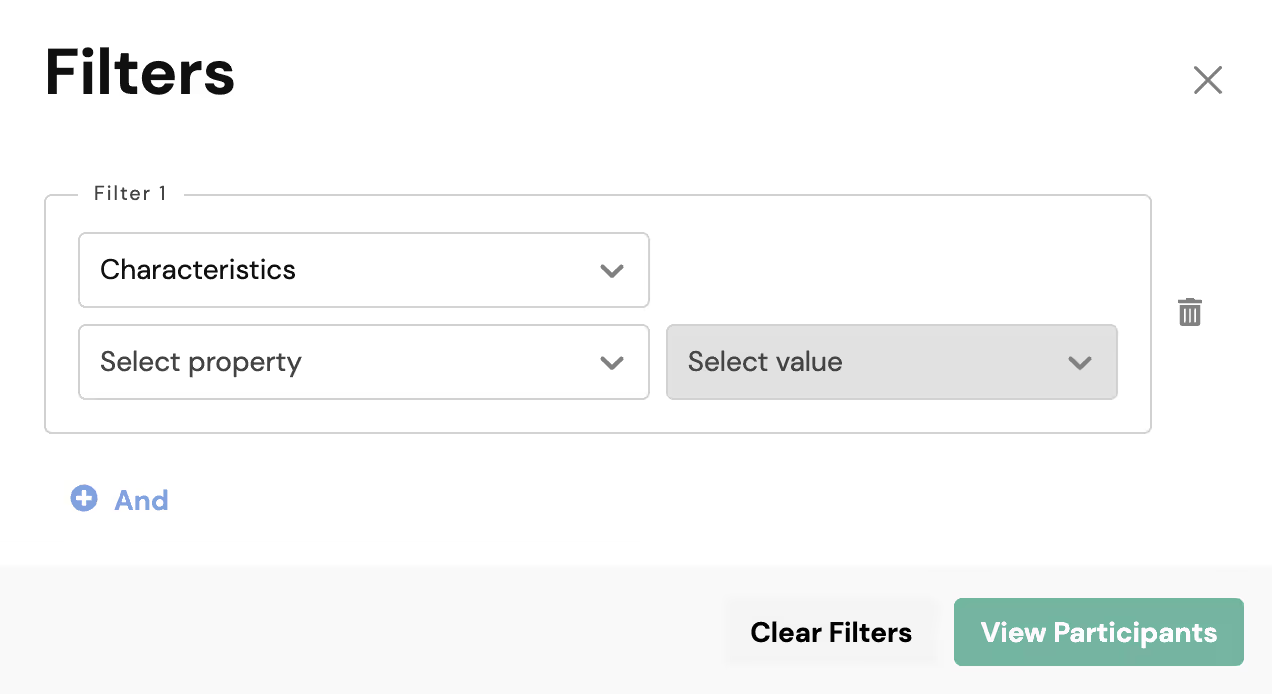
5. If you only need to use one filter, click “View Participants” to apply the filter to your participant queue. You’re all done!
How to use multiple filters
1. If you want to layer on a second filter, click the “+ And” button and go through the same process described above, selecting filter type, property, and target response.
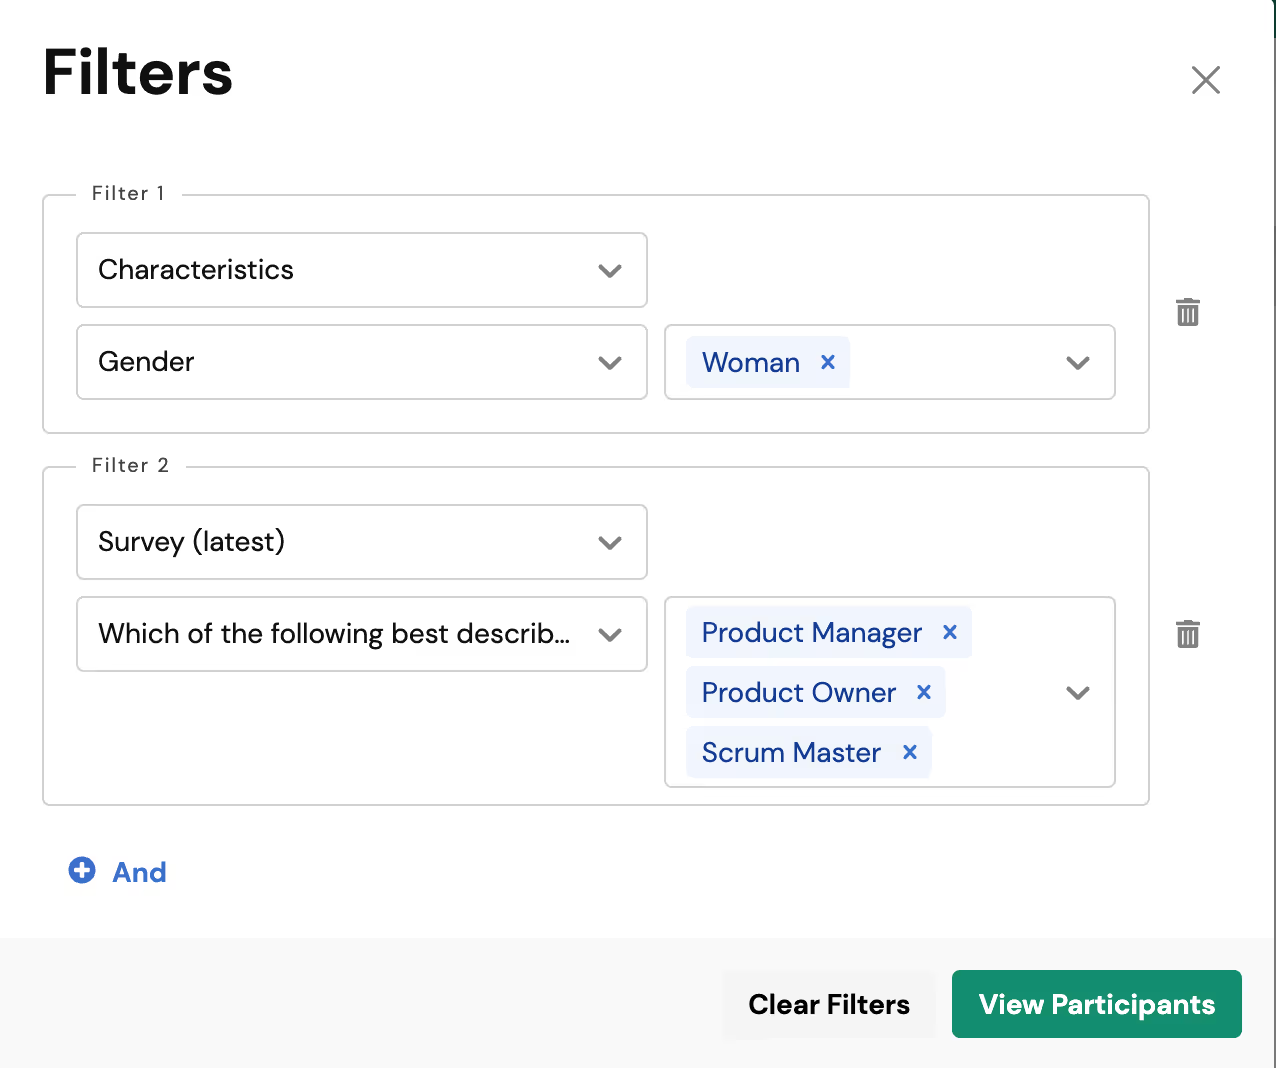
2. You can continue adding as many filters as you need. Note that multiple filters are treated as and statements.
3. Once you’re happy with the filters you’ve created, click “View Participants” to apply the filters to your participant queue.
Once you’ve got your filtered list of participants, you can click into a detailed view of any participant’s profile, and when you click the “Back to all participants’ button, the filters you’ve applied will persist.
If you need to adjust your filters, simply click back into the “Filter” modal and add, edit, or remove filters as needed. You can also click “Clear Filters” to remove all the filters you’ve applied in one go.
How does the filtering logic work
Multiple selections within a single filter are treated as or statements. For example, if a researcher applies a filter for “Level of education” and selects “Bachelor’s degree” and “Master’s degree”, participants who have either a Bachelor’s degree or a Master’s degree will be displayed in the results.
Multiple filters are treated as and statements. For example, if a researcher applies a filter for “Gender” and selects “Woman”, then applies a second filter for “Employment status” and selects “Full-time employed”, only participants who identify as women and are also full-time employed will be displayed in the results.


