
This article walks through some best practices for setting availability on your research calendar. To learn about how to automate scheduling for your projects through calendar integrations, visit our automated scheduling support guide.
Adding your availability
To update your calendar, navigate to the Research Design section > Research Activity tab > Session attendance, location, and scheduling drawer. This will open a side drawer where you'll be able to add future blocks of time, scheduling rules, collaborators, and much more. You can save changes by clicking "Save". Be sure to do this before you close the drawer!
💡Tip: Connect your Google Calendar or Microsoft Outlook Calendar for easier scheduling. Using a calendar integration allows you to easily reference your availability while selecting time slots in your research calendar, as well as automatically push confirmed sessions back to your calendar app. You can also connect your Collaborator's calendar for smooth cross collaboration.
Best Practices
Timezones
In the Draft phase, you can set your study timezone under the Research Design section > Research Activity tab > Scheduling Rules drawer. Make sure the timezone is correctly based on your location. This will be the timezone your team will see session availability in and will ensure integrated calendar times match. Participants will see an automatically converted time based on their location profile setting.
For example, say you're located in San Francisco and wish to speak to participants in New York City at 2pm your time. You'll want to set the study timezone to 2pm PST. For the NYC participant, they will automatically see the converted time availability as 5pm EST.
You will not be able to change your timezone after a project has launched. If participants are scheduled and you need to update your timezone, all participants will need to be rescheduled and our cancelation policy may apply. If it needs updating, email projects@userinterviews.com for further assistance.
Calendar Formats Based on Project Type
The calendar formats are different for each of the four project types. Outlined below are the setup, tips, and how to edit each type of calendar.
1-on-1 Interviews
The calendar design for this type of interview allows you to block out individual session times.
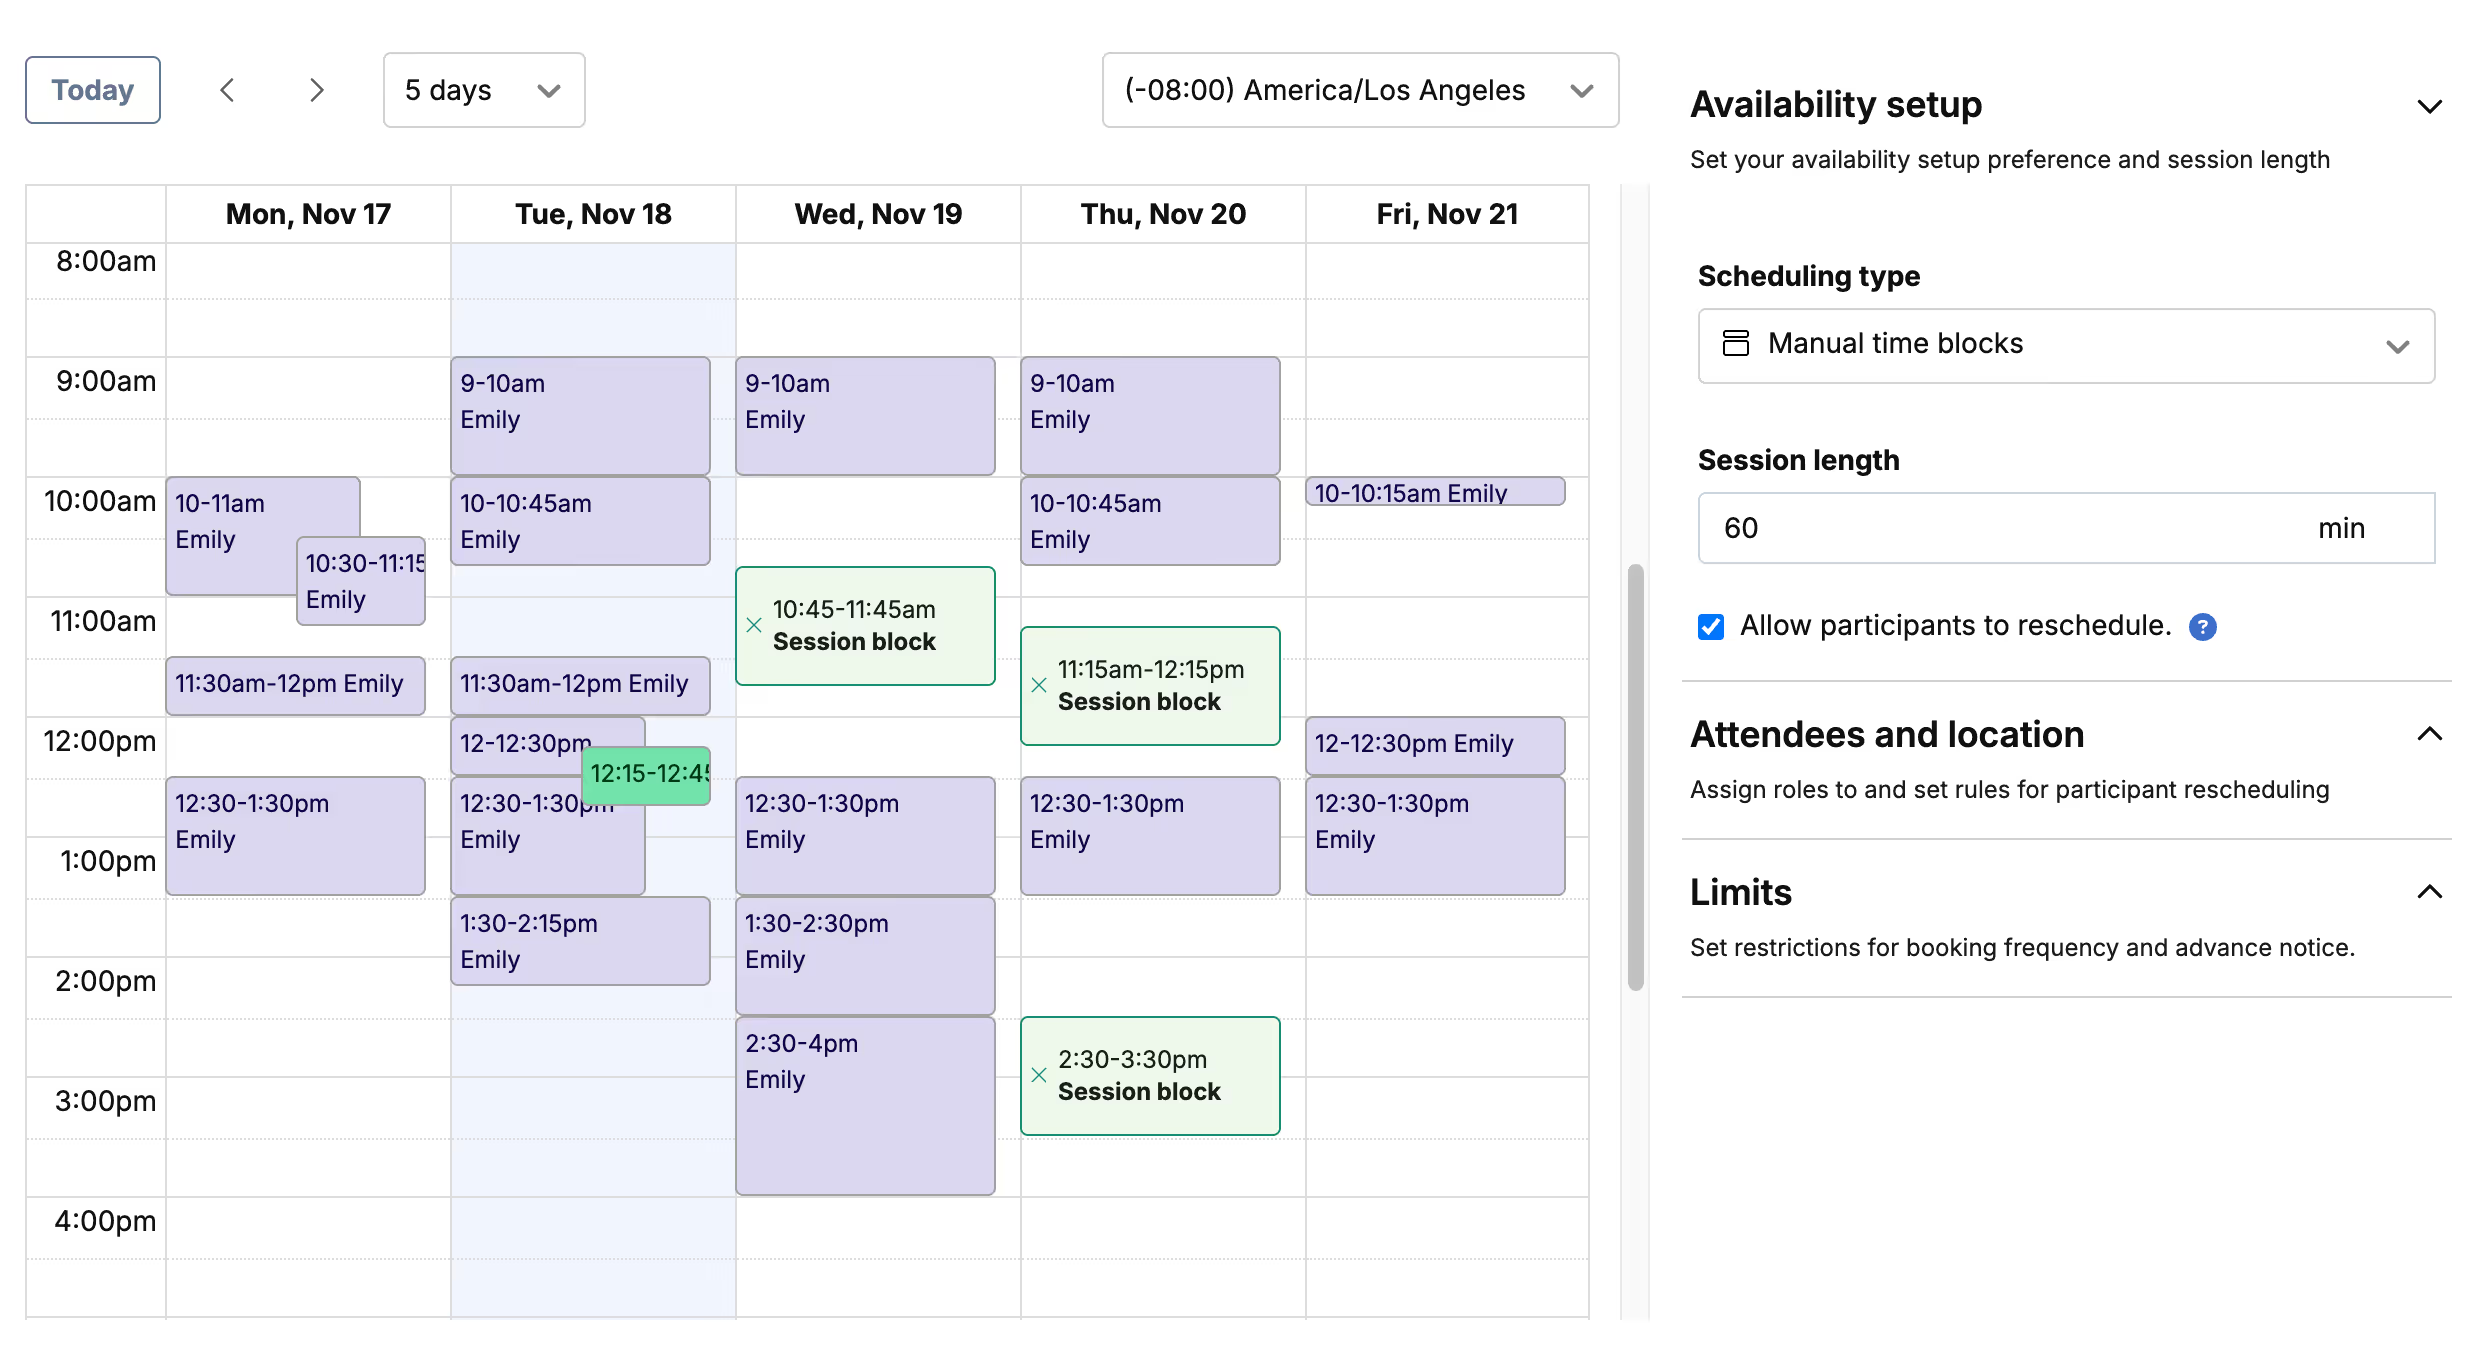
A few things to keep in mind:
- Select the correct timezone based on your location. If you change your timezone, the session will not automatically update. Be sure to move, remove, or add sessions to match your new timezone.
- All sessions must be the same length, reflecting the session length determined in your project setup.
Last but not least, be sure to save your changes before closing the drawer!
Focus Groups
The calendar design for this type of interview allows you to block out individual times where multiple people can be booked for a single session. You can set the number of participants you want to allow to join each session. To do this, you'll need to click the pencil icon next to each session time.
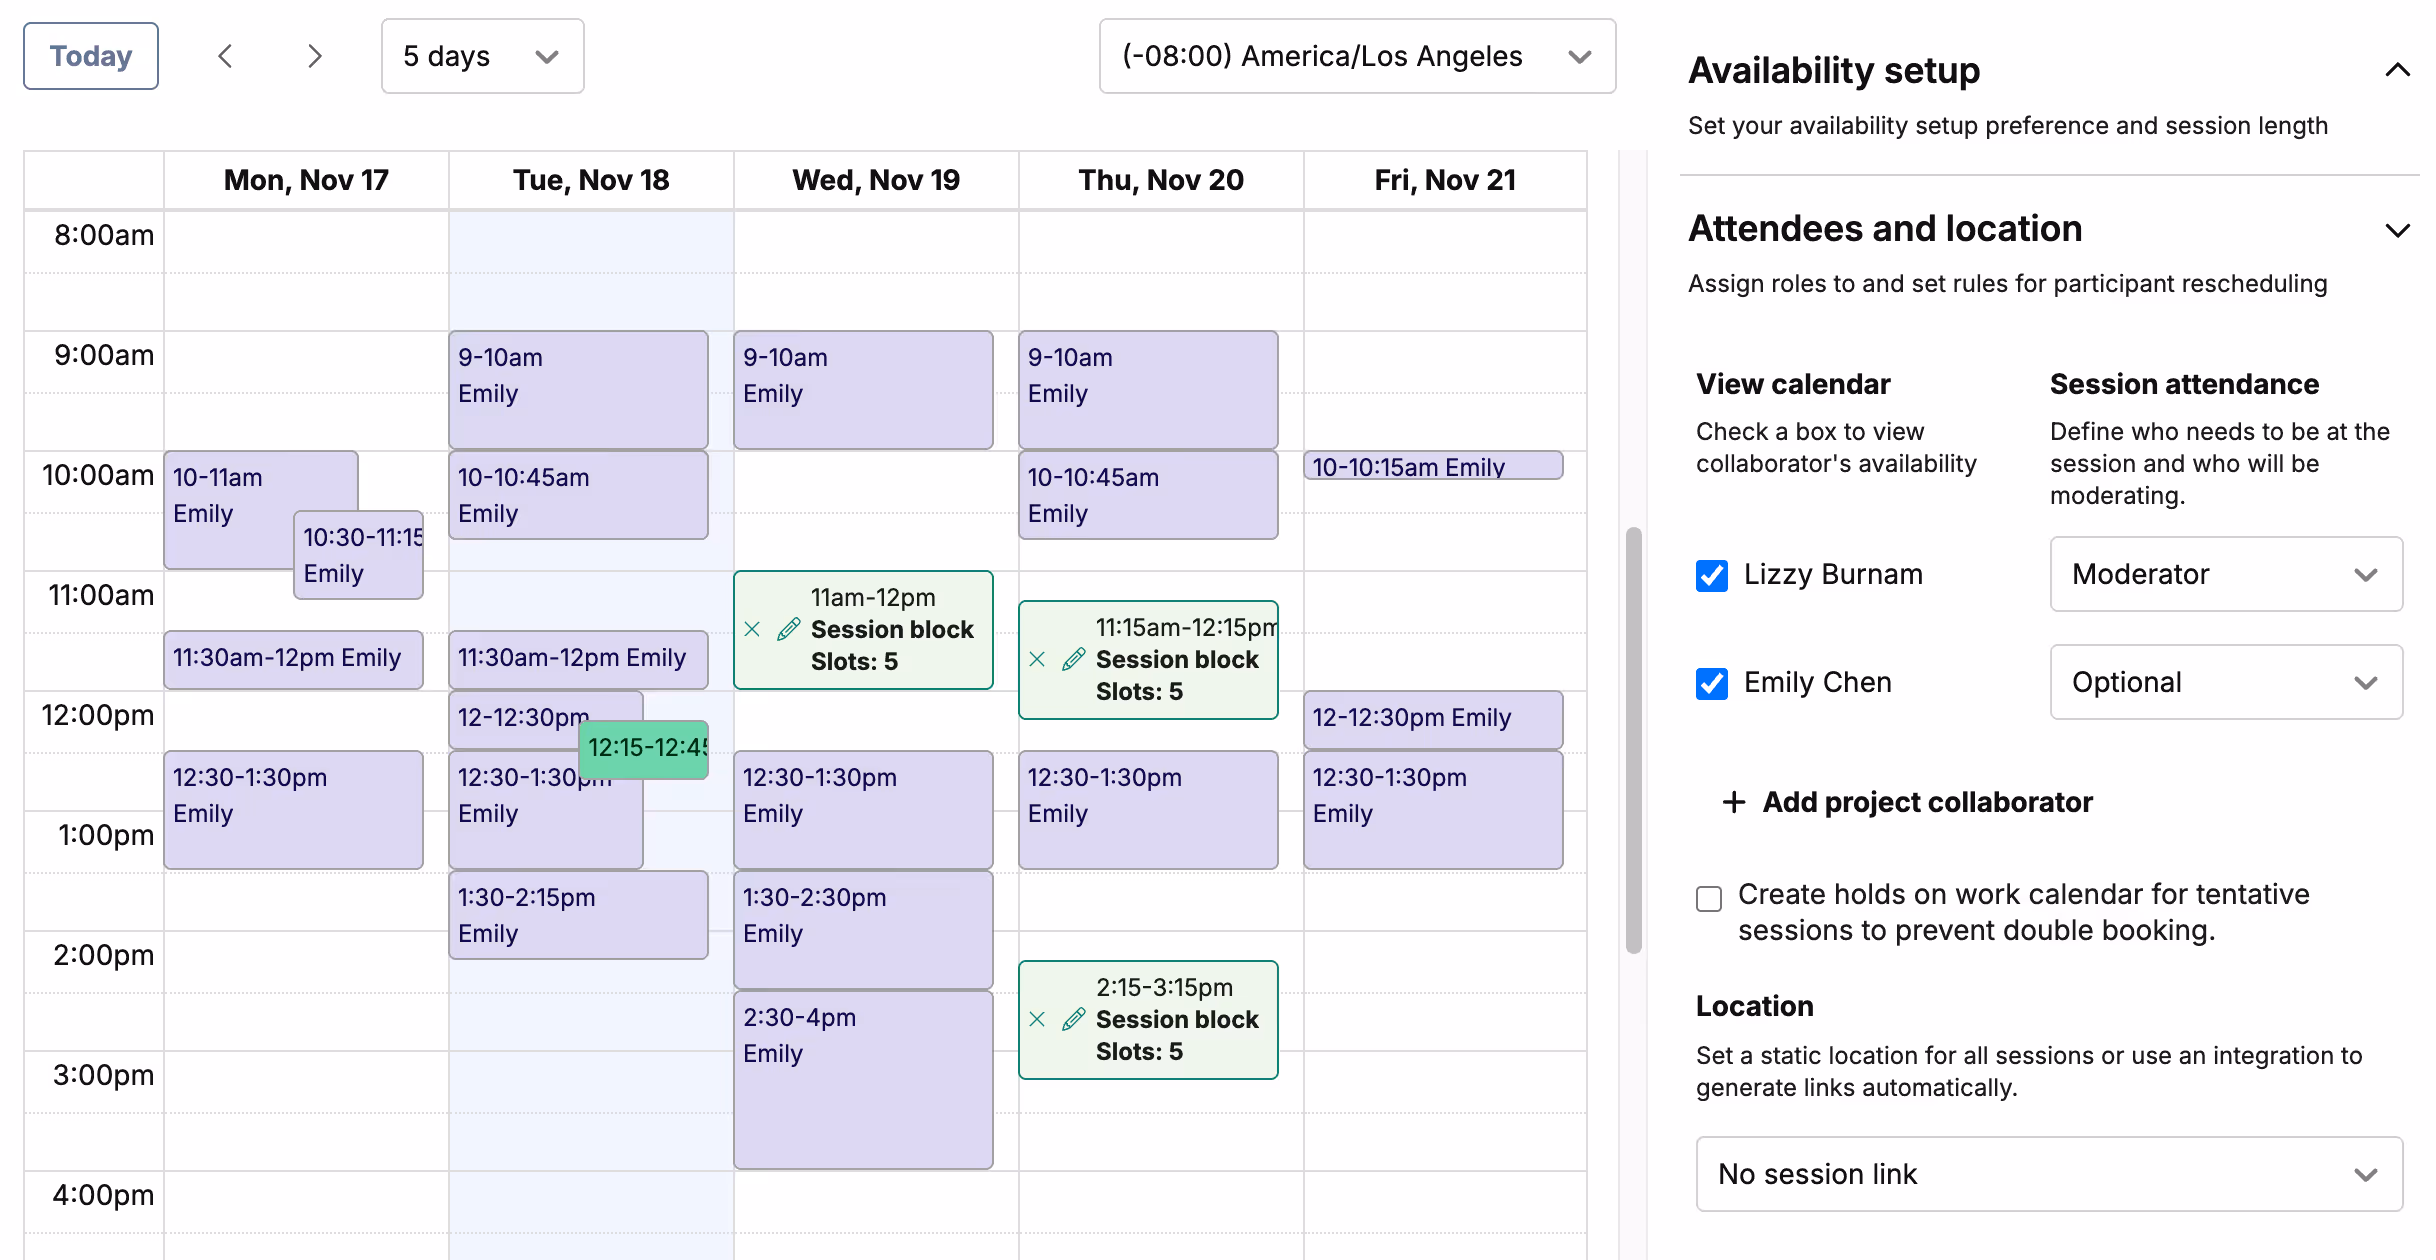
A few things to keep in mind:
- You can change the number of slots in each session to reflect the number of people who can sign up for a specific time. If you'd like to change a session to allow more or less, click the pencil icon in the blue time block. This will let you update each block of time individually.
- All sessions must be the same length, reflecting the session length determined in your project setup.
Last but not least, be sure to save your changes before closing the drawer!
Multi-Day Studies
The calendar design for this type of interview allows you to block out days, not times, over which the study will be run.
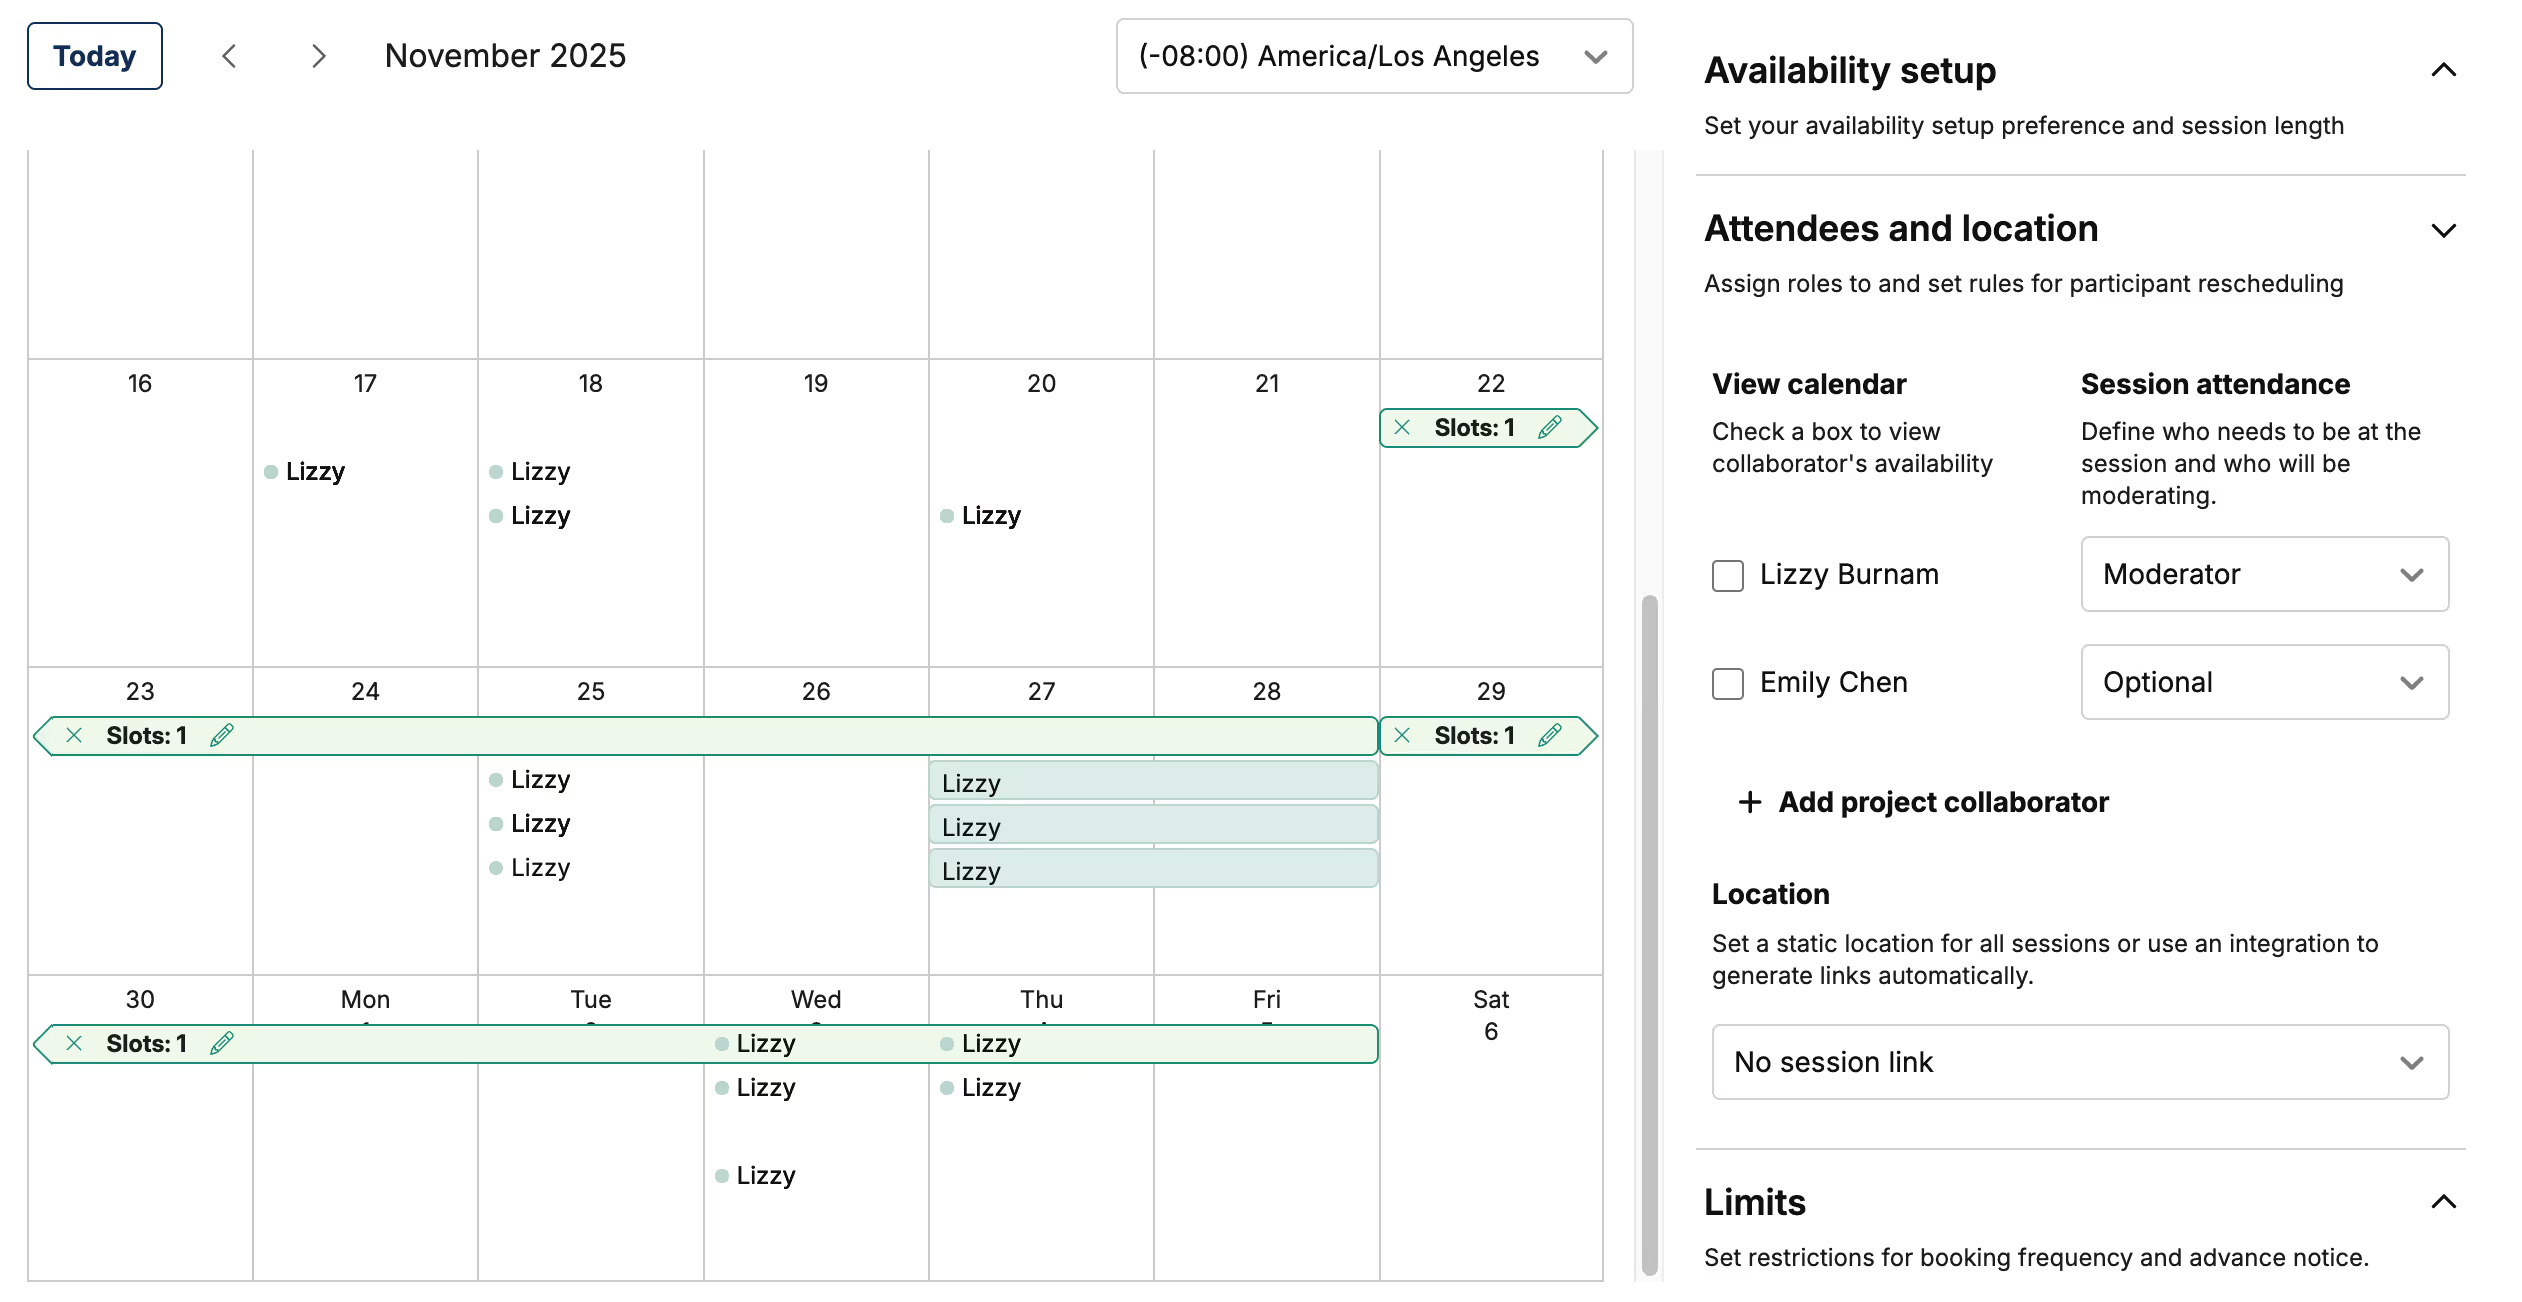
A few things to keep in mind:
- Sessions within this study type must be at least 1 full day. You will not be able to list partial day sessions.
- As with focus groups, you can set the default number of slots in each session to reflect the number of people who can sign up for a specific time. If you'd like to change a session to allow more or less than your default, click the pencil icon in the blue time block. This will let you update each block of time individually.
- All sessions must be the same length, reflecting the session length determined in your project setup.
- If you change your timezone, the session will not automatically update. Be sure to move, remove, or add sessions to match your new timezone.
Last but not least, be sure to save your changes before closing the drawer!
Unmoderated Tasks
The calendar design for this type of interview allows you to set a deadline for when the task must be completed by your participants. You can also select a timezone! When the system sends automatic task reminders, the participants will see all these details.
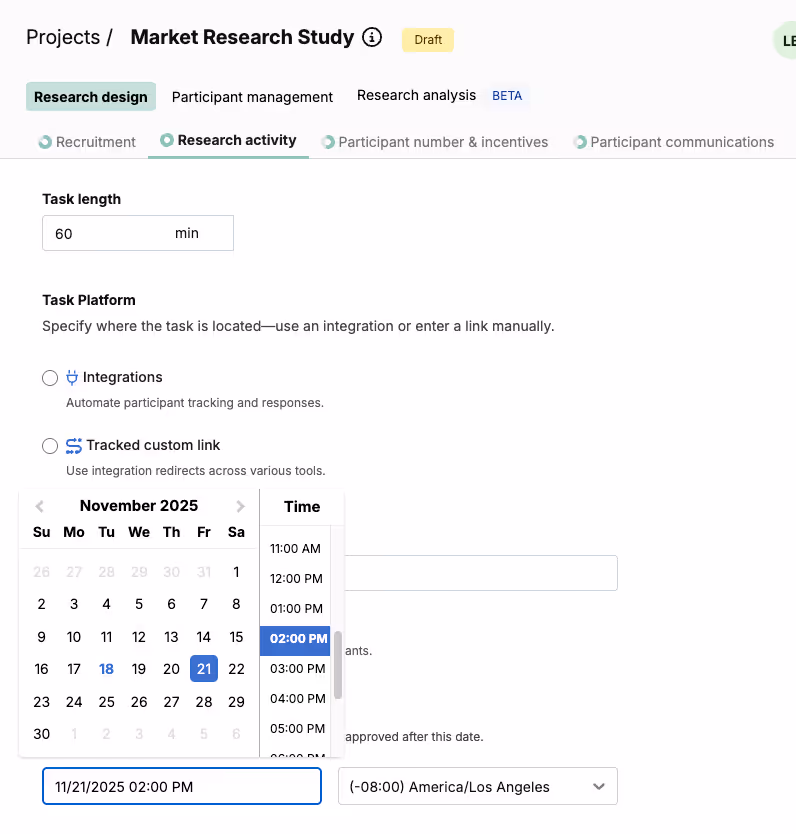
A few things to keep in mind:
- If you extend a deadline, all confirmed participants will be notified via our automated email.
- To view participant contact information, navigate to the Participant Management section > Participant Tracking tab> click the "View" button next to the participant's name.
- The "Completed" and "Incomplete" options will appear under the 3 dots once the deadline has passed. This means you'll need to wait until after the deadline passes to record participation.
- Selecting a 12:00 AM time will represent the beginning of the following day.
Last but not least, be sure to save your changes before closing the drawer!


