
Who is this article for?
🗣️ All researchers (both admins and users)
⭐ Teams on any User Interviews plan
You can now enable a recorder bot to join your 1:1 moderated research sessions (using Zoom, Google Meet, or Microsoft Teams). After your session, you’ll be able to:
- Replay video recordings in the app
- Read and search transcripts
- Download video files or transcripts
This new feature is designed to help you synthesize faster, share insights more easily, and connect the dots across interviews, participants, and projects—all while keeping your data secure within your workspace.
Watch It In Action
How It Works
Enabling AI features
Firstly, make sure AI features are enabled for your team. Admins control access to AI features from the advanced options page. Once AI features are turned on, all team members will be able to access recording and transcription within their projects.
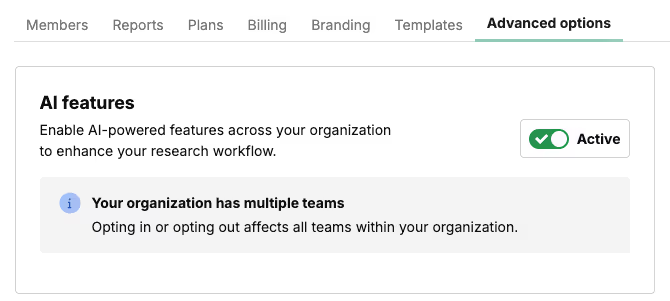
If the toggle appears grayed out, that means you are not an admin user. Reach out to an admin to get it enabled for your team.
Requirements
- Session type: 1:1 Moderated
- Integration: Zoom, Google Meet, or Microsoft Teams
- AI functionality must be enabled by your team admin
Setup: Adding the Recorder Bot
- Go to the Scheduled tab of your project.
- Toggle on Auto-Record next to the session you'd like to record, or set all sessions to auto-record via the top Automatic session recording toggle.
- The recorder bot will join the call at the scheduled time.
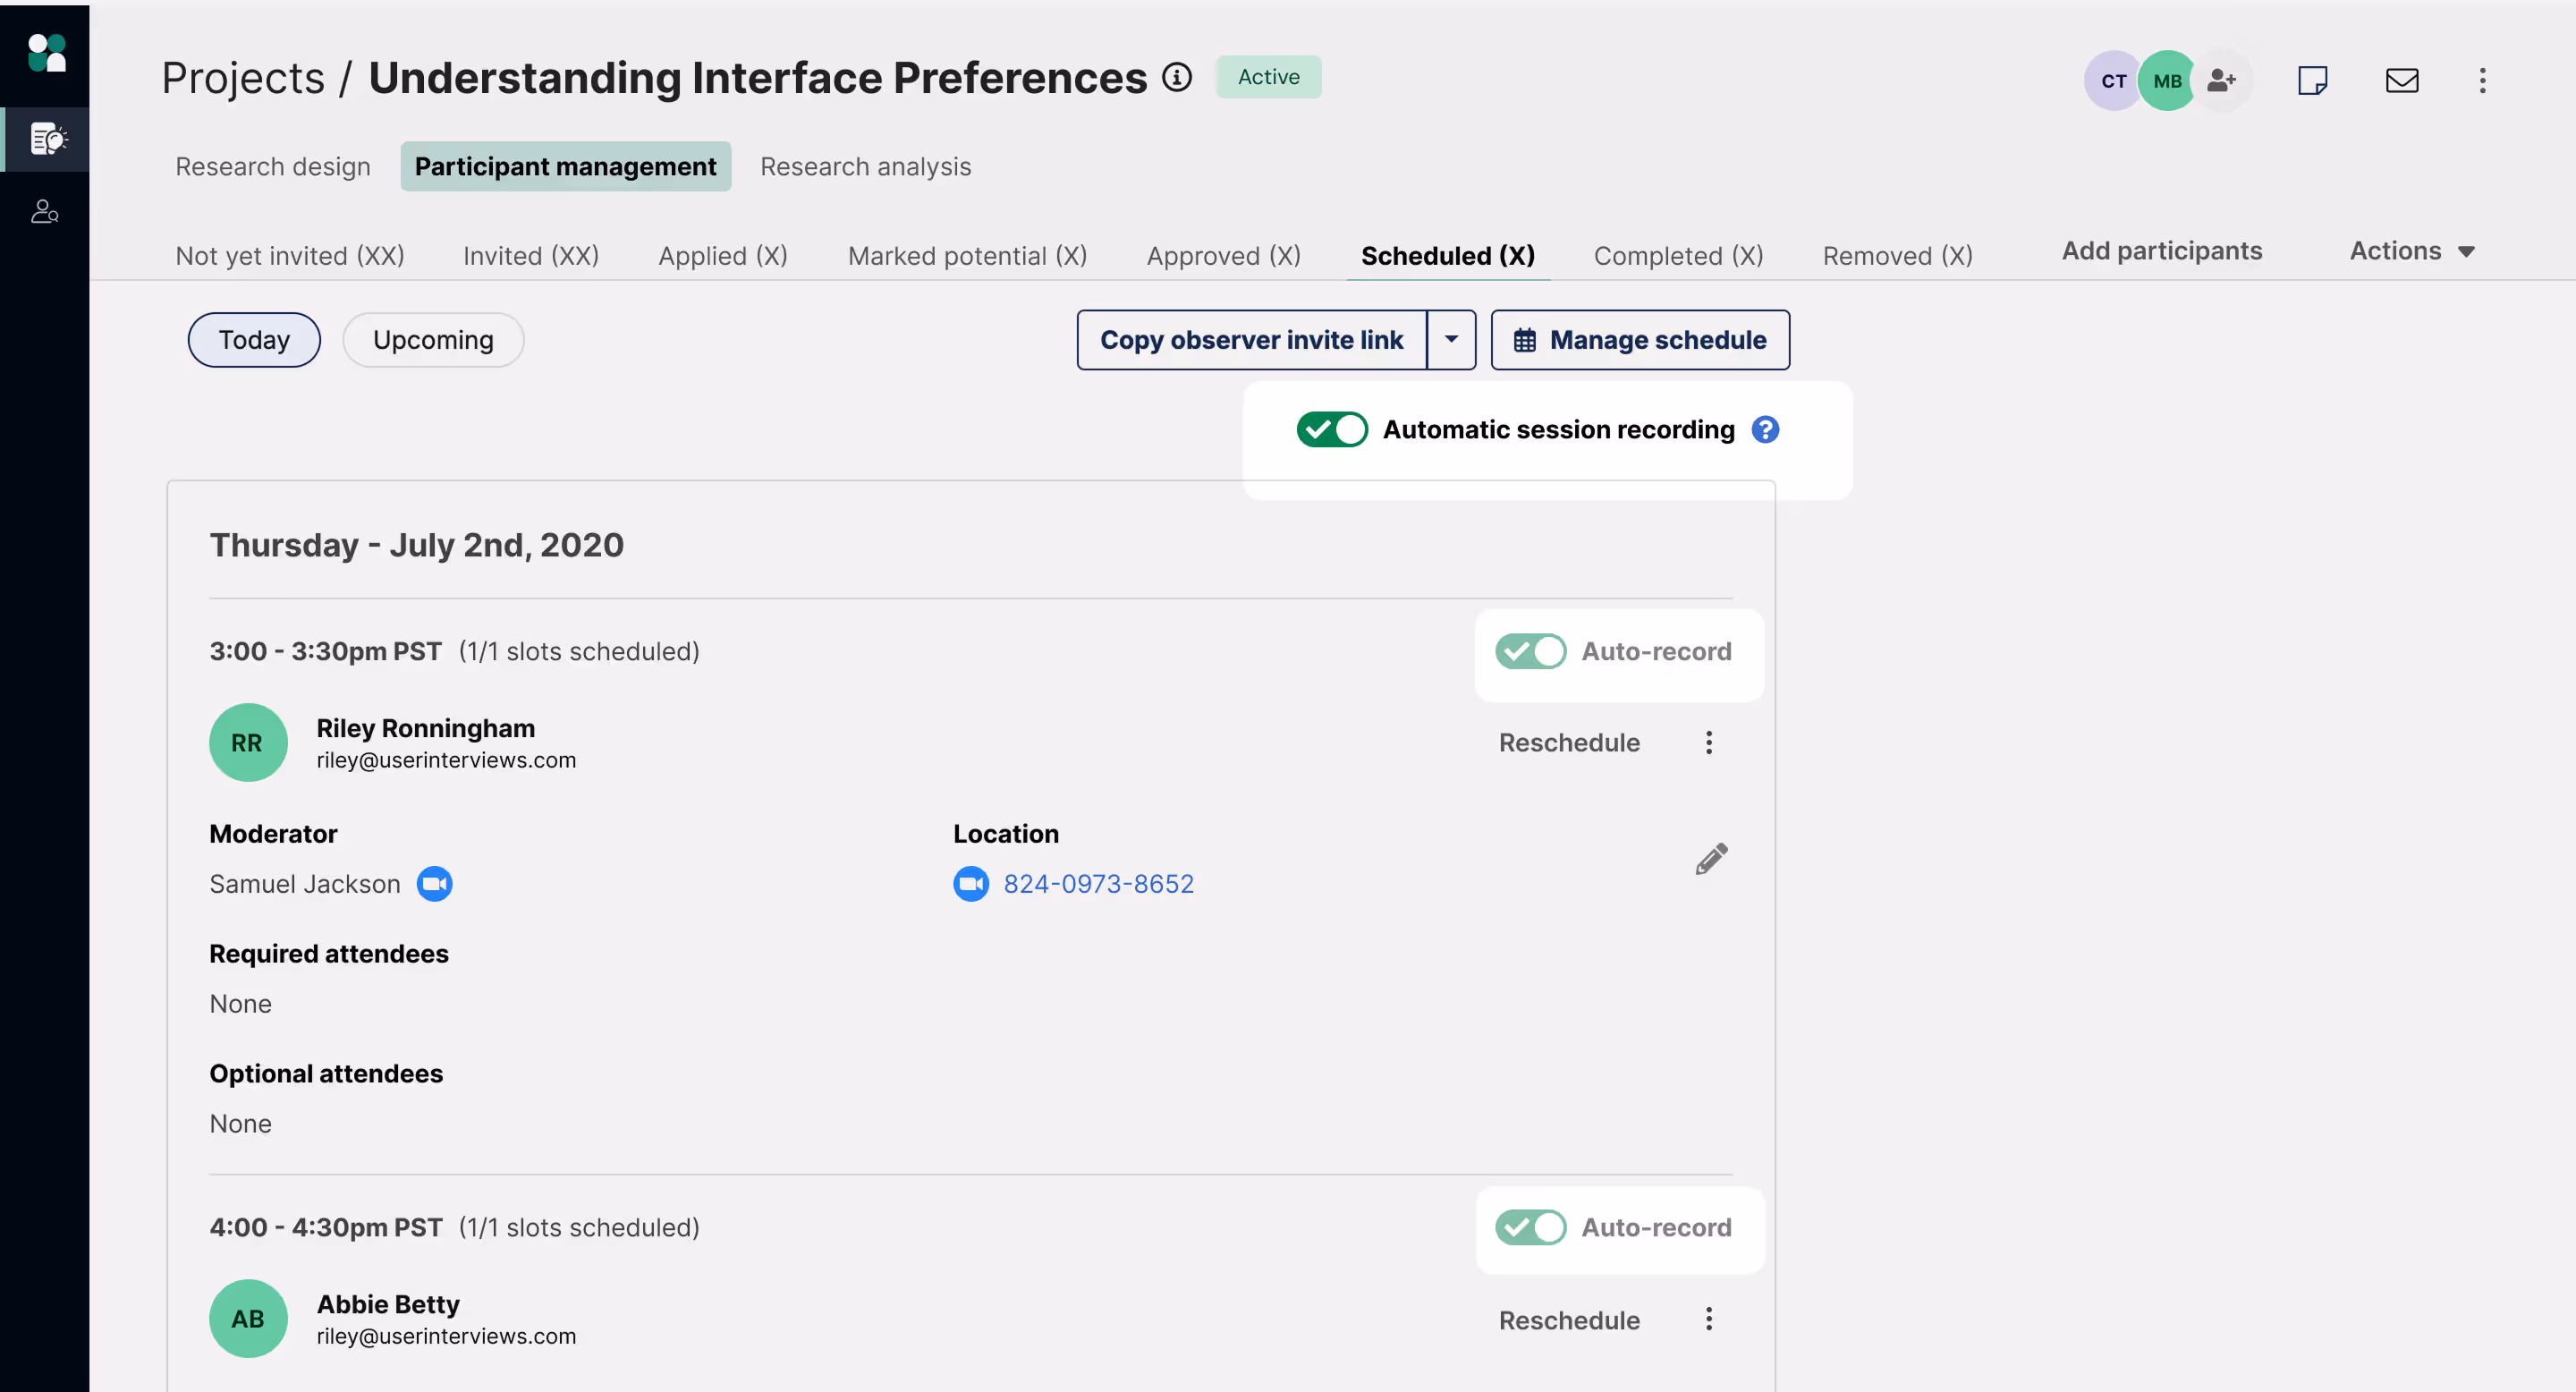
Enabling Automatic session recording for all sessions will record every session by default to capture valuable insight and ensure nothing gets missed. Please ensure that the moderator is present during the session to allow the recorder to join.
💡 If you haven’t enabled auto-record in advance, the toggle will change to Start Recording just before your session starts. Toggle it on to add the recorder bot to your session.
In the Zoom, Google Meet, or Microsoft Teams window, you will be prompted to admit the recorder bot. Once admitted, a message will appear informing meeting participants that the session is being recorded.
Reviewing Recordings and Transcripts
How It Works
After your session ends and processing is complete:
- Go to the participant’s profile in your project and open the participant drawer
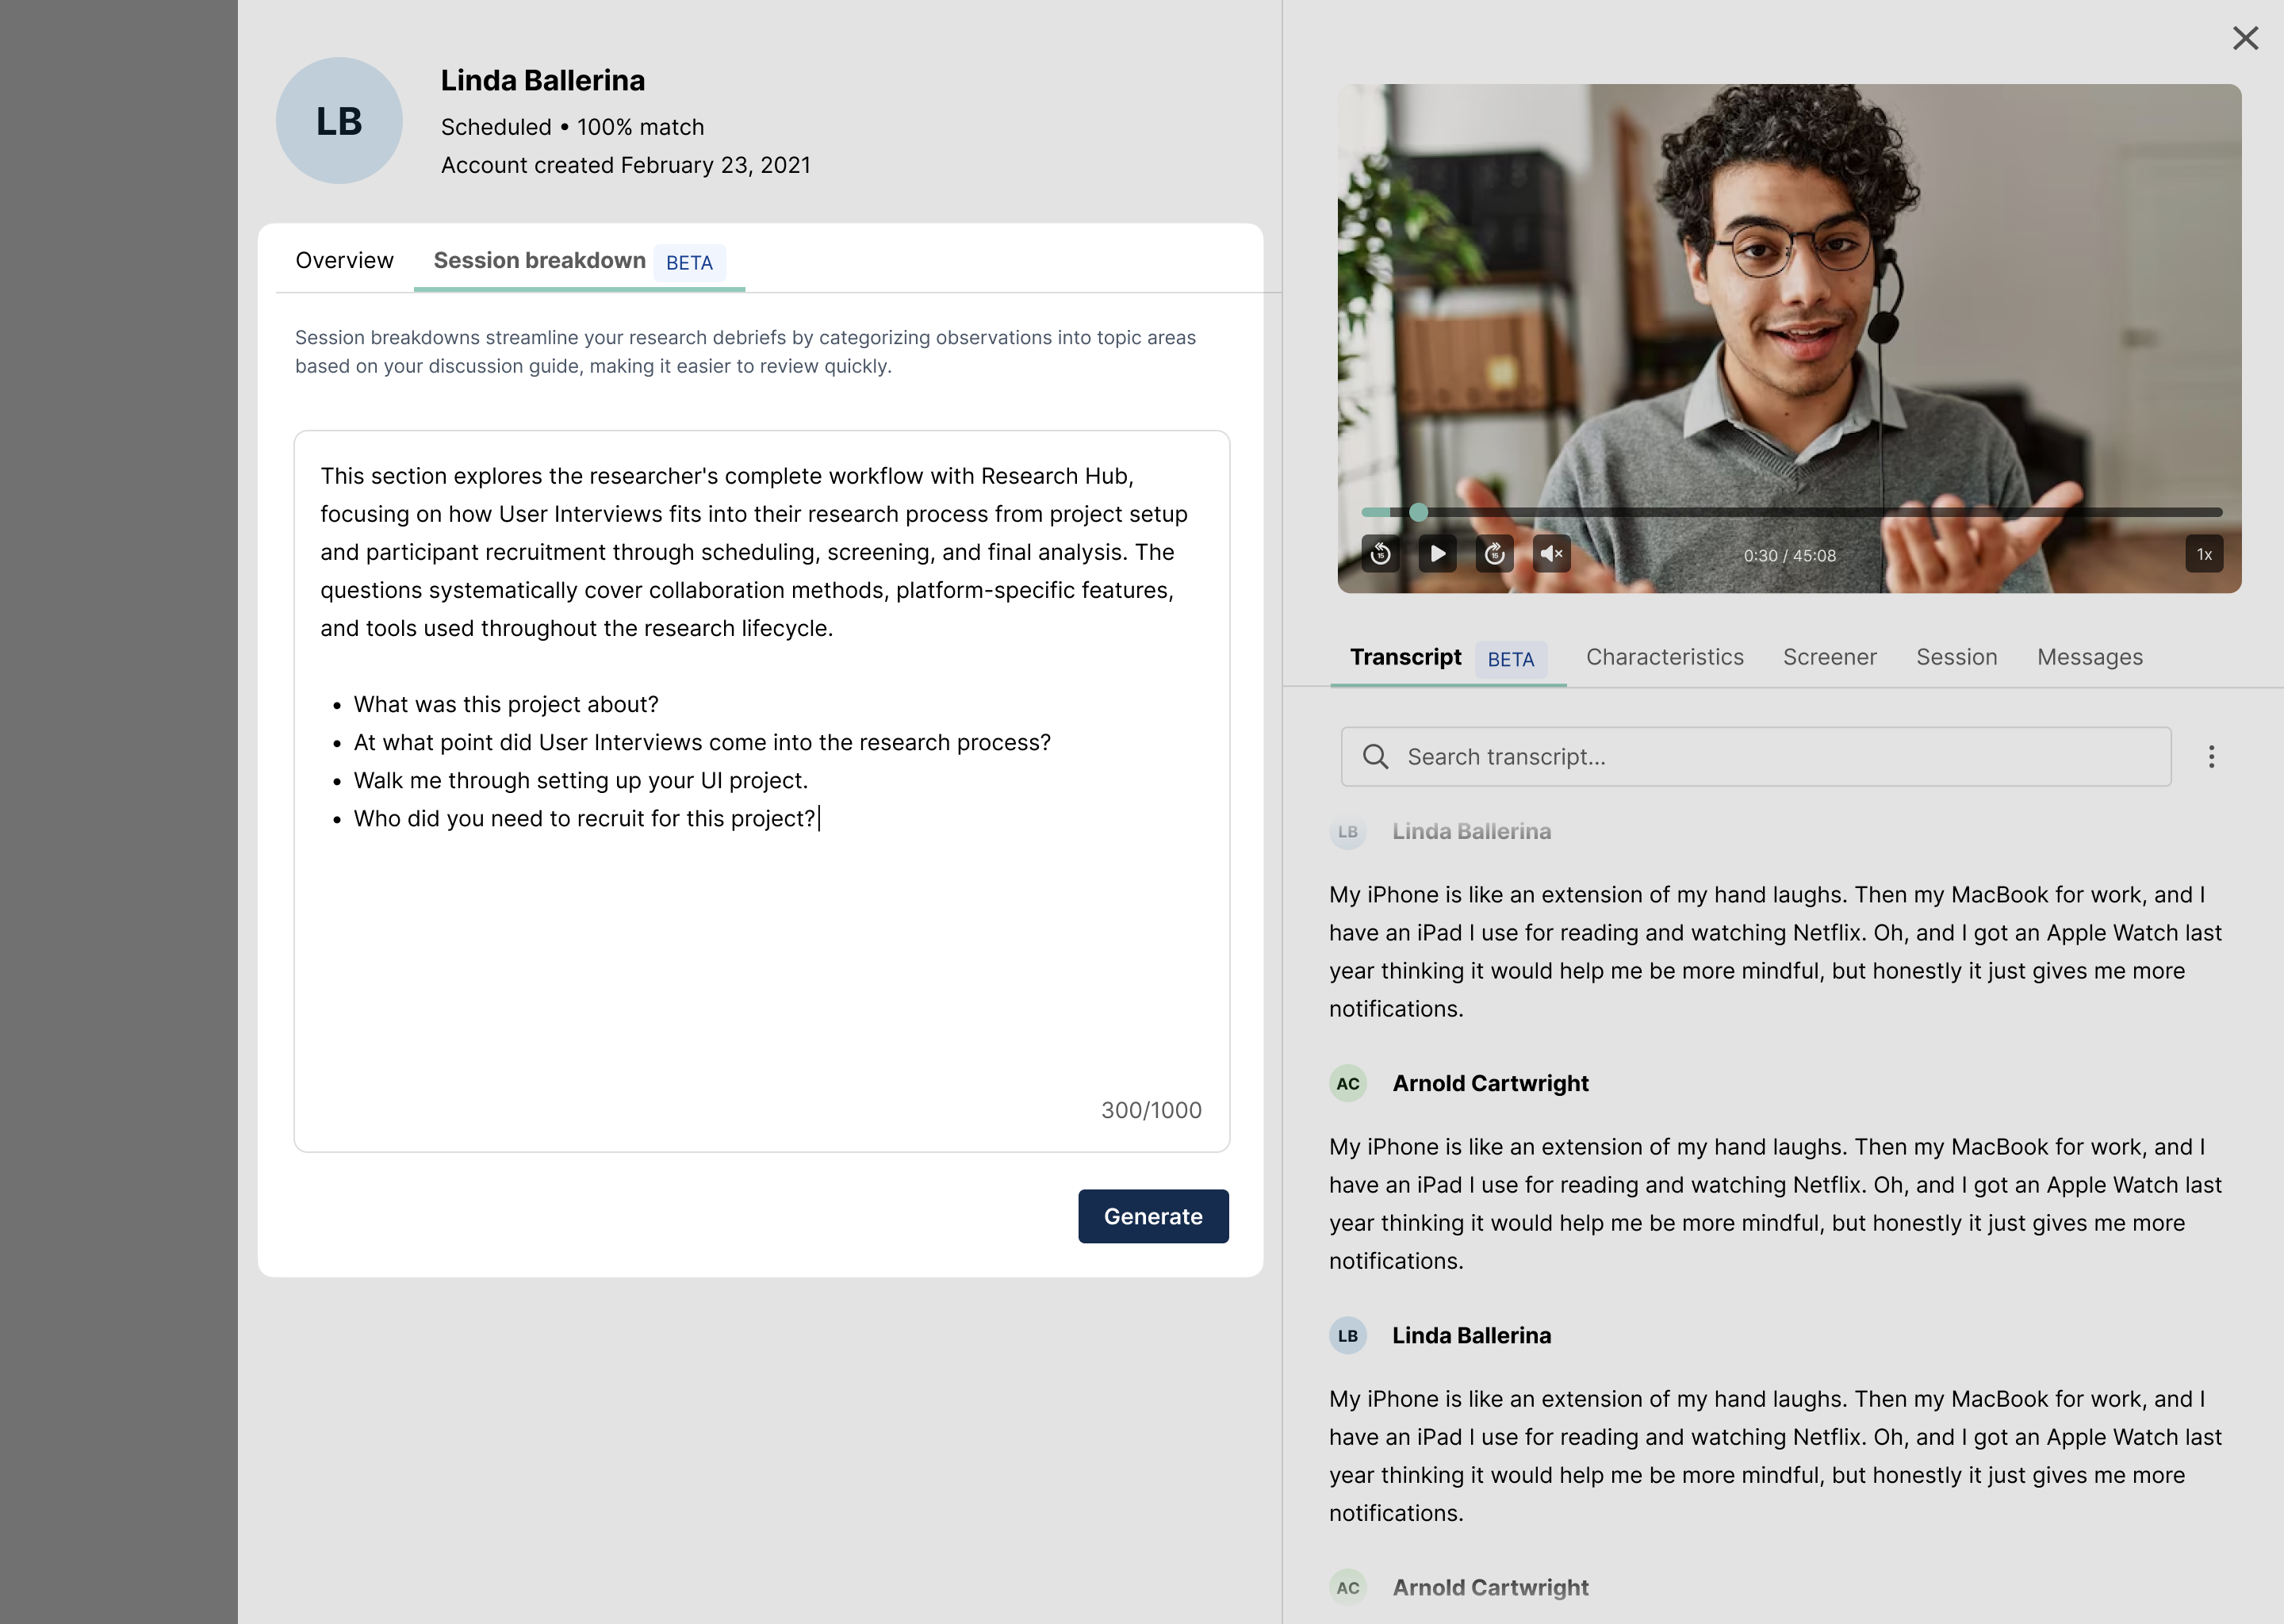
- Watch the video or read the transcript under the Transcript tab
- Generate a session analysis under the Session Breakdown tab to speed up the debrief process
Playback Features
- Adjust playback speed
- Skip ahead or skip back 15 seconds
- Highlighted transcript synced to video
- Speaker names labeled
- Scroll or jump to specific moments
- Search transcript for keywords
Processing is extremely fast and recordings and transcripts are available within seconds of the meeting ending.

Generating Insights
Session breakdowns
The session breakdown speeds up the research review process by categorizing key observations into topic areas based on your discussion guide. Every observation has citations and links directly to its source quote(s) from the transcript for additional review or context.
How it works
Upload your discussion guide to any session, and it will apply to all sessions across the project. There are two ways to upload your discussion guide:
1. Via the Analysis Tab:
- Go to the Research Analysis tab of your project and click “Add discussion guide.”
- A form will appear where you can paste your discussion guide.
- Paste your guide into the text area and click “Generate.”
2. Via the Session Breakdown:
- Go to the Participant Management > Completed Sessions section of your project workspace and click open the session you want to analyze.
- Go to the Session Breakdown tab and click “add discussion guide.”
- Simply copy and paste your discussion guide into the textbox, and then click “Generate.”
How session breakdowns are generated
Based on your discussion guide, our AI Assistant will create learning topic areas and organize participant quotes into structured observations, linking every observation directly back to its source quotes.
Each observation will include:
- One or more citations
- Clickable links to transcript timestamps
Note that session breakdowns are structured observations, not final insights — use them as a starting point for synthesis, and then apply your research judgment: check the citations to review the context for each observation, and edit, refine, or discard observations as needed.
How to turn observations into sharable insights
From a session breakdown, you can:
- Pull quotes
- Create clips
- Share early learnings
- Copy any observation with one click
To create a clip, highlight text on the transcript or data grid, click “Clip”, and this will instantly create a saved clip that you can easily reference or share with your team. You can view all your saved clips in the Clips tab. This brings together clips from every participant in one place for easy review.

Continue your research analysis with our other built-in AI Insights & Analysis tools—they help you organize conversations into structured observations, compare participants side by side, surface evidence faster, and share insights more clearly. Every claim links back to real participant quotes, so it’s easy to verify accuracy and context.
- Data grid for side-by-side comparison: View participant responses across topics alongside screener data and session characteristics, no manual spreadsheets needed.
- AI chat to find quotes and themes instantly: Ask natural language questions of your sessions and get cited answers back in seconds, complete with exact quotes and timestamps.
- Shareable clips with citations: Create clips in seconds with automatic participant identification and source material linked.
- Easy integration with your existing tools: Export data grids, clips, and transcripts to bring into presentations, reports, repositories, or other tools to continue your analysis.
Tips & Best Practices
- Let participants know ahead of time that the session will be recorded.
- Use the transcript to quickly pull quotes or verify what was said.
- Share recordings with stakeholders to bring insights to life.
FAQ
Who can use this feature?
Only teams with AI functionality turned on will have access. Admins can manage this setting at the organizational level.
Is this available for all sessions?
Not yet. This feature is currently available for 1:1 moderated sessions using the Zoom, Google Meet, or Microsoft Teams integrations. Webex support is coming soon.
Can I download recordings?
Yes, video recordings and transcripts can be exported.
Where are recordings stored?
Recordings and transcripts are securely stored in AWS (US) and only accessible within your project.


